Ga door naar hoofdinhoud

Dell Latitude 3380 Fan Replacement

Wat je nodig hebt

  1. Dell Latitude 3380 Fan Replacement, Back Cover: stap 1, afbeelding 1 van 2 Dell Latitude 3380 Fan Replacement, Back Cover: stap 1, afbeelding 2 van 2
    • Turn the laptop over so that the back is facing up.

    • Remove the nine 3 mm screws with a Phillips #0 screwdriver.

  2. Dell Latitude 3380 Fan Replacement: stap 2, afbeelding 1 van 2 Dell Latitude 3380 Fan Replacement: stap 2, afbeelding 2 van 2
    • Use an opening tool to pry the back cover away from the laptop.

  3. Dell Latitude 3380 Fan Replacement, Fan: stap 3, afbeelding 1 van 1
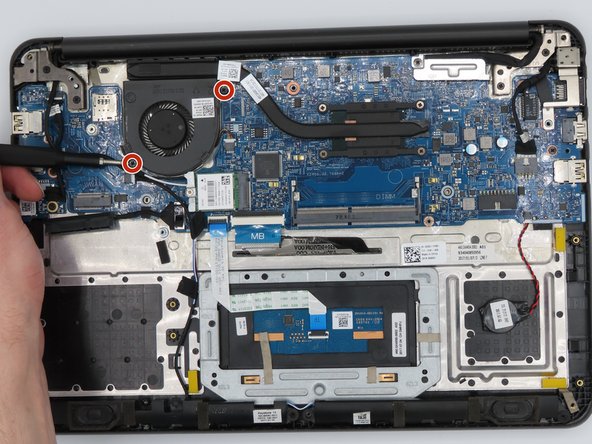
    • Remove the two 5 mm screws from the fan using a Phillips #0 screwdriver.

  4. Dell Latitude 3380 Fan Replacement: stap 4, afbeelding 1 van 1
    • Loosen the four captive screws on the heatsink using a Phillips #0 screwdriver.

  5. Dell Latitude 3380 Fan Replacement: stap 5, afbeelding 1 van 1
    • Remove the heatsink from the motherboard.

  6. Dell Latitude 3380 Fan Replacement: stap 6, afbeelding 1 van 2 Dell Latitude 3380 Fan Replacement: stap 6, afbeelding 2 van 2
    Gereedschap gebruikt in deze stap:
    Tweezers
    $4.99
    Koop
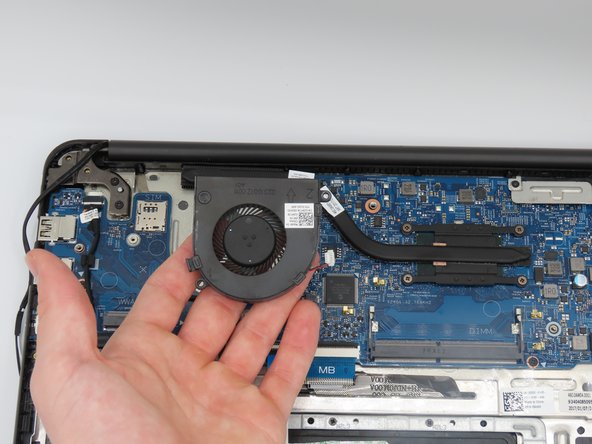
    • Using tweezers, loosen the power connector from the fan to the motherboard, fully disconnecting the fan.

Conclusie

To reassemble your device, follow these instructions in reverse order.

Dami Olowoye

Lid sinds: 02/21/23

229 Reputatie

2 handleidingen geschreven

0 opmerkingen

Voeg opmerking toe

Weergavestatistieken:

Afgelopen 24 uren: 0

Afgelopen 7 dagen: 5

Afgelopen 30 dagen: 11

Altijd: 81