Ga door naar hoofdinhoud

Dell Latitude 3190 Motherboard Replacement

Wat je nodig hebt

  1. Dell Latitude 3190 Motherboard Replacement, Base Cover: stap 1, afbeelding 1 van 2 Dell Latitude 3190 Motherboard Replacement, Base Cover: stap 1, afbeelding 2 van 2
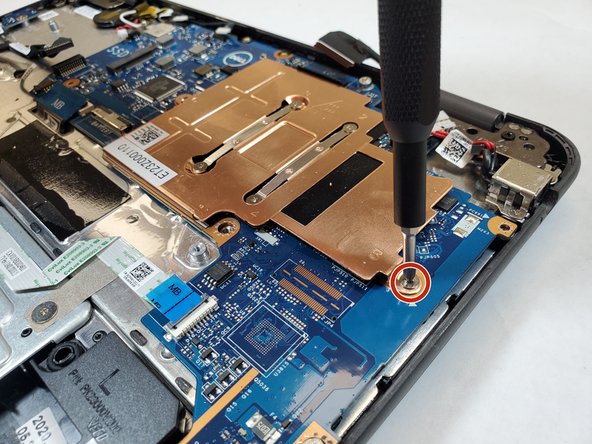
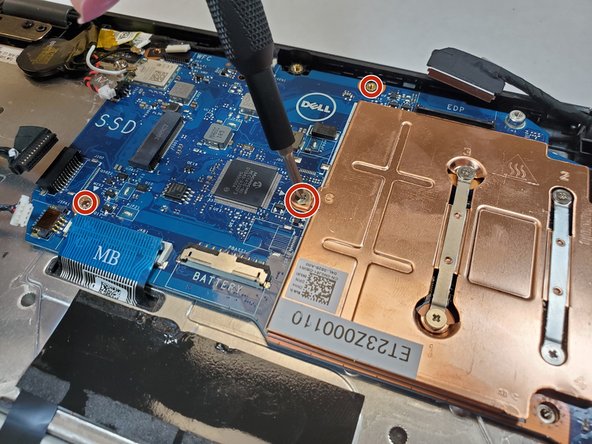
    • Use a Phillips #0 screwdriver to remove the seven 7 mm screws securing the back case.

  2. Dell Latitude 3190 Motherboard Replacement: stap 2, afbeelding 1 van 3 Dell Latitude 3190 Motherboard Replacement: stap 2, afbeelding 2 van 3 Dell Latitude 3190 Motherboard Replacement: stap 2, afbeelding 3 van 3
    • Using a plastic opening tool carefully separate the plastic base cover from the rest of the laptop.

    • Lift the bottom cover from the laptop.

  3. Dell Latitude 3190 Motherboard Replacement, Battery: stap 3, afbeelding 1 van 1
    • Locate the battery.

  4. Dell Latitude 3190 Motherboard Replacement: stap 4, afbeelding 1 van 3 Dell Latitude 3190 Motherboard Replacement: stap 4, afbeelding 2 van 3 Dell Latitude 3190 Motherboard Replacement: stap 4, afbeelding 3 van 3
    • Disconnect the battery cable located on the top of the battery.

    • Use the spudger and disconnect the battery cable.

    • Pull the cable out of the way.

  5. Dell Latitude 3190 Motherboard Replacement: stap 5, afbeelding 1 van 3 Dell Latitude 3190 Motherboard Replacement: stap 5, afbeelding 2 van 3 Dell Latitude 3190 Motherboard Replacement: stap 5, afbeelding 3 van 3
    • Use a Phillips #0 screwdriver to remove the three 3 mm screws from the battery.

  6. Dell Latitude 3190 Motherboard Replacement: stap 6, afbeelding 1 van 3 Dell Latitude 3190 Motherboard Replacement: stap 6, afbeelding 2 van 3 Dell Latitude 3190 Motherboard Replacement: stap 6, afbeelding 3 van 3
    • Pull the black battery tap upwards to remove the battery.

    • The battery adhesive is strong, do not be afraid to use force. You may need to use the spudger or opening tool as a wedge.

  7. Dell Latitude 3190 Motherboard Replacement, M.2 SSD: stap 7, afbeelding 1 van 3 Dell Latitude 3190 Motherboard Replacement, M.2 SSD: stap 7, afbeelding 2 van 3 Dell Latitude 3190 Motherboard Replacement, M.2 SSD: stap 7, afbeelding 3 van 3
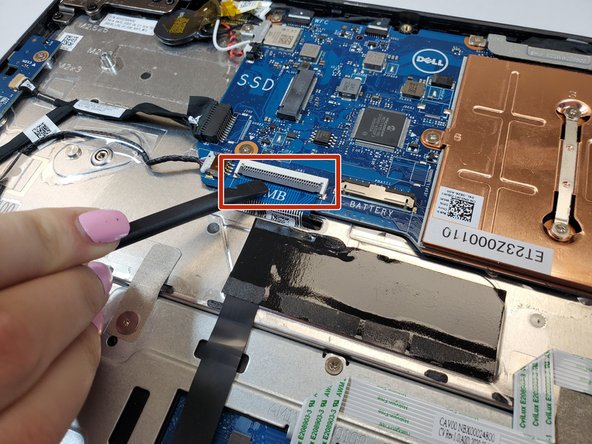
    • Use a spudger to disconnect the battery cable from the motherboard located at the top of the battery.

  8. Dell Latitude 3190 Motherboard Replacement: stap 8, afbeelding 1 van 3 Dell Latitude 3190 Motherboard Replacement: stap 8, afbeelding 2 van 3 Dell Latitude 3190 Motherboard Replacement: stap 8, afbeelding 3 van 3
    • Locate the M.2 SSD after the battery is removed

    • Use the Phillips #0 screwdriver to remove the 3 mm screw from the SSD.

    • Pull the M.2 SSD from the board.

  9. Dell Latitude 3190 Motherboard Replacement, Motherboard: stap 9, afbeelding 1 van 3 Dell Latitude 3190 Motherboard Replacement, Motherboard: stap 9, afbeelding 2 van 3 Dell Latitude 3190 Motherboard Replacement, Motherboard: stap 9, afbeelding 3 van 3
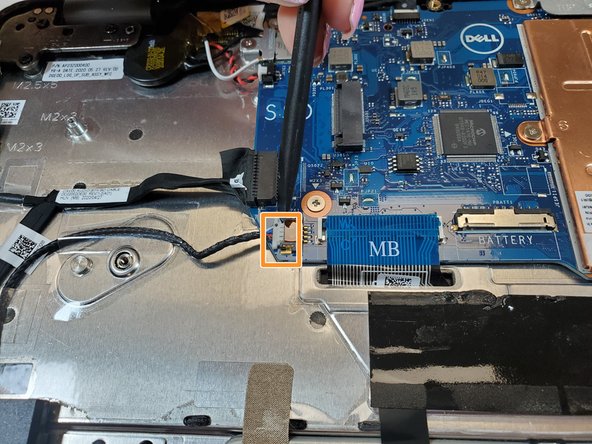
    • Remove the motherboard cable by pulling up on the black bar and carefully removing the blue ribbon cable.

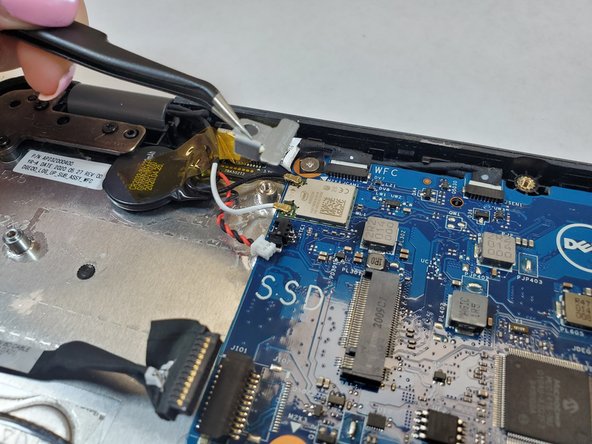
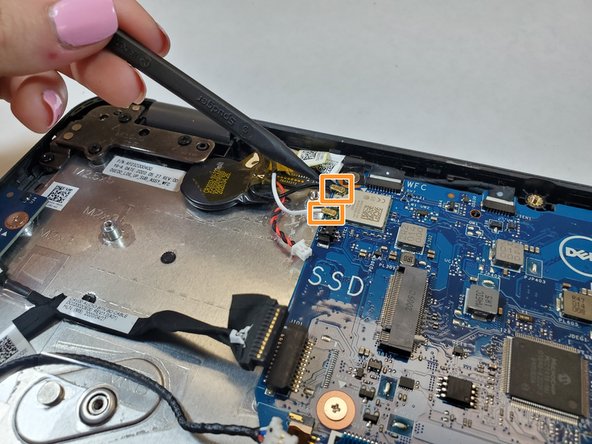
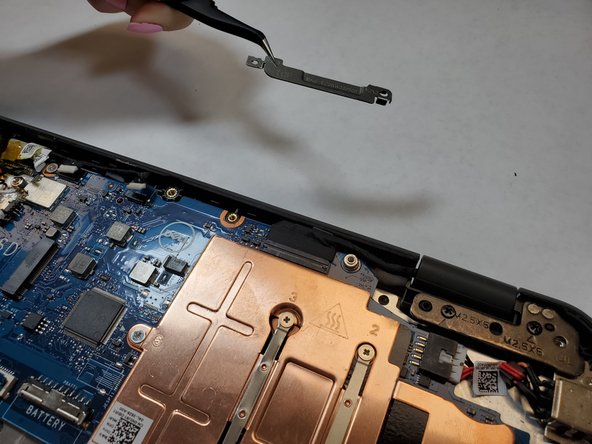
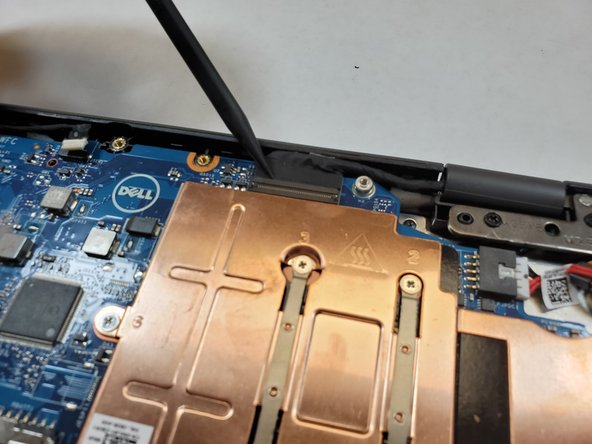
    • Disconnect the white speaker cable connector.

  10. Dell Latitude 3190 Motherboard Replacement: stap 10, afbeelding 1 van 2 Dell Latitude 3190 Motherboard Replacement: stap 10, afbeelding 2 van 2
    • Using a spudger, disconnect the black power board and audio cable.

    • Disconnect the white coin cell battery cable.

  11. Dell Latitude 3190 Motherboard Replacement: stap 11, afbeelding 1 van 3 Dell Latitude 3190 Motherboard Replacement: stap 11, afbeelding 2 van 3 Dell Latitude 3190 Motherboard Replacement: stap 11, afbeelding 3 van 3
    • Use the Phillips #0 screwdriver to remove the 3 mm screw and lift the metal bracket that secures the WLAN card on the system board.

    • Disconnect the black and white WLAN cables.

  12. Dell Latitude 3190 Motherboard Replacement: stap 12, afbeelding 1 van 2 Dell Latitude 3190 Motherboard Replacement: stap 12, afbeelding 2 van 2
    • Remove the screw that secures the camera cable to the system board.

    • Disconnect camera cable.

    • Disconnect the black sensor cable.

  13. Dell Latitude 3190 Motherboard Replacement: stap 13, afbeelding 1 van 3 Dell Latitude 3190 Motherboard Replacement: stap 13, afbeelding 2 van 3 Dell Latitude 3190 Motherboard Replacement: stap 13, afbeelding 3 van 3
    • Use the Phillips #0 screwdriver to remove the two 3 mm screws from the metal bracket on the display cable.

    • Lift the metal bracket that secures the display cable on the computer.

    • Disconnect the black display cable using a spudger or pull it out by hand.

  14. Dell Latitude 3190 Motherboard Replacement: stap 14, afbeelding 1 van 3 Dell Latitude 3190 Motherboard Replacement: stap 14, afbeelding 2 van 3 Dell Latitude 3190 Motherboard Replacement: stap 14, afbeelding 3 van 3
    • Disconnect the white power connector.

    • Use the spudger to lift up on black bar to release the trackpad ribbon cable.

    • Pull the blue tab release to the cable from the connector.

  15. Dell Latitude 3190 Motherboard Replacement: stap 15, afbeelding 1 van 3 Dell Latitude 3190 Motherboard Replacement: stap 15, afbeelding 2 van 3 Dell Latitude 3190 Motherboard Replacement: stap 15, afbeelding 3 van 3
    • Use a Phillips #0 tp remove the two 3 mm screws on the metal bracket that secures the board.

    • Remove the metal bracket.

  16. Dell Latitude 3190 Motherboard Replacement: stap 16, afbeelding 1 van 3 Dell Latitude 3190 Motherboard Replacement: stap 16, afbeelding 2 van 3 Dell Latitude 3190 Motherboard Replacement: stap 16, afbeelding 3 van 3
    • Use the Phillips #0 screwdriver to remove the five 3 mm screws that secure the motherboard.

  17. Dell Latitude 3190 Motherboard Replacement: stap 17, afbeelding 1 van 3 Dell Latitude 3190 Motherboard Replacement: stap 17, afbeelding 2 van 3 Dell Latitude 3190 Motherboard Replacement: stap 17, afbeelding 3 van 3
    • Carefully lift the motherboard up to remove it from the computer.

    • Make sure not to snag any of the other cables.

Conclusie

To reassemble your device, follow these instructions in reverse order.

Één andere persoon heeft deze handleiding voltooid.

Sean Gherkins

Lid sinds: 12/26/17

292 Reputatie

2 handleidingen geschreven

Team

Gateway, Team 1-5, Saknee Fall 2021 Lid van Gateway, Team 1-5, Saknee Fall 2021

GCC-SAKNEE-F21S1G5

3 Leden

6 handleidingen geschreven

0 opmerkingen

Voeg opmerking toe

Weergavestatistieken:

Afgelopen 24 uren: 2

Afgelopen 7 dagen: 10

Afgelopen 30 dagen: 49

Altijd: 1,116