Inleiding
If your Dell Inspiron 16-7610 begins to have random freezing, blue screens, restarting, or beeping noise your motherboard may be wearing out and need replaced. Motherboards tend to wear out over time or can be damaged from water, power surges, and other foreign objects getting inside your laptop.
Before beginning your motherboard replacement, be sure to properly diagnose that the motherboard is faulty. This can be done by taking it to a local computer shop or if your laptop shows the above issues.
After properly diagnosing the motherboard is faulty you may begin the repair, be sure to purchase the proper motherboard. Motherboards that will work for the Dell Inspiron 16-7610 include the 0FHWFDFHWFD CN-0FHWHFD motherboard. You may also do your own research to find different motherboards that will work.
Warning: Be sure to power off the laptop and disconnect it from the AC adaptor before repairs begin
Wat je nodig hebt
-
-
Flip the device over, so the backside is facing up.
-
Use a Phillips #00 screwdriver to remove four 4.00 mm screws.
-
Use the Phillips #00 screwdriver to unscrew or loosen two captive screws at the right and left corner near the hinges.
-
Three of the screws are dummy screws, only screwed into retainers. They are not holding anything in and can be left in place for simplicity.
-
-
-
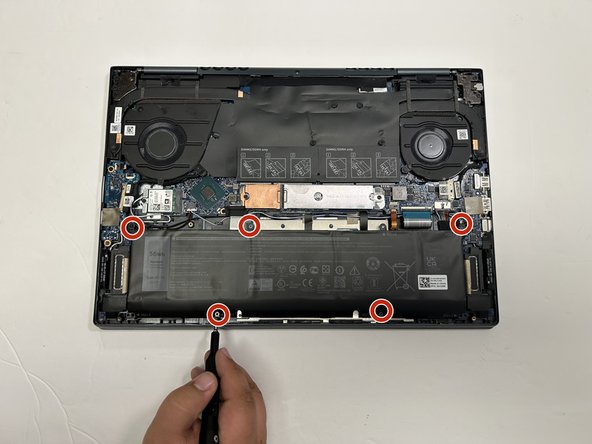
Use a Phillips #00 to remove the five screws securing the battery to the laptop.
-
Pull the bundled cable away from the connector in the same direction as the wires are running.
-
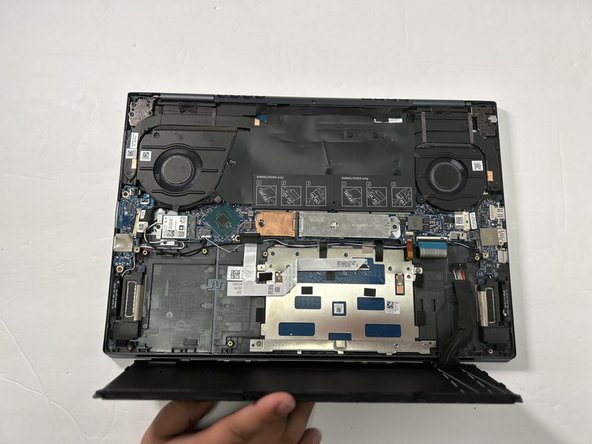
Use both hands to life the battery up and remove it from the laptop.
-
-
-
Use a Phillips #00 screwdriver to remove the screw that secures the Wi-Fi card bracket to the system board.
-
Lift the Wi-Fi card bracket off of the Wi-Fi card.
-
-
-
-
Slide a thin, ESD-safe pry tool or tweezers under the wire until it's snug against the connector, and pry straight up from the board to disconnect the coaxial cables from the Wi-Fi card.
-
Slide the Wi-Fi card from the slot to remove it from the device.
-
-
-
Flip the plastic cover over to reveal the RAM stick. Do not pull the plastic cover off.
-
Pull the two RAM retaining arms away from the center of the RAM stick.
-
Pull the RAM stick out of the socket. Repeat for each of the RAM sticks you are replacing.
-
-
-
Double check that every component is removed from the motherboard.
-
Disconnect all the pin and ribbon cables from the motherboard.
-
Locate and remove all the screws that are holding the motherboard in place.
-


To reassemble your device, follow these instructions in reverse order.
To reassemble your device, follow these instructions in reverse order.

Team

Gateway, Team 1-3, Pee Spring 2023 Lid van Gateway, Team 1-3, Pee Spring 2023
GCC-PEE-S23S1G3
4 Leden
6 handleidingen geschreven