Inleiding
The motherboard may be responsible for your computer not functioning as intended, it may be necessary to completely replace the motherboard.
Wat je nodig hebt
-
-
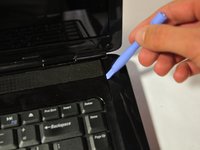
After removing the battery, remove the two screws (3mm Phillips #1) beneath it. These screws hold the Center Control Cover in place.
-
-
-
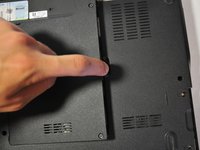
Unscrew the four screws (3mm Phillips #1) that hold the base cover in place.
-
-
-
Loosen the 5 screws (4mm, Phillips #1) that secure the CPU Heat Sink to the motherboard.
My fifth screw, (the one towards the bottom), won't unscrew. Anybody that can help?
-
-
-
-
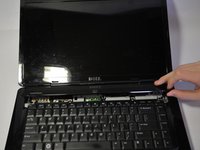
Lift the connector latch that secures the keyboard cable to the connector on the motherboard and remove the cable.
The connector latch is the black piece.
Good tip! As shown. flips up and toward user
-
-
-
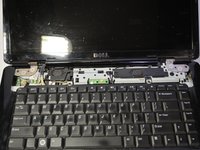
Remove the 11 screws (5mm Phillips #1) from the back of the laptop as marked. One screw is in the middle, by the RAM.
If you’re using the ifixit pro tech toolkit and are having trouble getting the top screws, try using the flex connector. Took me a a few tries, but it worked for me.
-
-
-
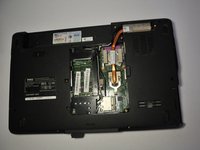
Disconnect the Bluetooth card cable, Wed cable, Camera1 cable, power cable, and touchpad cable from the respective Motherboard connectors as marked. For the Bluetooth cable and Camera1 cable, pull the plugs towards the screen. For the touchpad and power cable, lift the black tab and then pull them out. For the Wed cable, pull the blue tab up.
-
Unsecure the wires from the routing guides so they are loose.
-
-
-
Flip the laptop to its back side.
-
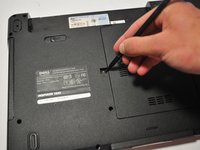
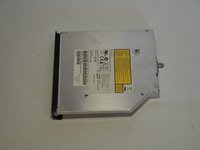
Remove the screw (5mm Phillips #1) that secures the Optical Disk Drive on the back of the laptop.
You really don’t need to have the “Flip the laptop to its back side” comment here, as you should have already done that to get the battery out due to having to slide the battery latch, which is on the bottom.
-
-
-
Remove the 3 screws (3mm Phillips #1) that secure the daughter board to the motherboard.
-
Lift the daughter board away from the laptop.
-
-
-
Remove the two screws (3mm, Phillips #1) on the left and the two screws (5mm, Phillips #1) on the right that secure the Motherboard to the laptop.
-
-
-
To remove the Motherboard, pull away and up from the base of the laptop.
Great job. Couldn’t have done it nearly as fast without making mistakes. Thank you.
-


To reassemble your device, follow these instructions in reverse order.
To reassemble your device, follow these instructions in reverse order.
Annuleren: ik heb deze handleiding niet afgemaakt.
22 andere personen hebben deze handleiding voltooid.

Team

Cal Poly, Team 9-14, Regan Spring 2014 Lid van Cal Poly, Team 9-14, Regan Spring 2014
CPSU-REGAN-S14S9G14
4 Leden
15 handleidingen geschreven
2Gids Commentaar
Thank you so much for the guide extremely helpful
im trying to find out for sure with out any question at all that this motherboard is infact the right one i am paying for… i want my old laptop to work like brand new as it did about four weeks ago.. granted it had windows 7 at the time of mr, laxton i hope that you can offer me a complete windows 10 updates.. seems like every where we try and move too..when we do move ..it dont take long to set it up//as long as they keep