Ga door naar hoofdinhoud

Dell Inspiron 15-7548 Power Port Replacement

Wat je nodig hebt

  1. Dell Inspiron 15-7548  Power Port Replacement, Back Panel: stap 1, afbeelding 1 van 2 Dell Inspiron 15-7548  Power Port Replacement, Back Panel: stap 1, afbeelding 2 van 2
    • Remove the six 6 mm screws from the back panel with a Phillips #1 screwdriver.

    • Loosen the four captive screws at the bottom using a Phillips #1 screwdriver.

    • The four screws on the bottom are captive screws and cannot be removed.

  2. Dell Inspiron 15-7548  Power Port Replacement: stap 2, afbeelding 1 van 2 Dell Inspiron 15-7548  Power Port Replacement: stap 2, afbeelding 2 van 2
    • Pry out the back panel using the flat head side of the spudger.

    • Do not insert the spudger more than half an inch when separating the bottom and right side of the back panel.

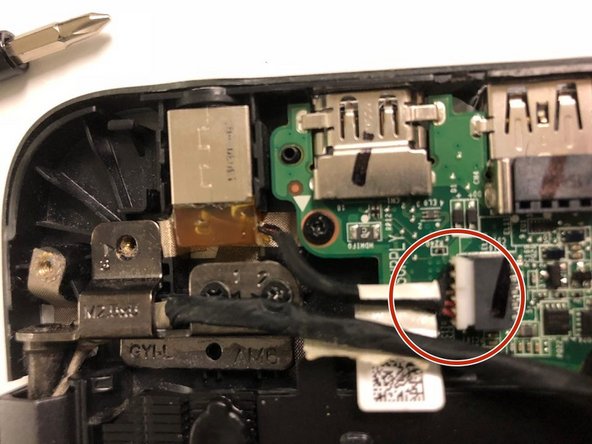
  3. Dell Inspiron 15-7548  Power Port Replacement, Power Port: stap 3, afbeelding 1 van 2 Dell Inspiron 15-7548  Power Port Replacement, Power Port: stap 3, afbeelding 2 van 2
    • Grab the wires and lightly pull to remove the power port from the motherboard.

Conclusie

To reassemble your device, follow these instructions in reverse order.

Één andere persoon heeft deze handleiding voltooid.

0 opmerkingen

Voeg opmerking toe

Weergavestatistieken:

Afgelopen 24 uren: 0

Afgelopen 7 dagen: 0

Afgelopen 30 dagen: 1

Altijd: 378