Wat je nodig hebt
-
-
Before flipping the laptop right-side up, remove screws holding the back plate to the laptop frame
-
Remove the backplate screws using a phillips head PH0 screwdriver (11).
-
Remove the screws located underneath the battery and access panel using the same phillips head PH0 screwdriver (3).
-
-
-
Flip the laptop right-side-up
-
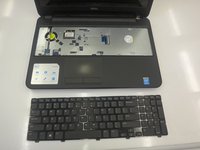
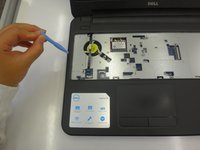
Using a spudger, separate the keyboard from the laptop frame.
-
Using fingers to remove the keyboard from the laptop frame, be careful not to damage the keyboard cable.
-
-
-
To disconnect the keyboard, locate the keyboard cable locking mechanism.
-
Open the locking mechanism by gently pulling up.
-
Slide out the keyboard cable from the interface to separate the keyboard from the laptop.
-
-
-
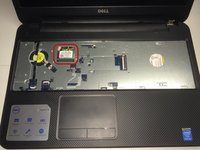
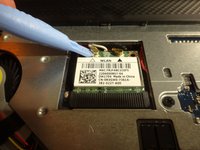
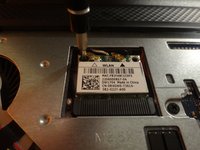
Locate the wireless card location underneath the removed keyboard.
-
Disengage the antenna cables connecting the laptop to the wireless card.
-
Using a phillips head PH0 screwdriver, unscrew the single screw holding the wireless card to the laptop frame.
-
Remove the wireless card.
-
-
-
-
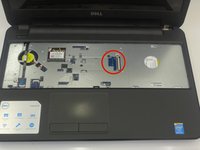
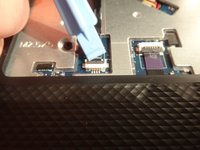
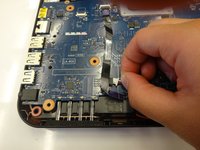
Unplug the palmrest cables, which are denoted by a blue and a purple marking.
-
To remove, lift up the locking tab and pull the cables from their laptop interface.
-
-
-
Remove the four 2.5 mm by 5 mm screws underneath the keyboard plate using a phillips head PH0 screwdriver.
-
Remove the three 2 mm by 3 mm screws underneath the keyboard plate using a phillips head PH0 screwdriver.
-
-
-
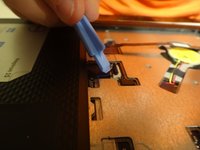
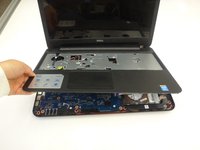
Using a spudger, separate the palmrest from the base of the laptop. This interface is located around the equator of the laptop.
-
Use your fingers to completely remove the palmrest from the laptop base.
-
-
-
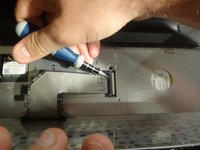
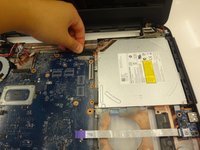
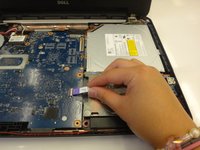
First, remove the power cable, located in the upper left hand side of the laptop. This can be removed using forceps or using your fingers.
-
Second, remove the LCD cable located in the upper center of the laptop. This cablemust be removed using the same unlocking procedure as the palmrest cables used in step 6.
-
-
-
Third, unplug the speaker cables using forceps or by using your fingers.
-
Fourth, unplug the final cable, denoted by a purple plastic flag. This cable uses the same locking mechanism as the palmrest cables seen in step 6.
-
-
-
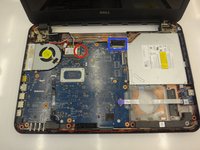
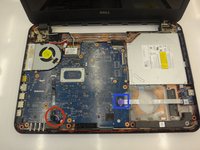
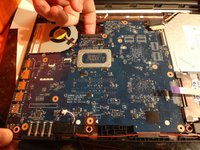
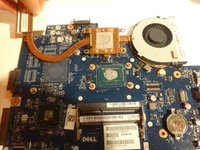
Unscrew the motherboard from the laptop frame using a phillips head PH0 screwdriver.
-
Then, use your fingers to remove the motherboard from the laptop.
-
-
-
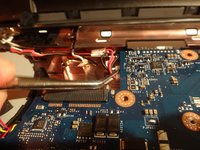
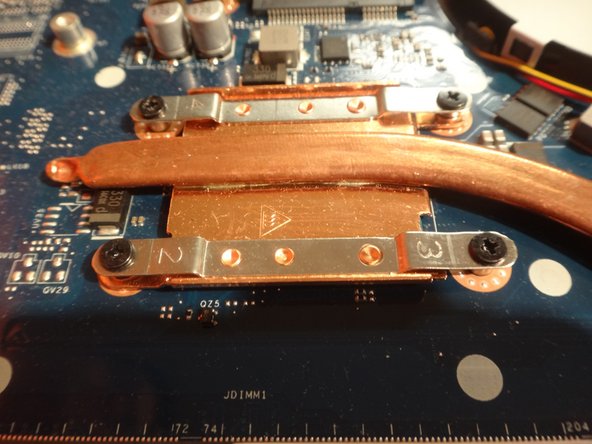
Flip the mother board, so that the heat sink attachment point is visible.
-
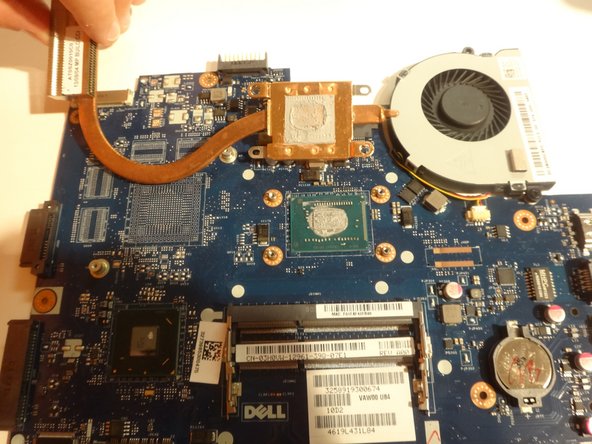
Remove the four screws that are attaching the heat sink (copper) to the motherboard. Use a phillips head PH0 screwdriver to do this.
-
Clean the interface between the motherboard and the heat sink.
-
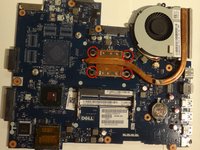
Attach a new heat sink to the motherboard, make sure to reapply the thermal compound (grey material), lock into place by reattaching screws.
-


To reassemble your device, follow these instructions in reverse order.
To reassemble your device, follow these instructions in reverse order.
Annuleren: ik heb deze handleiding niet afgemaakt.
5 andere personen hebben deze handleiding voltooid.
Team

Clemson, Team 3-1, Benson Fall 2014 Lid van Clemson, Team 3-1, Benson Fall 2014
CLEM-BENSON-F14S3G1
4 Leden
9 handleidingen geschreven