Deze versie kan foutieve bewerkingen bevatten. Schakel over naar de recentste gecontroleerde momentopname.
Wat je nodig hebt
-
Deze stap is niet vertaald. Help het te vertalen
-
Remove the four screws with a Torx T8 screwdriver to access the back con board.
-
-
Deze stap is niet vertaald. Help het te vertalen
-
Remove three screws using a Phillips #00 screwdriver.
-
-
Deze stap is niet vertaald. Help het te vertalen
-
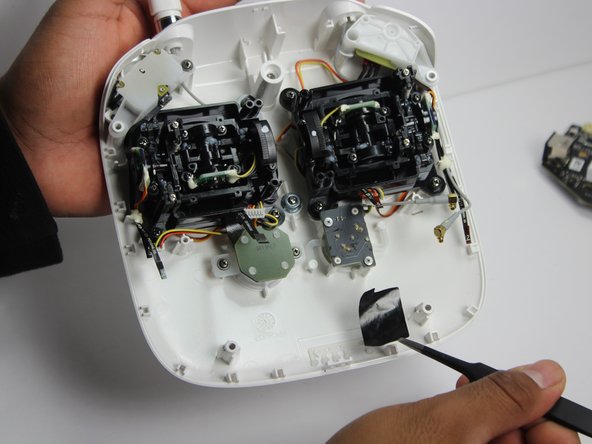
With tweezers, gently remove the large con board tab.
-
Use your hands to remove the two small clips. Pull out from the socket, in a horizontal direction.
-
-
Deze stap is niet vertaald. Help het te vertalen
-
Peel off the rubber grips to access the screw holes.
-
Remove the back board and set it aside.
-
-
-
Deze stap is niet vertaald. Help het te vertalen
-
Pull apart the back plastic panel.
-
Once the back panel is off, you will have access to the motherboard.
-
-
Deze stap is niet vertaald. Help het te vertalen
-
Disconnect ribbon tabs 1,2,5,8G, and 3.
-
Remove ribbon tab by pulling gently along motherboard. Do not pull straight out.
-
Then remove the plugs
-
-
Deze stap is niet vertaald. Help het te vertalen
-
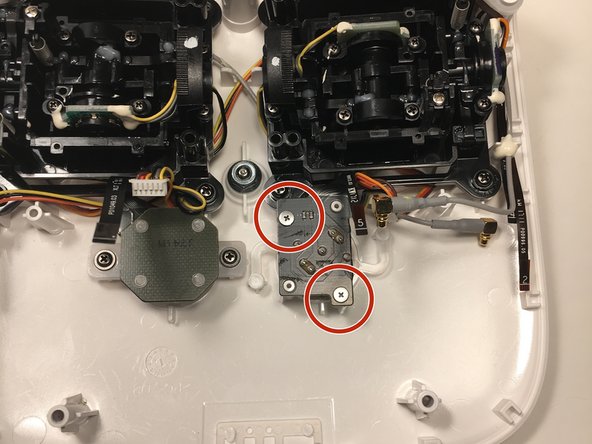
With the Phillips #00 screwdriver, remove the two Phillips screws.
-
-
Deze stap is niet vertaald. Help het te vertalen
-
Carefully remove the plastic. This will help you gain access to the power button panel.
-
-
Deze stap is niet vertaald. Help het te vertalen
-
With a Phillips #00 screwdriver, remove the two screws on the power button panel.
-
-
Deze stap is niet vertaald. Help het te vertalen
-
Gently pull the power button out from the panel. Replace it with a new one.
-


Annuleren: ik heb deze handleiding niet afgemaakt.
2 andere personen hebben deze handleiding voltooid.
Team

Linn Benton Community College, Team S1-G4, Johnson Fall 2018 Lid van Linn Benton Community College, Team S1-G4, Johnson Fall 2018
LBCC-JOHNSON-F18S1G4
3 Leden
12 handleidingen geschreven