Ga door naar hoofdinhoud
Word lid van de reparatiegemeenschap - Account aanmaken

D-Link DCS-5222L Motor Replacement

Wat je nodig hebt

    1. D-Link DCS-5222L Motor Replacement, Motors: stap 1, afbeelding 1 van 3 D-Link DCS-5222L Motor Replacement, Motors: stap 1, afbeelding 2 van 3 D-Link DCS-5222L Motor Replacement, Motors: stap 1, afbeelding 3 van 3
      Gereedschap gebruikt in deze stap:
      Tweezers
      $4.99
      • Remove the four rubber feet on the bottom of the camera with tweezers.

      • Remove the four screws using a Phillips #1 screwdriver.

      • Remove the lower piece of the camera body.

      Vraag FixBot

      Voeg opmerking toe

    2. D-Link DCS-5222L Motor Replacement: stap 2, afbeelding 1 van 2 D-Link DCS-5222L Motor Replacement: stap 2, afbeelding 2 van 2
      • Remove the motherboard and bottom of the camera body.

      • Disconnect the five cables from the motherboard using tweezers.

      Vraag FixBot

      Voeg opmerking toe

    3. D-Link DCS-5222L Motor Replacement: stap 3, afbeelding 1 van 2 D-Link DCS-5222L Motor Replacement: stap 3, afbeelding 2 van 2
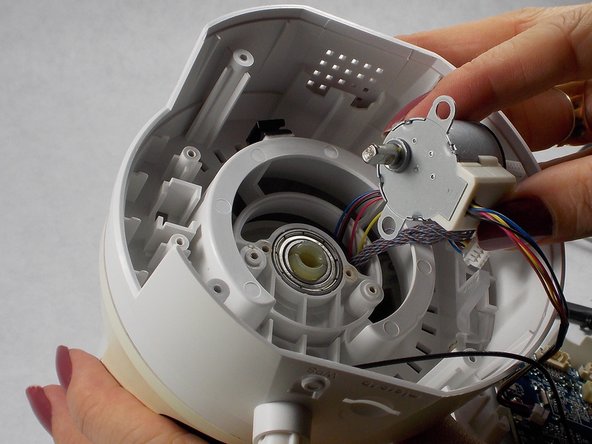
      • Use a #1 Phillips screwdriver to remove the two 7mm screws holding the motor in place.

      Vraag FixBot

      Voeg opmerking toe

    4. D-Link DCS-5222L Motor Replacement: stap 4, afbeelding 1 van 2 D-Link DCS-5222L Motor Replacement: stap 4, afbeelding 2 van 2
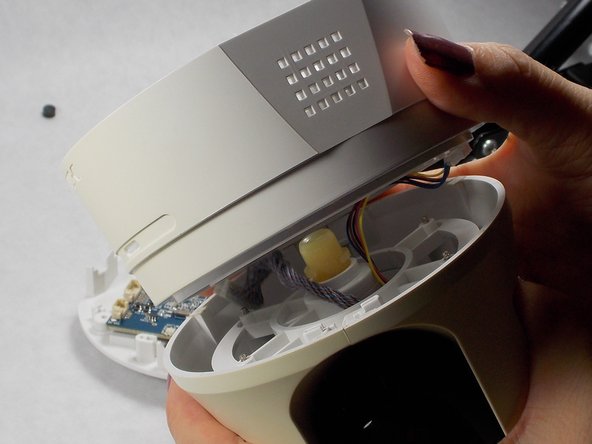
      • Using your hands, separate the bottom of the body from the upper portion.

      Vraag FixBot

      Voeg opmerking toe

    5. D-Link DCS-5222L Motor Replacement: stap 5, afbeelding 1 van 2 D-Link DCS-5222L Motor Replacement: stap 5, afbeelding 2 van 2
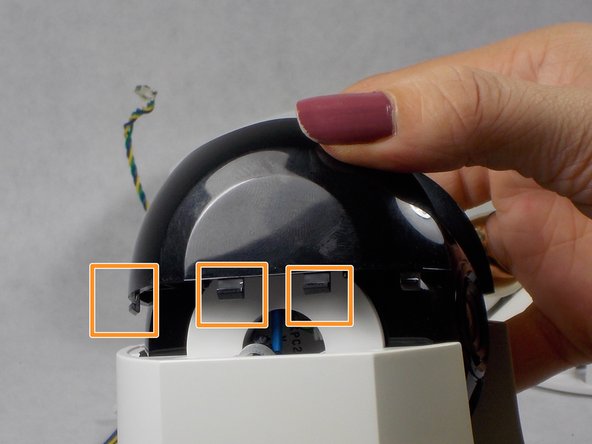
      • To remove the top of the camera you must push in the black tabs using the spudger. There are 3 tabs per side.

      • While pushing in the tabs, you can now lift the top black portion of the camera using your hands.

      Vraag FixBot

      Voeg opmerking toe

    6. D-Link DCS-5222L Motor Replacement: stap 6, afbeelding 1 van 2 D-Link DCS-5222L Motor Replacement: stap 6, afbeelding 2 van 2
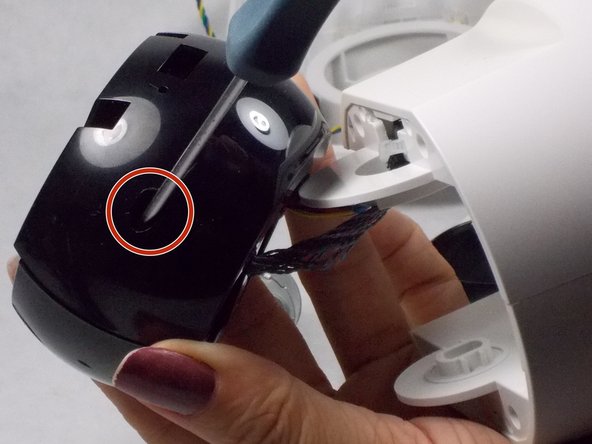
      • With a little wiggle, the camera module will come free from the body.

      • Unscrew the two 7mm screws on the camera using a #1 Phillips screwdriver.

      Vraag FixBot

      Voeg opmerking toe

    7. D-Link DCS-5222L Motor Replacement: stap 7, afbeelding 1 van 2 D-Link DCS-5222L Motor Replacement: stap 7, afbeelding 2 van 2
      • Pry apart the camera housing with your fingers to reveal the second motor.

      Vraag FixBot

      Voeg opmerking toe

    8. D-Link DCS-5222L Motor Replacement: stap 8, afbeelding 1 van 1
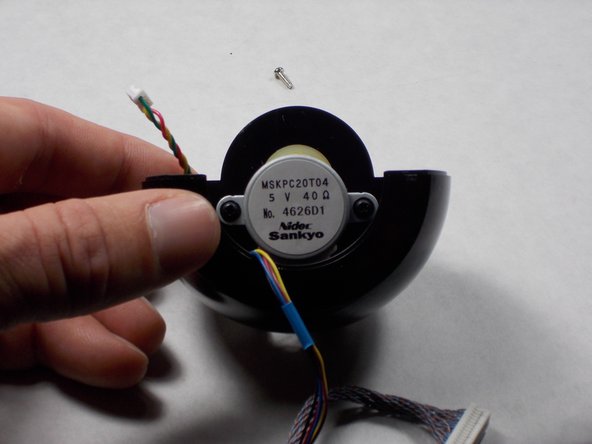
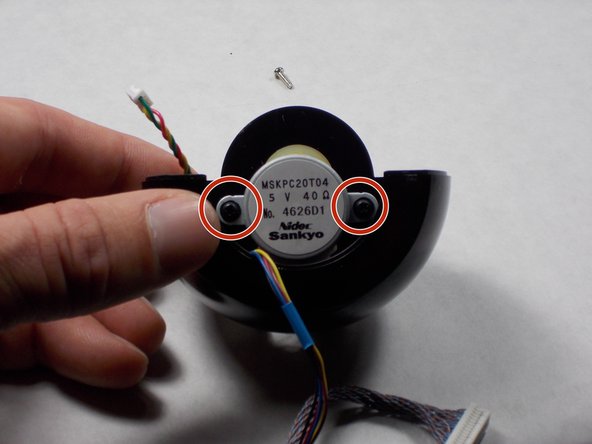
      • Unscrew the two 6mm screws holding the motor in place with a #1 Phillips screwdriver.

      Vraag FixBot

      Voeg opmerking toe

Conclusie

To reassemble your device, follow these instructions in reverse order.

Annuleren: ik heb deze handleiding niet afgemaakt.

Één andere persoon heeft deze handleiding voltooid.

Jason Munyon

Lid sinds: 10/30/18

268 Reputatie

2 handleidingen geschreven

Team

UMass Dartmouth, Team S2-G5, Peak Fall 2018 Lid van UMass Dartmouth, Team S2-G5, Peak Fall 2018

UMASSD-PEAK-F18S2G5

3 Leden

60 handleidingen geschreven

2Gids Commentaar

Where can I buy new motor?

Michael Williams - Antwoord Deel

I do not know, I purchased a “for Parts” camera on e-bay for $15.00 and used the motor from that unit.

Ed Wheelbarger - Antwoord Deel

Voeg opmerking toe

Weergavestatistieken:

Afgelopen 24 uren: 1

Afgelopen 7 dagen: 12

Afgelopen 30 dagen: 30

Altijd: 1,345