Deze versie kan foutieve bewerkingen bevatten. Schakel over naar de recentste gecontroleerde momentopname.
Wat je nodig hebt
-
Deze stap is niet vertaald. Help het te vertalen
-
Press the green arm away from the melting tray. Remove the melting tray.
-
Pop the metal arms out of the green pivot support.
-
-
Deze stap is niet vertaald. Help het te vertalen
-
Remove the 2 screws (.75cm in length) currently securing the metal melting tray with a Phillips #2 screwdriver.
-
-
Deze stap is niet vertaald. Help het te vertalen
-
The light bulb should now be revealed. Unscrew the burned out bulb and replace with a new bulb.
-
-
Deze stap is niet vertaald. Help het te vertalen
-
Flip the crayon maker.
-
Remove six screws (2 cm in length) with a spanner.
-
Remove the green base plate and set it aside.
-
-
-
Deze stap is niet vertaald. Help het te vertalen
-
Locate the clear plastic arm inside the control box.
-
-
Deze stap is niet vertaald. Help het te vertalen
-
If necessary, unscrew the plastic arm with a Phillips #00 Precision screwdriver and readjust the arm until the desired position is reached.
-
If the plastic arm is broken, contact Crayola for replacement parts.
-
-
Deze stap is niet vertaald. Help het te vertalen
-
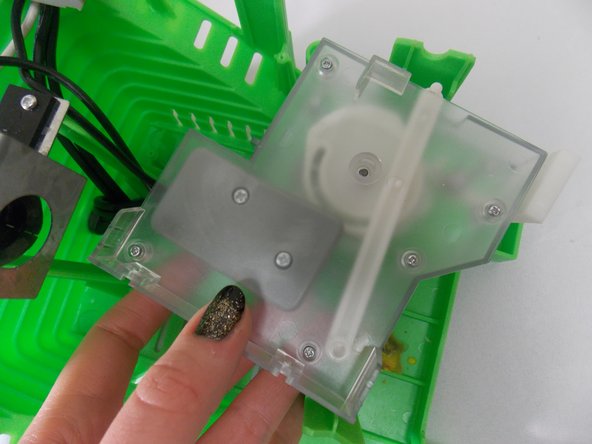
Remove the green base from the crayon maker and set aside.
-
Locate the clear box.
-
-
Deze stap is niet vertaald. Help het te vertalen
-
There are four screws (circled in red) that need to be removed with a Phillips #00 Precision screwdriver.
-
-
Deze stap is niet vertaald. Help het te vertalen
-
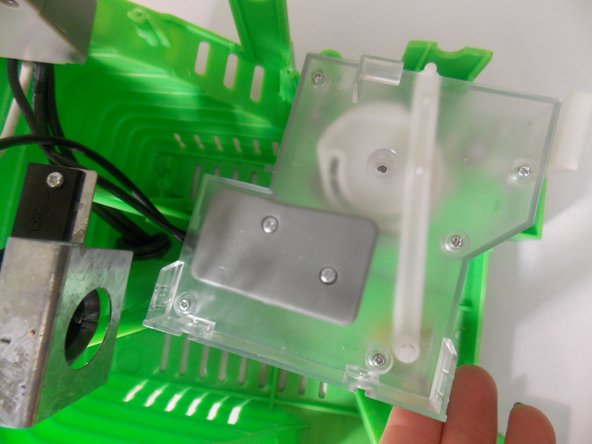
Remove five screws (1.5 cm in length) using a Phillips #00 Precision screwdriver and open the clear plastic box.
-
-
Deze stap is niet vertaald. Help het te vertalen
-
The plastic arm should be positioned as shown in the figure. Adjust the arm's position if necessary.
-


Annuleren: ik heb deze handleiding niet afgemaakt.
Één andere persoon heeft deze handleiding voltooid.