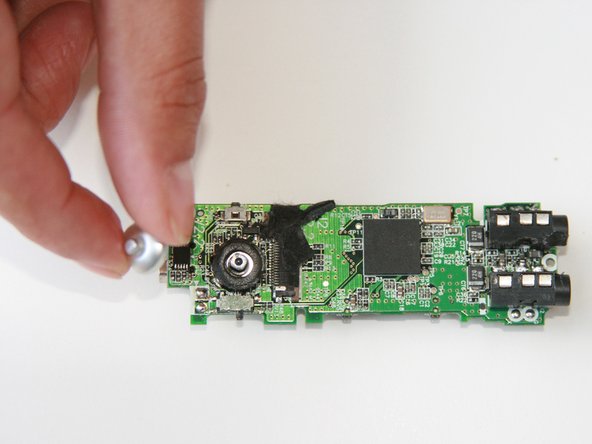
Ga door naar hoofdinhoud

Cowon iAudio U2 Joystick Replacement

Wat je nodig hebt

  1. Cowon iAudio U2 Joystick Replacement, Joystick: stap 1, afbeelding 1 van 1
    • Before starting the disassemble, make sure the device is powered off.

    • Unscrew the four (4) screws using the PH000 drill bit from the iFixit toolkit.

    • Don't forget to set the screws aside in a safe location, perhaps using a magnetic board to store them. You will need the screws to put the device back together.

  2. Cowon iAudio U2 Joystick Replacement: stap 2, afbeelding 1 van 2 Cowon iAudio U2 Joystick Replacement: stap 2, afbeelding 2 van 2
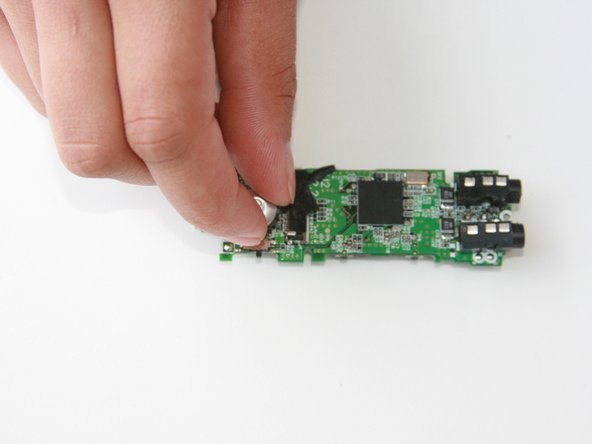
    • Use the plastic opening tool from the iFixit toolkit to separate the back from the front of the device. This can be done by wedging the opening tool into the space where the two sides of the cover on the device meet.

    • After the plastic opening tool is wedged into the space, push down on the exposed end until the two sides come apart.

  3. Cowon iAudio U2 Joystick Replacement: stap 3, afbeelding 1 van 1
    • Using the PH000 drill bit from the iFixit toolkit, unscrew the two (2) screws to detach the motherboard from the device.

  4. Cowon iAudio U2 Joystick Replacement: stap 4, afbeelding 1 van 1
    • Wedge the plastic opening tool between the device case and the motherboard. Push down on the exposed end of the device, and the motherboard should pop up.

  5. Cowon iAudio U2 Joystick Replacement: stap 5, afbeelding 1 van 3 Cowon iAudio U2 Joystick Replacement: stap 5, afbeelding 2 van 3 Cowon iAudio U2 Joystick Replacement: stap 5, afbeelding 3 van 3
    • The silver plastic cover to the joystick will be on the front side of the device. Pull the cover off with your hand.

  6. Cowon iAudio U2 Joystick Replacement: stap 6, afbeelding 1 van 2 Cowon iAudio U2 Joystick Replacement: stap 6, afbeelding 2 van 2
    • Using the soldering tool, remove the joystick control.

    • Once the original joystick is removed, solder the new joystick controller into place.

    • The soldering tool will be hot, so be cautious when using it.

Conclusie

To reassemble your device, follow these instructions in reverse order.

Één andere persoon heeft deze handleiding voltooid.

Justin Proshka

Lid sinds: 01/14/16

624 Reputatie

5 handleidingen geschreven

Team

0 opmerkingen

Voeg opmerking toe

Weergavestatistieken:

Afgelopen 24 uren: 1

Afgelopen 7 dagen: 7

Afgelopen 30 dagen: 10

Altijd: 444