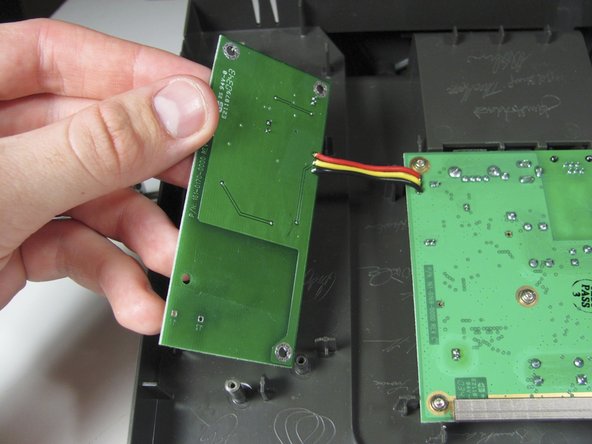
Ga door naar hoofdinhoud

Ceiva LF2003 Power Supply Board Replacement

Wat je nodig hebt

  1. Ceiva LF2003 Power Supply Board Replacement, Exterior Frame and Matting: stap 1, afbeelding 1 van 1
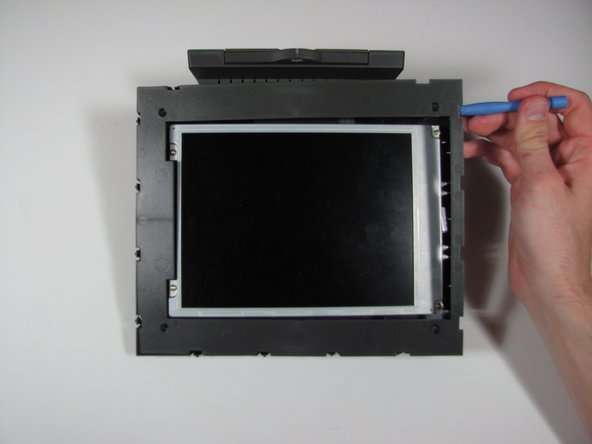
    • Lay the device on its back, and rotate so the base is facing away from you.

  2. Ceiva LF2003 Power Supply Board Replacement: stap 2, afbeelding 1 van 1
    • Grip the frame with your fingers under the edge of the frame, and thumbs pushing down on the front of the device.

  3. Ceiva LF2003 Power Supply Board Replacement: stap 3, afbeelding 1 van 1
    • Lift up the frame with your fingers and push down the rest of the device with your thumbs.

  4. Ceiva LF2003 Power Supply Board Replacement: stap 4, afbeelding 1 van 1
    • Remove the frame and matte from the device.

  5. Ceiva LF2003 Power Supply Board Replacement, Internal Plastic Screen Frame: stap 5, afbeelding 1 van 1
    • Remove the four 7mm Torx T6 screws.

  6. Ceiva LF2003 Power Supply Board Replacement: stap 6, afbeelding 1 van 2 Ceiva LF2003 Power Supply Board Replacement: stap 6, afbeelding 2 van 2
    • Using the plastic opening tool or your fingers, lift up the frame from any edge.

    • Remove the frame from the device.

  7. Ceiva LF2003 Power Supply Board Replacement, Display: stap 7, afbeelding 1 van 3 Ceiva LF2003 Power Supply Board Replacement, Display: stap 7, afbeelding 2 van 3 Ceiva LF2003 Power Supply Board Replacement, Display: stap 7, afbeelding 3 van 3
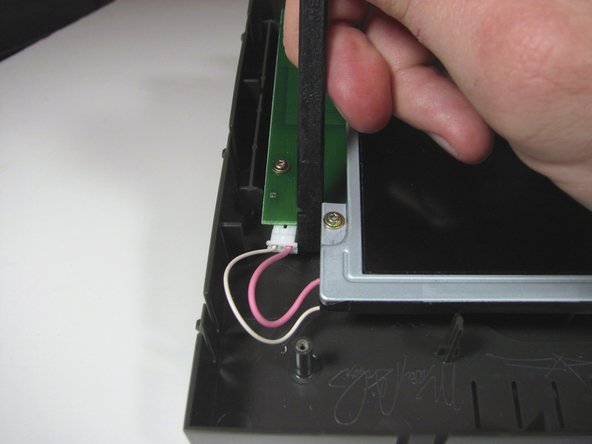
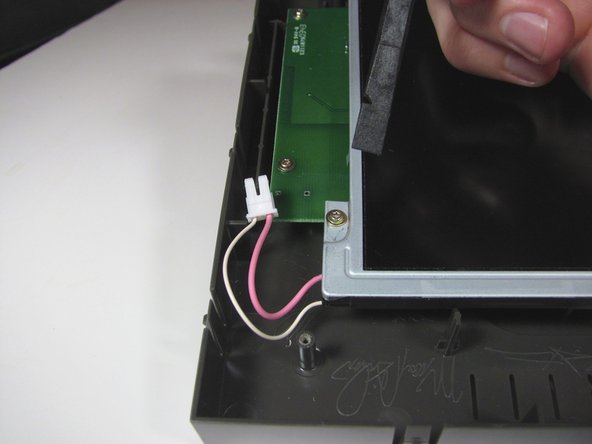
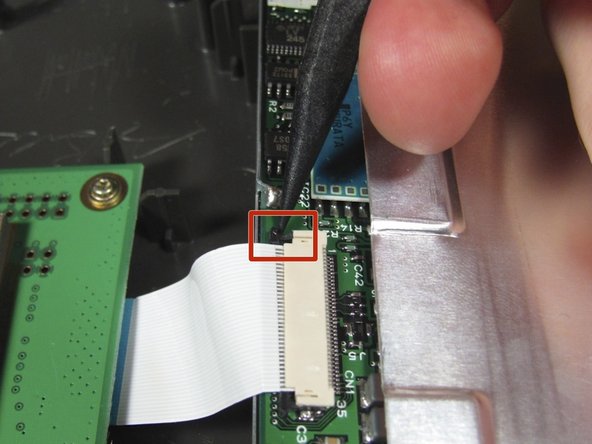
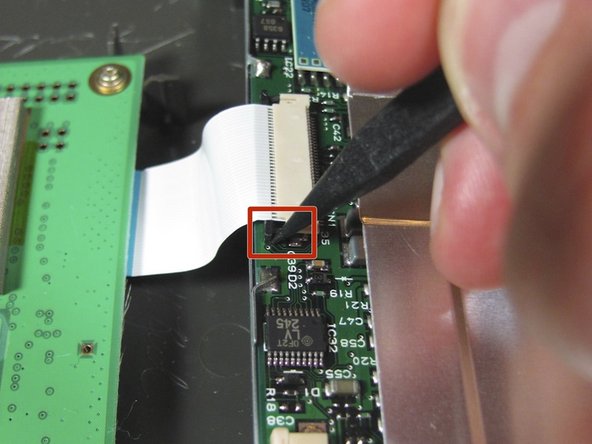
    • Unplug the cable connecting the display to the power supply using the flat end of the spudger to pry the connector away from the circuit board.

    • Alternate applying pressure to the left and right side of the connector to ensure that it does not break.

  8. Ceiva LF2003 Power Supply Board Replacement: stap 8, afbeelding 1 van 1
    • Remove the four 7mm Torx T6 screws.

  9. Ceiva LF2003 Power Supply Board Replacement: stap 9, afbeelding 1 van 2 Ceiva LF2003 Power Supply Board Replacement: stap 9, afbeelding 2 van 2
    • Lift up the display from the left edge and flip display over.

    • Do not lift the display too quickly, as the display is still connected to the main circuit board on the right.

  10. Ceiva LF2003 Power Supply Board Replacement: stap 10, afbeelding 1 van 3 Ceiva LF2003 Power Supply Board Replacement: stap 10, afbeelding 2 van 3 Ceiva LF2003 Power Supply Board Replacement: stap 10, afbeelding 3 van 3
    • Use the spudger to disconnect the ribbon cable from the display by the black pins away from the connector. There is a pin on either side of the connector.

    • Once both pins are released, the ribbon cable should slide easily out.

    • It may be easier if someone else holds the display so the cable does not get ripped out.

  11. Ceiva LF2003 Power Supply Board Replacement: stap 11, afbeelding 1 van 1
    • Remove the display assembly from the device.

  12. Ceiva LF2003 Power Supply Board Replacement, Power Supply Board: stap 12, afbeelding 1 van 1
    • Remove the four 7mm Torx T6 screws.

  13. Ceiva LF2003 Power Supply Board Replacement: stap 13, afbeelding 1 van 2 Ceiva LF2003 Power Supply Board Replacement: stap 13, afbeelding 2 van 2
    • Desolder the 3 wires attached to the board.

    • Remove the power supply board from the device.

    • The wires shown were not actually desoldered, but the board will now be separated from the rest of the device.

Conclusie

To reassemble your device, follow these instructions in reverse order.

Één andere persoon heeft deze handleiding voltooid.

Casey Glasgow

Lid sinds: 01/26/14

510 Reputatie

5 handleidingen geschreven

Team

Cal Poly, Team 9-25, Maness Winter 2014 Lid van Cal Poly, Team 9-25, Maness Winter 2014

CPSU-MANESS-W14S9G25

4 Leden

5 handleidingen geschreven

0 opmerkingen

Voeg opmerking toe

Weergavestatistieken:

Afgelopen 24 uren: 0

Afgelopen 7 dagen: 0

Afgelopen 30 dagen: 0

Altijd: 142