Ga door naar hoofdinhoud

Casio Exilim EX-Z80 Motherboard Replacement

Wat je nodig hebt

  1. Casio Exilim EX-Z80 Motherboard Replacement, Battery: stap 1, afbeelding 1 van 2 Casio Exilim EX-Z80 Motherboard Replacement, Battery: stap 1, afbeelding 2 van 2
    • Locate the battery compartment at the bottom of the camera.

    • With your thumb, gently press down on the compartment door and slide to the left to open.

  2. Casio Exilim EX-Z80 Motherboard Replacement: stap 2, afbeelding 1 van 2 Casio Exilim EX-Z80 Motherboard Replacement: stap 2, afbeelding 2 van 2
    • With your index finger, gently pull back gray release lever for the battery to pop out.

    • Gently pull the battery out of the slot.

  3. Casio Exilim EX-Z80 Motherboard Replacement, Back and Front Cover: stap 3, afbeelding 1 van 3 Casio Exilim EX-Z80 Motherboard Replacement, Back and Front Cover: stap 3, afbeelding 2 van 3 Casio Exilim EX-Z80 Motherboard Replacement, Back and Front Cover: stap 3, afbeelding 3 van 3
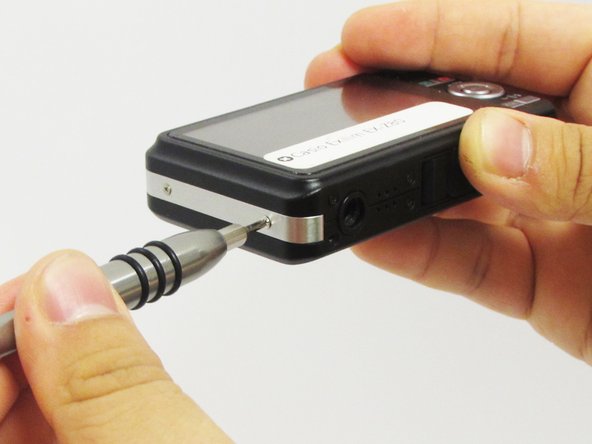
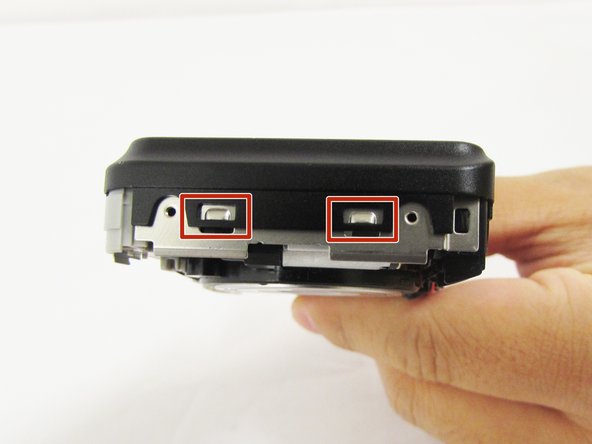
    • Remove the four 3 mm black screws from the bottom of the camera using a Phillips #000 screwdriver.

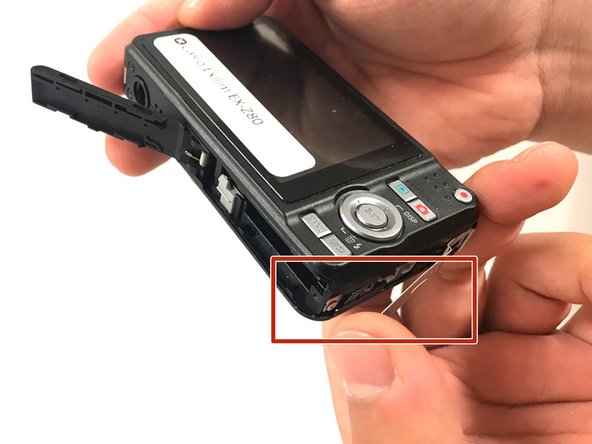
    • Open the battery compartment with your thumb or index finger.

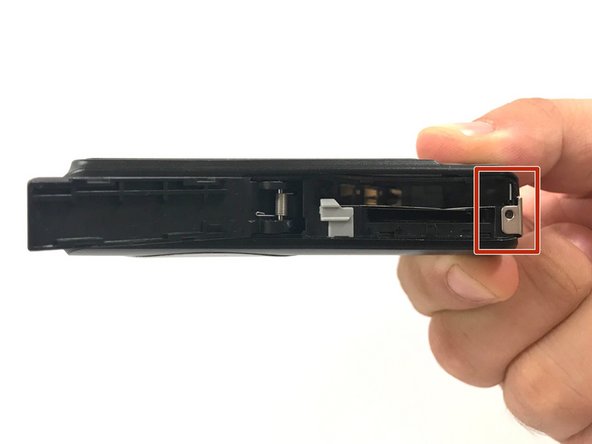
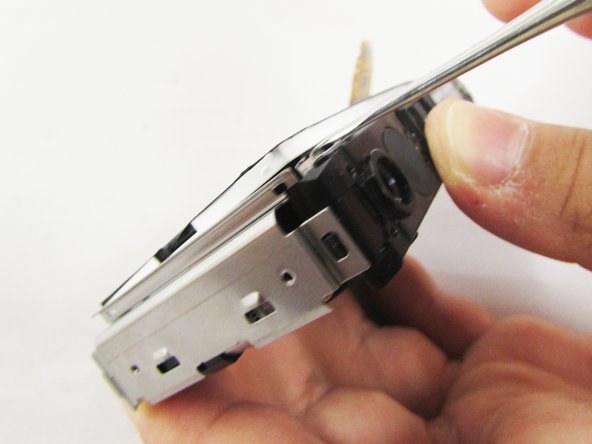
    • Remove the single 2 mm silver screw that is now exposed using a Phillips #000 screwdriver.

  4. Casio Exilim EX-Z80 Motherboard Replacement: stap 4, afbeelding 1 van 3 Casio Exilim EX-Z80 Motherboard Replacement: stap 4, afbeelding 2 van 3 Casio Exilim EX-Z80 Motherboard Replacement: stap 4, afbeelding 3 van 3
    • Open the USB port tab.

    • Remove the single 2 mm silver screw using a Phillips #000 screwdriver.

  5. Casio Exilim EX-Z80 Motherboard Replacement: stap 5, afbeelding 1 van 2 Casio Exilim EX-Z80 Motherboard Replacement: stap 5, afbeelding 2 van 2
    • Remove the two 2 mm silver screws using a Phillips #000 screwdriver.

  6. Casio Exilim EX-Z80 Motherboard Replacement: stap 6, afbeelding 1 van 2 Casio Exilim EX-Z80 Motherboard Replacement: stap 6, afbeelding 2 van 2
    • Carefully remove the silver strip from left side. Open the battery cover and remove the metal strip with fingers by sliding it to the left.

  7. Casio Exilim EX-Z80 Motherboard Replacement: stap 7, afbeelding 1 van 2 Casio Exilim EX-Z80 Motherboard Replacement: stap 7, afbeelding 2 van 2
    • With the metal spudger, pry out the edge of the silver strip at the bottom right side of the camera.

    • Carefully remove the remaining part of the metal strip.

  8. Casio Exilim EX-Z80 Motherboard Replacement: stap 8, afbeelding 1 van 2 Casio Exilim EX-Z80 Motherboard Replacement: stap 8, afbeelding 2 van 2
    • Remove the two 2 mm silver screws from the top corners of the camera using a Phillips #000 screwdriver.

    • Remove the three 2 mm screws from the left side using a Phillips #000 screwdriver.

  9. Casio Exilim EX-Z80 Motherboard Replacement: stap 9, afbeelding 1 van 3 Casio Exilim EX-Z80 Motherboard Replacement: stap 9, afbeelding 2 van 3 Casio Exilim EX-Z80 Motherboard Replacement: stap 9, afbeelding 3 van 3
    • Using a small opening tool carefully release all lock tabs at the top and on the side of the camera from their locked position.

    • Using your hands, carefully separate the front and back panel from the camera.

  10. Casio Exilim EX-Z80 Motherboard Replacement, LCD Screen: stap 10, afbeelding 1 van 3 Casio Exilim EX-Z80 Motherboard Replacement, LCD Screen: stap 10, afbeelding 2 van 3 Casio Exilim EX-Z80 Motherboard Replacement, LCD Screen: stap 10, afbeelding 3 van 3
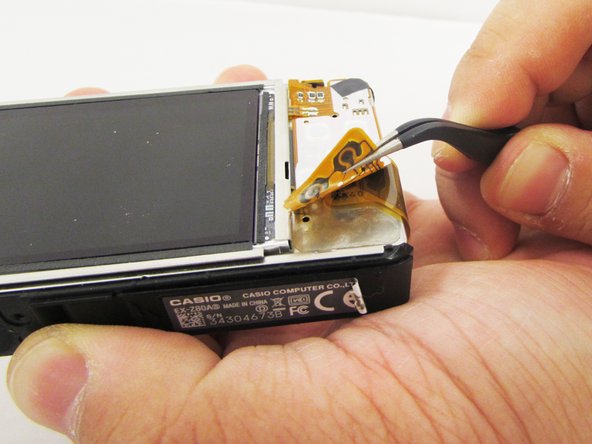
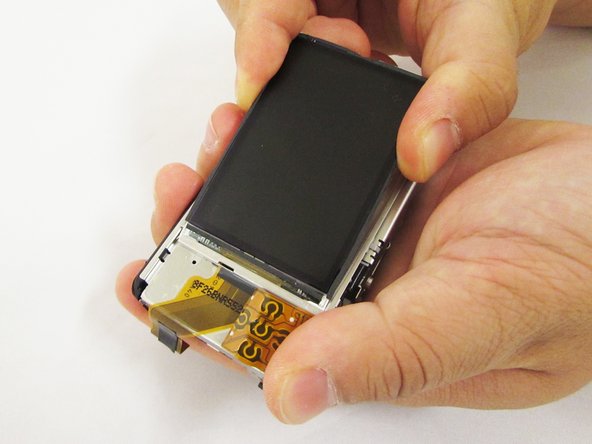
    • Gently flip the wide button cable up from the display cable.

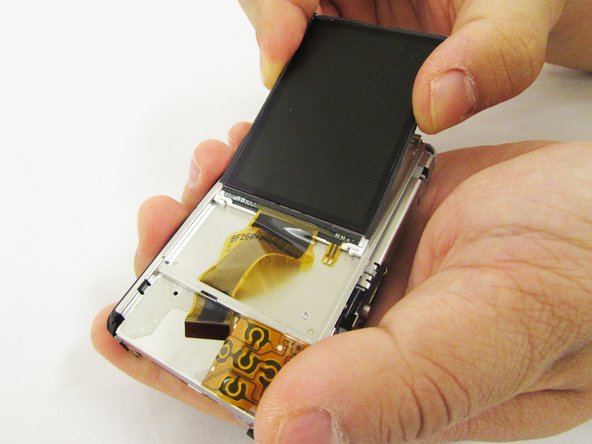
    • Lift the brown retention flap on the display cable ZIF connector with tweezers or an ESD-safe tool.

    • Carefully pull the display cable from its connector.

  11. Casio Exilim EX-Z80 Motherboard Replacement: stap 11, afbeelding 1 van 3 Casio Exilim EX-Z80 Motherboard Replacement: stap 11, afbeelding 2 van 3 Casio Exilim EX-Z80 Motherboard Replacement: stap 11, afbeelding 3 van 3
    • Pry the square holes that hold the LCD screen up with a metal spudger until you see the raised tabs in the metal holes.

    • Repeat the process with the holes around the four edges of the camera.

    • Insert the metal spudger into the gap of the metal case and pry up the LCD screen.

  12. Casio Exilim EX-Z80 Motherboard Replacement: stap 12, afbeelding 1 van 3 Casio Exilim EX-Z80 Motherboard Replacement: stap 12, afbeelding 2 van 3 Casio Exilim EX-Z80 Motherboard Replacement: stap 12, afbeelding 3 van 3
    • Hold up the LCD screen in one hand and hold back the button cable with the other.

    • Don't let the LCD screen to fall back into the metal case and make sure the button cable does not get stuck on the display cable.

    • Pull on the LCD screen until the yellow display cable is fully out of the metal case.

  13. Casio Exilim EX-Z80 Motherboard Replacement, Lens: stap 13, afbeelding 1 van 3 Casio Exilim EX-Z80 Motherboard Replacement, Lens: stap 13, afbeelding 2 van 3 Casio Exilim EX-Z80 Motherboard Replacement, Lens: stap 13, afbeelding 3 van 3
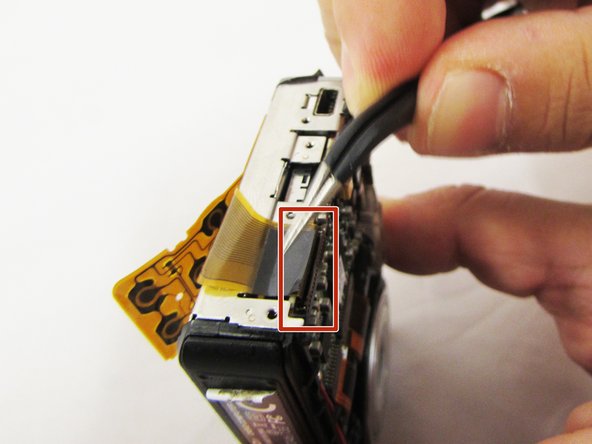
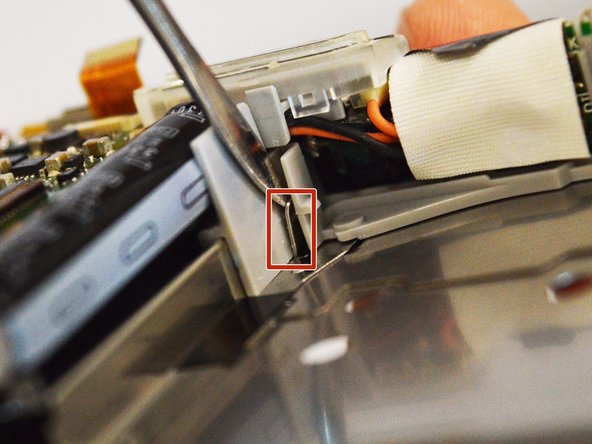
    • Lift the retaining flaps on the two ZIF connectors that secure the the lens ribbon cables to the motherboard.

    • Carefully pull the two ribbon cables from their sockets on the motherboard.

  14. Casio Exilim EX-Z80 Motherboard Replacement: stap 14, afbeelding 1 van 3 Casio Exilim EX-Z80 Motherboard Replacement: stap 14, afbeelding 2 van 3 Casio Exilim EX-Z80 Motherboard Replacement: stap 14, afbeelding 3 van 3
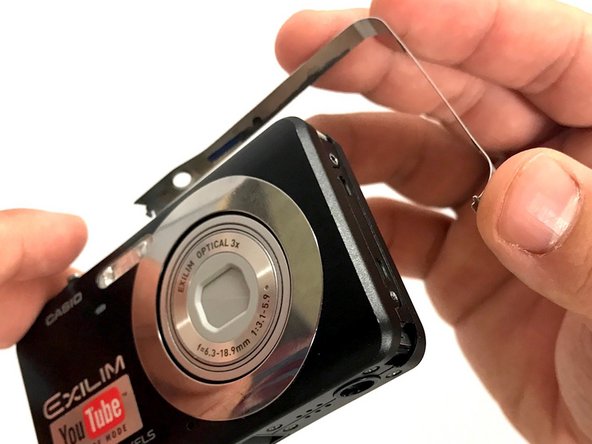
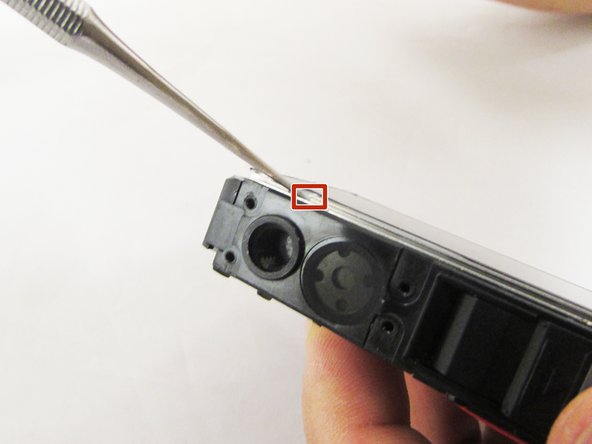
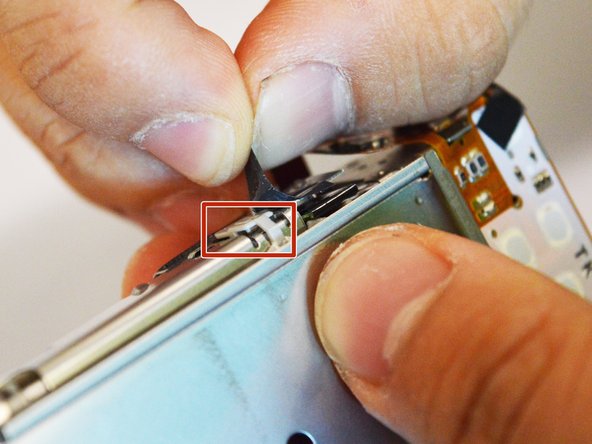
    • Turn the camera around and locate the holes on the metal panel.

    • With a heavy duty spudger, gently poke through the holes, releasing the lens from the main portion of the camera.

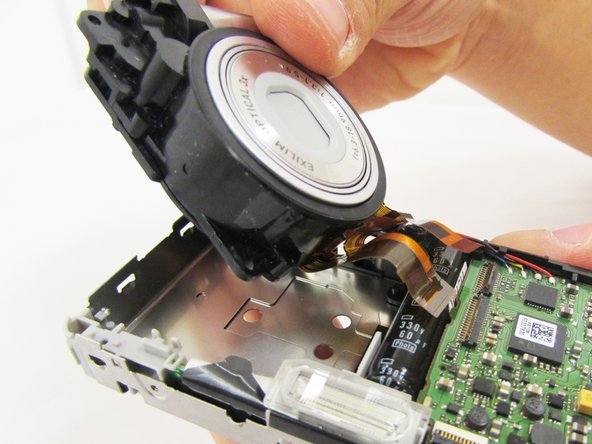
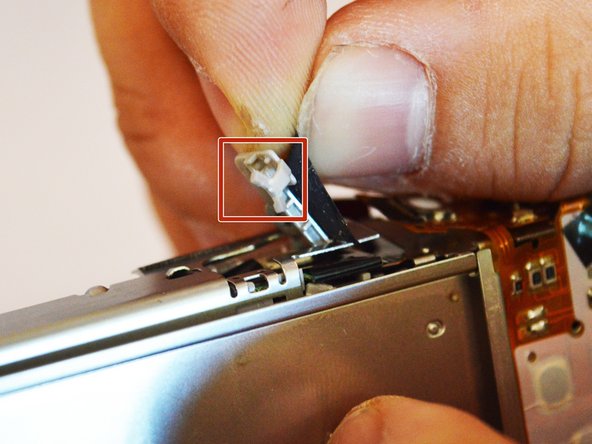
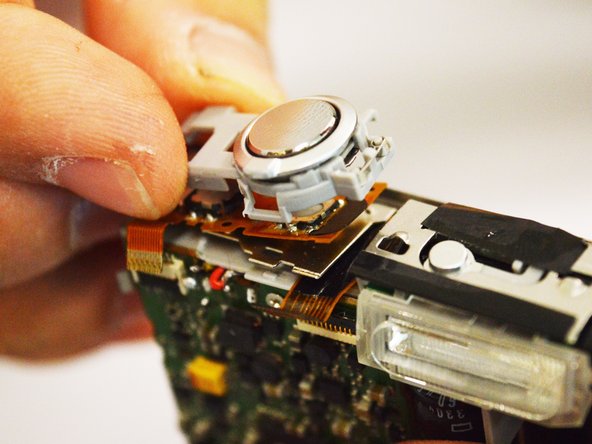
    • With your index finger and thumb gently pull the full lens out.

  15. Casio Exilim EX-Z80 Motherboard Replacement, Motherboard: stap 15, afbeelding 1 van 3 Casio Exilim EX-Z80 Motherboard Replacement, Motherboard: stap 15, afbeelding 2 van 3 Casio Exilim EX-Z80 Motherboard Replacement, Motherboard: stap 15, afbeelding 3 van 3
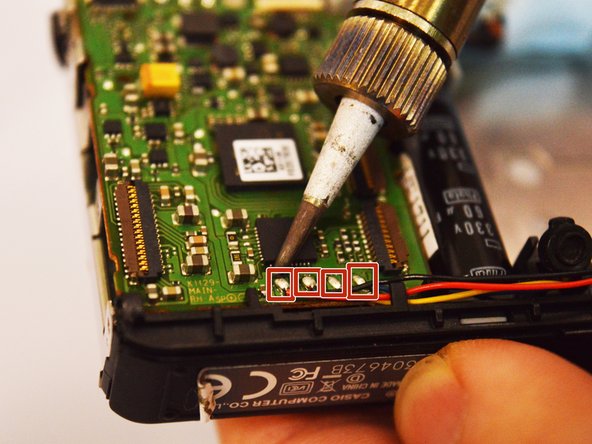
    • Turn the camera face up with the motherboard facing you.

    • Ensure that the soldering iron is heated and ready to use. Be careful not to touch any surfaces with hot tip.

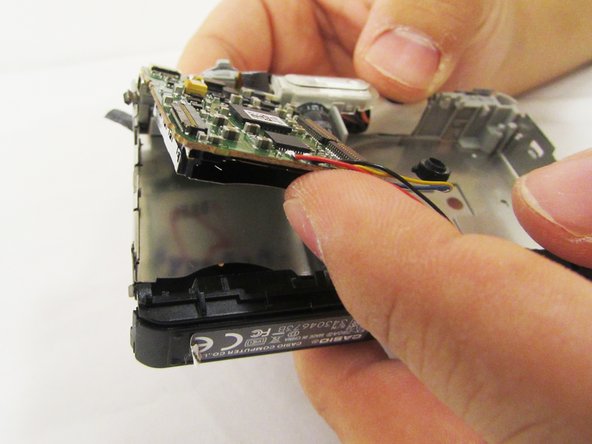
    • At the bottom of the motherboard, there are four nodes. With the soldering iron, desolder the metal nodes to release the wires from the board.

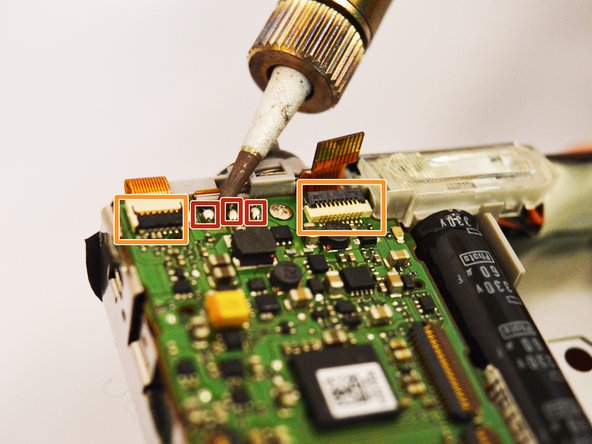
    • With the soldering iron, desolder the three remaining nodes at the top of the motherboard.

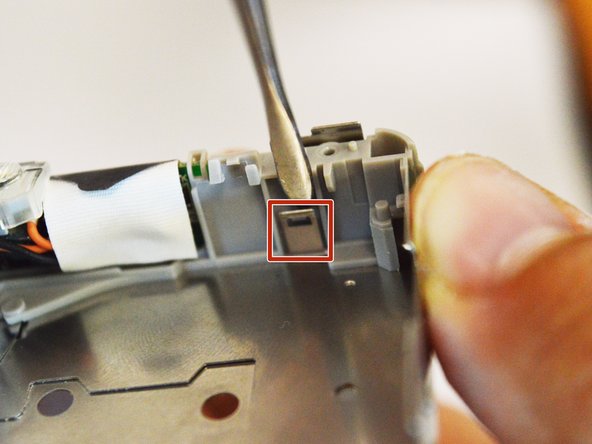
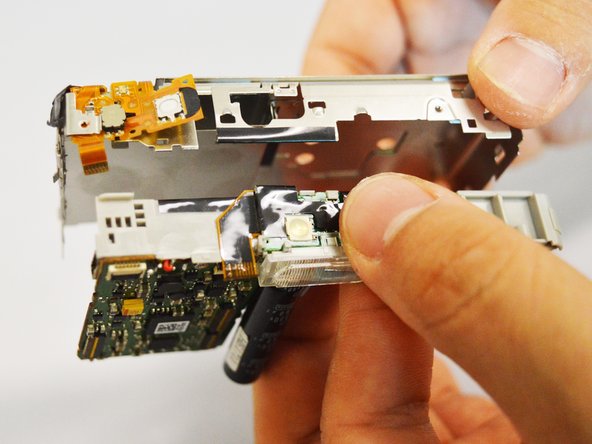
    • Lift the two black retaining flaps on the ZIF connectors at the top of the motherboard.

  16. Casio Exilim EX-Z80 Motherboard Replacement: stap 16, afbeelding 1 van 3 Casio Exilim EX-Z80 Motherboard Replacement: stap 16, afbeelding 2 van 3 Casio Exilim EX-Z80 Motherboard Replacement: stap 16, afbeelding 3 van 3
    • Gently pull the black plastic case from the bottom of the camera.

    • Pull out the little white plastic (the power button) on the top of the camera. It may be covered by a piece of black tape. Pulling the tape will allow for the power button to be released.

  17. Casio Exilim EX-Z80 Motherboard Replacement: stap 17, afbeelding 1 van 2 Casio Exilim EX-Z80 Motherboard Replacement: stap 17, afbeelding 2 van 2
    • Insert a metal spudger into the edge of the camera shutter button and pry the button out.

    • Remove the button by pinching and pulling with two fingers.

  18. Casio Exilim EX-Z80 Motherboard Replacement: stap 18, afbeelding 1 van 3 Casio Exilim EX-Z80 Motherboard Replacement: stap 18, afbeelding 2 van 3 Casio Exilim EX-Z80 Motherboard Replacement: stap 18, afbeelding 3 van 3
    • Pry the iron tabs with the metal spudger in order to free the motherboard. There are three places to pry. Once you are done, the mother board should be able to move.

  19. Casio Exilim EX-Z80 Motherboard Replacement: stap 19, afbeelding 1 van 2 Casio Exilim EX-Z80 Motherboard Replacement: stap 19, afbeelding 2 van 2
    • Gently push the motherboard up from the bottom of the camera. Then pull the motherboard out at the top of the camera.

    • Use gentle force to pry out the motherboard.

Conclusie

To reassemble your device, follow these instructions in reverse order.

0 opmerkingen

Voeg opmerking toe

Weergavestatistieken:

Afgelopen 24 uren: 0

Afgelopen 7 dagen: 1

Afgelopen 30 dagen: 6

Altijd: 394