Ga door naar hoofdinhoud

Casio Exilim EX-Z80 LCD Screen Replacement

Wat je nodig hebt

  1. Casio Exilim EX-Z80 LCD Screen Replacement, Back and Front Cover: stap 1, afbeelding 1 van 3 Casio Exilim EX-Z80 LCD Screen Replacement, Back and Front Cover: stap 1, afbeelding 2 van 3 Casio Exilim EX-Z80 LCD Screen Replacement, Back and Front Cover: stap 1, afbeelding 3 van 3
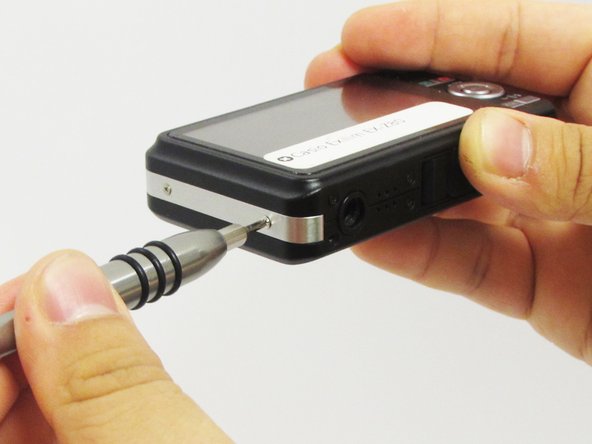
    • Remove the four 3 mm black screws from the bottom of the camera using a Phillips #000 screwdriver.

    • Open the battery compartment with your thumb or index finger.

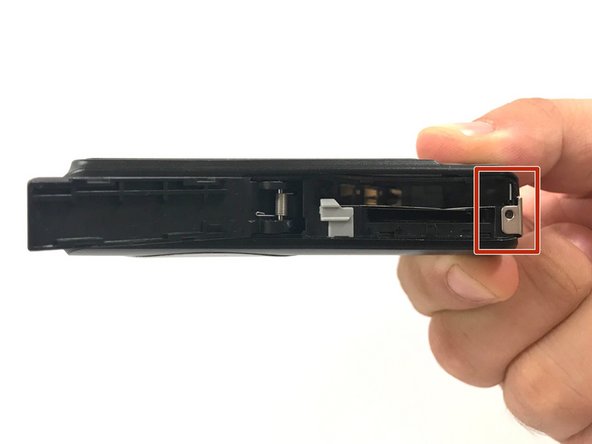
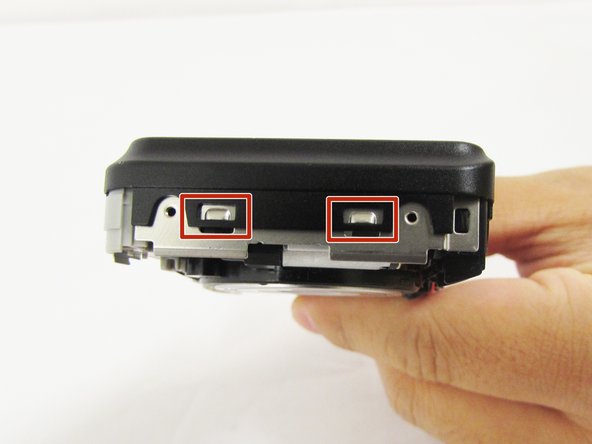
    • Remove the single 2 mm silver screw that is now exposed using a Phillips #000 screwdriver.

  2. Casio Exilim EX-Z80 LCD Screen Replacement: stap 2, afbeelding 1 van 3 Casio Exilim EX-Z80 LCD Screen Replacement: stap 2, afbeelding 2 van 3 Casio Exilim EX-Z80 LCD Screen Replacement: stap 2, afbeelding 3 van 3
    • Open the USB port tab.

    • Remove the single 2 mm silver screw using a Phillips #000 screwdriver.

  3. Casio Exilim EX-Z80 LCD Screen Replacement: stap 3, afbeelding 1 van 2 Casio Exilim EX-Z80 LCD Screen Replacement: stap 3, afbeelding 2 van 2
    • Remove the two 2 mm silver screws using a Phillips #000 screwdriver.

  4. Casio Exilim EX-Z80 LCD Screen Replacement: stap 4, afbeelding 1 van 2 Casio Exilim EX-Z80 LCD Screen Replacement: stap 4, afbeelding 2 van 2
    • Carefully remove the silver strip from left side. Open the battery cover and remove the metal strip with fingers by sliding it to the left.

  5. Casio Exilim EX-Z80 LCD Screen Replacement: stap 5, afbeelding 1 van 2 Casio Exilim EX-Z80 LCD Screen Replacement: stap 5, afbeelding 2 van 2
    • With the metal spudger, pry out the edge of the silver strip at the bottom right side of the camera.

    • Carefully remove the remaining part of the metal strip.

  6. Casio Exilim EX-Z80 LCD Screen Replacement: stap 6, afbeelding 1 van 2 Casio Exilim EX-Z80 LCD Screen Replacement: stap 6, afbeelding 2 van 2
    • Remove the two 2 mm silver screws from the top corners of the camera using a Phillips #000 screwdriver.

    • Remove the three 2 mm screws from the left side using a Phillips #000 screwdriver.

  7. Casio Exilim EX-Z80 LCD Screen Replacement: stap 7, afbeelding 1 van 3 Casio Exilim EX-Z80 LCD Screen Replacement: stap 7, afbeelding 2 van 3 Casio Exilim EX-Z80 LCD Screen Replacement: stap 7, afbeelding 3 van 3
    • Using a small opening tool carefully release all lock tabs at the top and on the side of the camera from their locked position.

    • Using your hands, carefully separate the front and back panel from the camera.

  8. Casio Exilim EX-Z80 LCD Screen Replacement, LCD Screen: stap 8, afbeelding 1 van 3 Casio Exilim EX-Z80 LCD Screen Replacement, LCD Screen: stap 8, afbeelding 2 van 3 Casio Exilim EX-Z80 LCD Screen Replacement, LCD Screen: stap 8, afbeelding 3 van 3
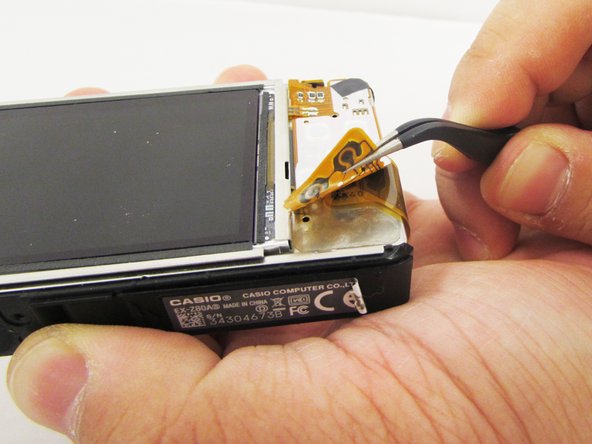
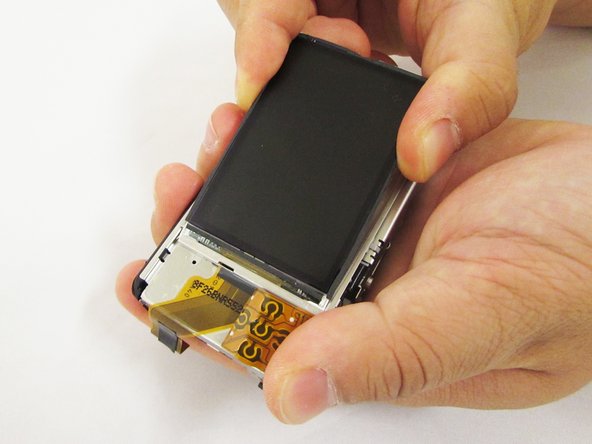
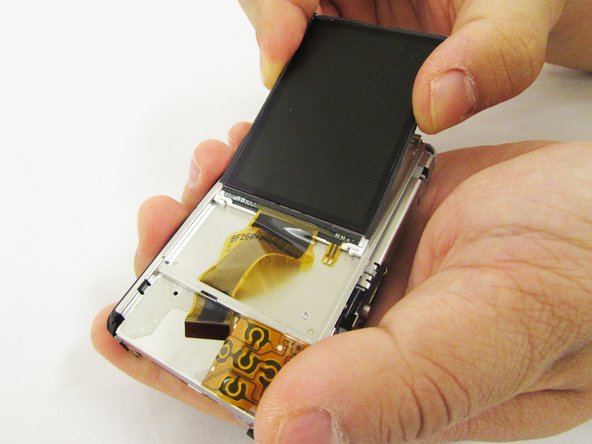
    • Gently flip the wide button cable up from the display cable.

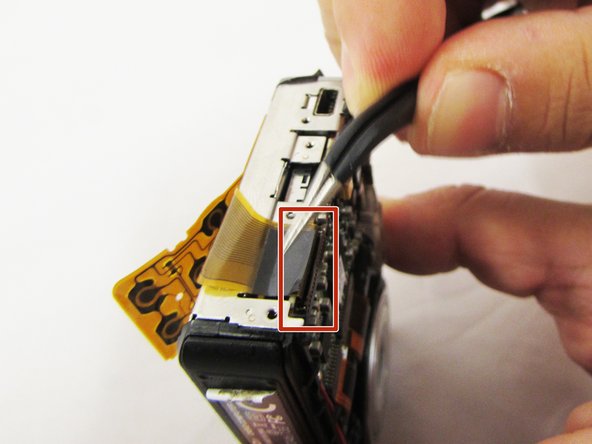
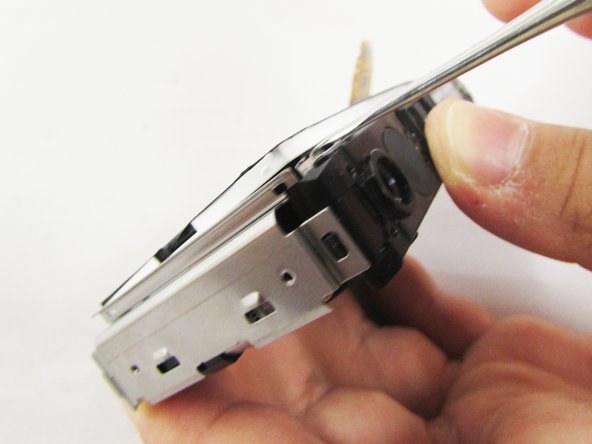
    • Lift the brown retention flap on the display cable ZIF connector with tweezers or an ESD-safe tool.

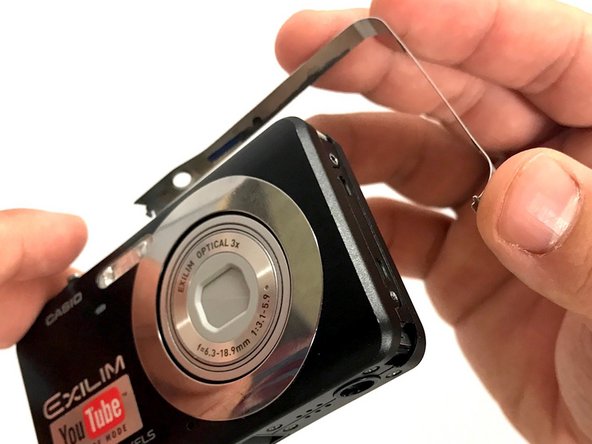
    • Carefully pull the display cable from its connector.

  9. Casio Exilim EX-Z80 LCD Screen Replacement: stap 9, afbeelding 1 van 3 Casio Exilim EX-Z80 LCD Screen Replacement: stap 9, afbeelding 2 van 3 Casio Exilim EX-Z80 LCD Screen Replacement: stap 9, afbeelding 3 van 3
    • Pry the square holes that hold the LCD screen up with a metal spudger until you see the raised tabs in the metal holes.

    • Repeat the process with the holes around the four edges of the camera.

    • Insert the metal spudger into the gap of the metal case and pry up the LCD screen.

  10. Casio Exilim EX-Z80 LCD Screen Replacement: stap 10, afbeelding 1 van 3 Casio Exilim EX-Z80 LCD Screen Replacement: stap 10, afbeelding 2 van 3 Casio Exilim EX-Z80 LCD Screen Replacement: stap 10, afbeelding 3 van 3
    • Hold up the LCD screen in one hand and hold back the button cable with the other.

    • Don't let the LCD screen to fall back into the metal case and make sure the button cable does not get stuck on the display cable.

    • Pull on the LCD screen until the yellow display cable is fully out of the metal case.

Conclusie

To reassemble your device, follow these instructions in reverse order.

0 opmerkingen

Voeg opmerking toe

Weergavestatistieken:

Afgelopen 24 uren: 0

Afgelopen 7 dagen: 1

Afgelopen 30 dagen: 5

Altijd: 356