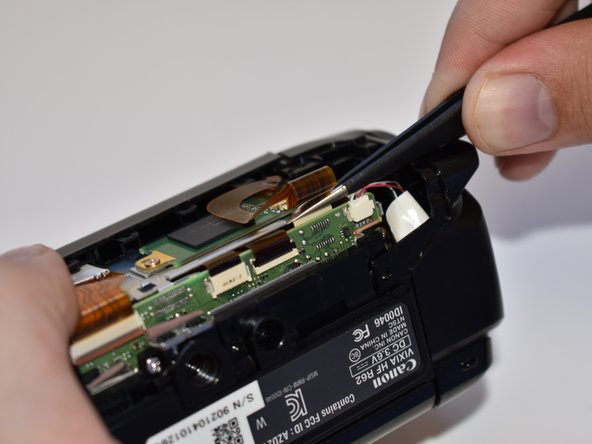
Ga door naar hoofdinhoud

Canon Vixia HF R62 Outer Casing Replacement

Wat je nodig hebt

  1. Canon Vixia HF R62 Outer Casing Replacement, Outer Shell: stap 1, afbeelding 1 van 2 Canon Vixia HF R62 Outer Casing Replacement, Outer Shell: stap 1, afbeelding 2 van 2
    • Remove the strap by undoing the Velcro and pulling it through the thread points.

    • Remove the external battery pack by pressing down on the slide release and sliding it out.

  2. Canon Vixia HF R62 Outer Casing Replacement: stap 2, afbeelding 1 van 2 Canon Vixia HF R62 Outer Casing Replacement: stap 2, afbeelding 2 van 2
    • Remove the three 5mm Phillips #000 screws on the bottom of the device.

  3. Canon Vixia HF R62 Outer Casing Replacement: stap 3, afbeelding 1 van 2 Canon Vixia HF R62 Outer Casing Replacement: stap 3, afbeelding 2 van 2
    • On the side of the device, remove the following Phillips #000 screws:

    • One 3mm screw

    • One 5mm screw

  4. Canon Vixia HF R62 Outer Casing Replacement: stap 4, afbeelding 1 van 2 Canon Vixia HF R62 Outer Casing Replacement: stap 4, afbeelding 2 van 2
    • Remove the panel opposite the display by pulling up perpendicular to the side.

  5. Canon Vixia HF R62 Outer Casing Replacement: stap 5, afbeelding 1 van 1
    • Remove the 4mm Phillips #000 screw that was exposed after taking off the side panel.

  6. Canon Vixia HF R62 Outer Casing Replacement: stap 6, afbeelding 1 van 2 Canon Vixia HF R62 Outer Casing Replacement: stap 6, afbeelding 2 van 2
    • Remove the three 4mm Phillips #000 screws shown.

    • There will be foam covers protecting some or all of these screws. These will need to be removed before you will be able to unscrew them.

  7. Canon Vixia HF R62 Outer Casing Replacement: stap 7, afbeelding 1 van 3 Canon Vixia HF R62 Outer Casing Replacement: stap 7, afbeelding 2 van 3 Canon Vixia HF R62 Outer Casing Replacement: stap 7, afbeelding 3 van 3
    • Using tweezers, disconnect this ribbon cable by pulling straight out.

  8. Canon Vixia HF R62 Outer Casing Replacement: stap 8, afbeelding 1 van 3 Canon Vixia HF R62 Outer Casing Replacement: stap 8, afbeelding 2 van 3 Canon Vixia HF R62 Outer Casing Replacement: stap 8, afbeelding 3 van 3
    • Repeat step seven (7) for the remaining three wires shown.

  9. Canon Vixia HF R62 Outer Casing Replacement: stap 9, afbeelding 1 van 3 Canon Vixia HF R62 Outer Casing Replacement: stap 9, afbeelding 2 van 3 Canon Vixia HF R62 Outer Casing Replacement: stap 9, afbeelding 3 van 3
    • Grasp the top of the camera and pull straight up to remove the top panel.

Conclusie

To reassemble your device, follow these instructions in reverse order.

0 opmerkingen

Voeg opmerking toe

Weergavestatistieken:

Afgelopen 24 uren: 0

Afgelopen 7 dagen: 0

Afgelopen 30 dagen: 0

Altijd: 126