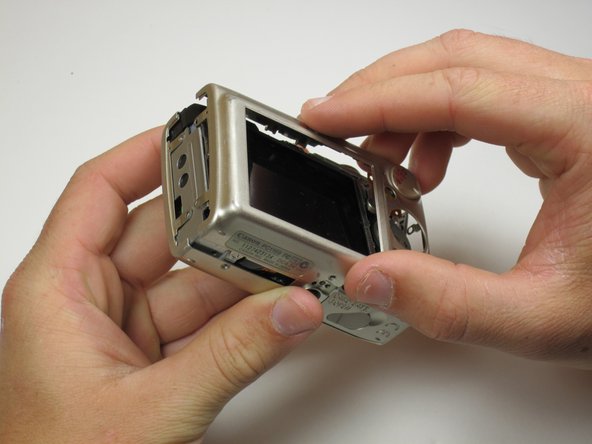
Canon Powershot SD550 Motherboard Replacement

What you need

  1. Canon Powershot SD550 Motherboard Replacement, Outer Case: step 1, image 1 of 1
    • Remove the battery and SD card from the camera.

  2. Canon Powershot SD550 Motherboard Replacement: step 2, image 1 of 1
    • Remove the three 3.8 mm screws from the underside of the camera.

    • Each of the screws is slightly different, so it is important that you note the original location of each screw.

  3. Canon Powershot SD550 Motherboard Replacement: step 3, image 1 of 3 Canon Powershot SD550 Motherboard Replacement: step 3, image 2 of 3 Canon Powershot SD550 Motherboard Replacement: step 3, image 3 of 3
    • Remove the 3.2 mm screw from the right side of the camera.

    • Remove the 2.2 mm screw from the right side of the camera.

    • One of these screws is hidden under the USB port cover.

    • Lift the side panel off.

    • Remove the 1.8 mm screw from underneath the side panel.

  4. Canon Powershot SD550 Motherboard Replacement: step 4, image 1 of 3 Canon Powershot SD550 Motherboard Replacement: step 4, image 2 of 3 Canon Powershot SD550 Motherboard Replacement: step 4, image 3 of 3
    • Remove the two 2.2 mm screws from the left side of the camera.

    • Lift the plate from the camera.

  5. Canon Powershot SD550 Motherboard Replacement: step 5, image 1 of 3 Canon Powershot SD550 Motherboard Replacement: step 5, image 2 of 3 Canon Powershot SD550 Motherboard Replacement: step 5, image 3 of 3
    • Gently lift the rear of the case to remove it from the camera.

  6. Canon Powershot SD550 Motherboard Replacement: step 6, image 1 of 3 Canon Powershot SD550 Motherboard Replacement: step 6, image 2 of 3 Canon Powershot SD550 Motherboard Replacement: step 6, image 3 of 3
    • Remove the front of the camera body.

    • Be sure to keep track of the rubber ring.

  7. Canon Powershot SD550 Motherboard Replacement, LCD Screen: step 7, image 1 of 3 Canon Powershot SD550 Motherboard Replacement, LCD Screen: step 7, image 2 of 3 Canon Powershot SD550 Motherboard Replacement, LCD Screen: step 7, image 3 of 3
    • Peel the navigation buttons from the button panel and set them aside.

    • To free the LCD display, remove the 2.9 mm screw in the top left corner.

    • Rotate the screen clockwise until it lifts away from the camera.

    • There are two ribbon cables attached to the rear of the screen. Do not try to pull the screen off at this point.

  8. Canon Powershot SD550 Motherboard Replacement: step 8, image 1 of 2 Canon Powershot SD550 Motherboard Replacement: step 8, image 2 of 2
    • To unplug the ribbon cables, pull them straight out of their plugs. Do this gently to avoid damaging the connections.

    • After disconnecting both cables, pull the screen away from the camera to remove it.

  9. Canon Powershot SD550 Motherboard Replacement, Motherboard: step 9, image 1 of 2 Canon Powershot SD550 Motherboard Replacement, Motherboard: step 9, image 2 of 2
    • Remove the two 3.4 mm screws still holding the button contact panel onto the camera.

    • Using the spudger, disconnect the ribbon cable attaching the button contact panel to the motherboard.

    • Gently pull the button contact panel away from the motherboard.

  10. Canon Powershot SD550 Motherboard Replacement: step 10, image 1 of 2 Canon Powershot SD550 Motherboard Replacement: step 10, image 2 of 2
    • Underneath the button contact panel, you will find a large connector.

    • Using the spudger as leverage, unplug the connector, and pull it away from the motherboard.

  11. Canon Powershot SD550 Motherboard Replacement: step 11, image 1 of 3 Canon Powershot SD550 Motherboard Replacement: step 11, image 2 of 3 Canon Powershot SD550 Motherboard Replacement: step 11, image 3 of 3
    • The last ribbon is held in place by the blue flap. Insert the spudger under the blue flap.

    • Using the spudger as leverage, flip the blue flap up, which will unlock the ribbon.

    • Place the spudger into the hole in the ribbon, and pull the ribbon away from the connector.

  12. Canon Powershot SD550 Motherboard Replacement: step 12, image 1 of 1
    • Remove the motherboard by pulling it out with either tweezers or the spudger.

Conclusion

To reassemble your device, follow these instructions in reverse order.

Luke Thompson

Member since: 04/17/11

11 Reputation

1 Guide authored

Team

Cal Poly, Team 18-23, Garner Spring 2011 Member of Cal Poly, Team 18-23, Garner Spring 2011

CPSU-GARNER-S11S18G23

5 Members

7 Guides authored

0 Comments

Add Comment

View Statistics:

Past 24 Hours: 0

Past 7 Days: 0

Past 30 Days: 1

All Time: 1,580