Deze versie kan foutieve bewerkingen bevatten. Schakel over naar de recentste gecontroleerde momentopname.
Wat je nodig hebt
-
Deze stap is niet vertaald. Help het te vertalen
-
Remove the knot on the wrist lanyard.
-
Remove the battery and the memory card.
-
-
Deze stap is niet vertaald. Help het te vertalen
-
Begin removing the screws on the bottom of the outer casing.
-
Next, remove the rest of the screws from the outer casing.
-
-
Deze stap is niet vertaald. Help het te vertalen
-
Open the "A/V Out Digital" cover. Remove the screw inside.
-
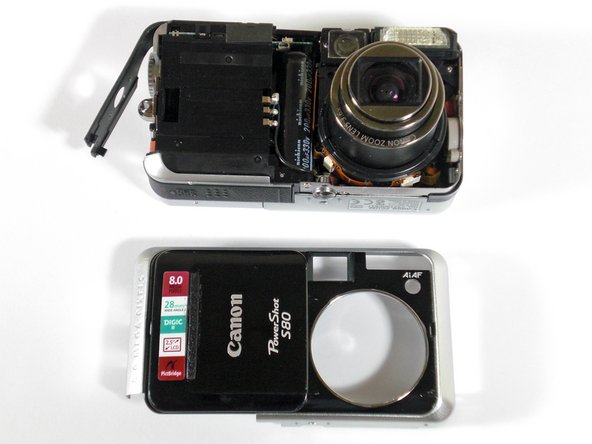
Gently pull off the back casing.
-
Remove the black "L" shaped piece of metal.
-
-
Deze stap is niet vertaald. Help het te vertalen
-
Remove the three screws that are holding the screen in place. Free the screen from the underlying components.
-
-
-
Deze stap is niet vertaald. Help het te vertalen
-
With the spudger, gently lift the black flap that is holding the wide ribbon cable wire in place.
-
Unplug the wide ribbon cable.
-
Unplug the narrow ribbon cable to free the LCD screen from the camera body.
-
-
Deze stap is niet vertaald. Help het te vertalen
-
Remove the L-shaped corner trim containing the picture button.
-
Carefully unplug the connection cable that is attached.
-
-
Deze stap is niet vertaald. Help het te vertalen
-
Pull the selector wheel from the top corner of the camera.
-
Carefully remove the ribbon cable connection with a set of tweezers.
-
-
Deze stap is niet vertaald. Help het te vertalen
-
With a Phillips #00 Screwdriver, unscrew the zoom toggle switch and remove it from the camera.
-
-
Deze stap is niet vertaald. Help het te vertalen
-
With a Phillips #00 Screwdriver, unscrew the flash board.
-
-
Deze stap is niet vertaald. Help het te vertalen
-
Remove the cable connection. With a metal spudger, gently pry up.
-
Remove the ribon cable. With a metal spudger, gently lift up the black tab.
-
-
Deze stap is niet vertaald. Help het te vertalen
-
Lift the entire three-part flash assembly from the camera.
-


Team

Cal Poly, Team 19-5, Maness SU 2012 Lid van Cal Poly, Team 19-5, Maness SU 2012
CPSU-MANESS-SU12S19G5
1 Lid
5 handleidingen geschreven