Deze versie kan foutieve bewerkingen bevatten. Schakel over naar de recentste gecontroleerde momentopname.
Wat je nodig hebt
-
Deze stap is niet vertaald. Help het te vertalen
-
On the bottom of the camera, push and slide open the battery compartment.
-
Remove the battery.
-
-
Deze stap is niet vertaald. Help het te vertalen
-
Open the screen.
-
Remove the Phillips #0 screws on the end of the screen.
-
-
Deze stap is niet vertaald. Help het te vertalen
-
Remove both Phillips #0 screws on the opposite side of the screen, located near the hinge.
-
-
Deze stap is niet vertaald. Help het te vertalen
-
Remove the back panel of the screen, using a spudger or opening tool if necessary.
-
-
-
Deze stap is niet vertaald. Help het te vertalen
-
Remove both Phillips #0 screws at the top of the screen.
-
-
Deze stap is niet vertaald. Help het te vertalen
-
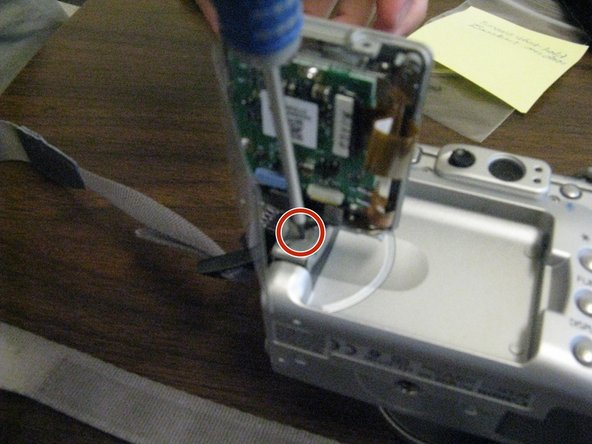
Turn the screen perpendicular to body of the camera.
-
Remove the Phillips #0 screw at the base of the hinge.
-
-
Deze stap is niet vertaald. Help het te vertalen
-
Push the screen down and away from the camera.
-
Remove the single Phillips #0 screw at the base of the rotating arm. This will allow you to remove the screen cover.
-
-
Deze stap is niet vertaald. Help het te vertalen
-
Remove the black bar attached to the data ribbon cable. You will use this with the replacement.
-
Slide the black bar from underneath the white socket.
-


Annuleren: ik heb deze handleiding niet afgemaakt.
2 andere personen hebben deze handleiding voltooid.
Team

Ohio State, Team 1-4, Buehl Fall 2012 Lid van Ohio State, Team 1-4, Buehl Fall 2012
OSU-BUEHL-F12S1G4
3 Leden
1 handleiding geschreven
2 opmerkingen
I'm guessing that the screen is OK and the wiring/connections is the problem.