Ga door naar hoofdinhoud

Canon EOS Rebel T5 Motherboard Replacement

Wat je nodig hebt

  1. Canon EOS Rebel T5 Motherboard Replacement, Battery: stap 1, afbeelding 1 van 1
    • Lay the camera on its back so that the card/battery door is facing you.

    • Using your fingernail, slide the tab on the battery door up to release the battery door latch.

  2. Canon EOS Rebel T5 Motherboard Replacement: stap 2, afbeelding 1 van 1
    • Lift the now free card/battery door to reveal the battery compartment.

    • Push the gray lever to the right side so that the battery can be removed and replaced with a new one.

  3. Canon EOS Rebel T5 Motherboard Replacement, Back Cover: stap 3, afbeelding 1 van 1
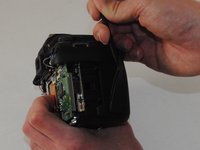
    • Turn the camera so that the back is facing to your right.

    • Remove the 5mm JIS #000 screw above the rubber USB port cover.

  4. Canon EOS Rebel T5 Motherboard Replacement: stap 4, afbeelding 1 van 1
    • Remove the rubber piece.

    • Unscrew the two screws under the rubber cover to completely remove the rubber cover piece.

    • It is held in place by a notched tether, but can be easily manipulated to slide out.

  5. Canon EOS Rebel T5 Motherboard Replacement: stap 5, afbeelding 1 van 1
    • Turn your camera so that the bottom is facing you.

    • Remove the 5mm JIS #000 screws.

  6. Canon EOS Rebel T5 Motherboard Replacement: stap 6, afbeelding 1 van 1
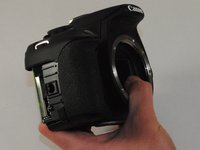
    • Now turn the camera so that the front is facing towards your right.

    • Remove the two remaining 5mm JIS #000 screws.

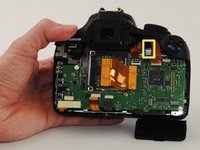
  7. Canon EOS Rebel T5 Motherboard Replacement: stap 7, afbeelding 1 van 3 Canon EOS Rebel T5 Motherboard Replacement: stap 7, afbeelding 2 van 3 Canon EOS Rebel T5 Motherboard Replacement: stap 7, afbeelding 3 van 3
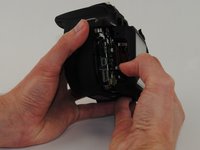
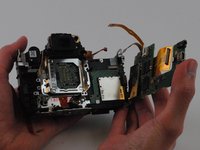
    • Now that all of the exterior screws have been removed, grip the camera firmly on both sides.

    • Gently pry the back panel from the main body of the camera.

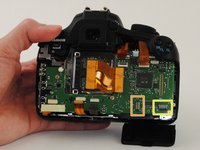
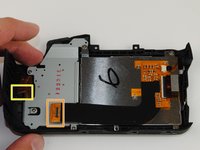
    • There are two ribbon cables that need to be removed in order for the back panel to come free from the camera body, as indicated.

    • This back panel contains various control components of the camera as well as the LCD screen.

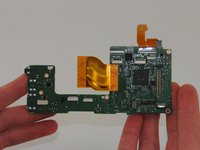
  8. Canon EOS Rebel T5 Motherboard Replacement, Motherboard: stap 8, afbeelding 1 van 2 Canon EOS Rebel T5 Motherboard Replacement, Motherboard: stap 8, afbeelding 2 van 2
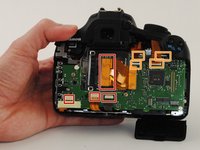
    • Remove all ribbon cables with the plastic spudger.

    • Gently pry up the black plastic tabs to slide out the ribbon cables

    • Take note of this black cable and where it connects to the motherboard. This is a fiber optic cable which is used for the camera flash. It will need to be reconnected after replacing the motherboard.

    • When reconnecting the fiber optic cable, simply push the black cable into the hole in the connector and push it all the way in.

  9. Canon EOS Rebel T5 Motherboard Replacement: stap 9, afbeelding 1 van 1
    • Turn your camera so that the top is facing you.

    • Remove the two black 5 mm JIS #000 screws.

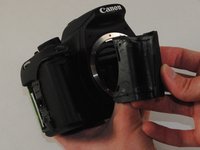
  10. Canon EOS Rebel T5 Motherboard Replacement: stap 10, afbeelding 1 van 3 Canon EOS Rebel T5 Motherboard Replacement: stap 10, afbeelding 2 van 3 Canon EOS Rebel T5 Motherboard Replacement: stap 10, afbeelding 3 van 3
    • Turn the grip side toward you.

    • Remove the rubber grip, using the plastic spudger.

  11. Canon EOS Rebel T5 Motherboard Replacement: stap 11, afbeelding 1 van 1
    • Remove the black 5 mm JIS #000 screw, located under the grip.

  12. Canon EOS Rebel T5 Motherboard Replacement: stap 12, afbeelding 1 van 1
    • Remove the top panel of the device.

  13. Canon EOS Rebel T5 Motherboard Replacement: stap 13, afbeelding 1 van 2 Canon EOS Rebel T5 Motherboard Replacement: stap 13, afbeelding 2 van 2
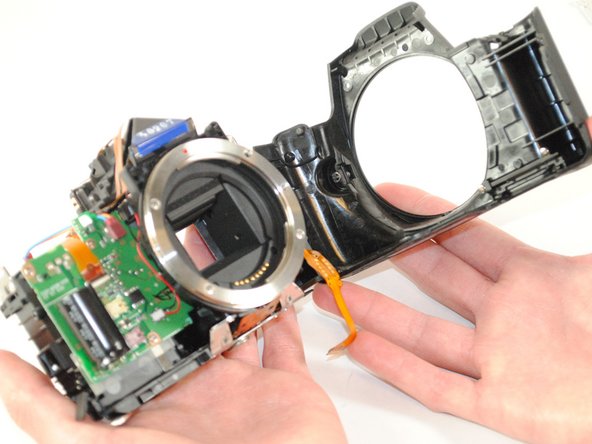
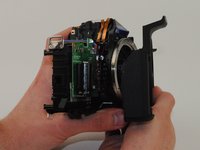
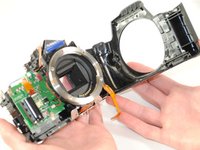
    • Remove the front panel of the camera.

  14. Canon EOS Rebel T5 Motherboard Replacement: stap 14, afbeelding 1 van 3 Canon EOS Rebel T5 Motherboard Replacement: stap 14, afbeelding 2 van 3 Canon EOS Rebel T5 Motherboard Replacement: stap 14, afbeelding 3 van 3
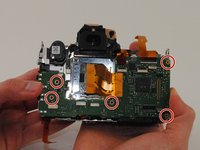
    • Remove the five silver 5mm JIS #000 screws.

    • The motherboard can now be removed.

Conclusie

To reassemble your device, follow these instructions in reverse order.

9 andere personen hebben deze handleiding voltooid.

Austin Tucker

Lid sinds: 08/27/15

1.042 Reputatie

4 handleidingen geschreven

Team

USF Tampa, Team 16-4, Wollert Fall 2015 Lid van USF Tampa, Team 16-4, Wollert Fall 2015

USFT-WOLLERT-F15S16G4

4 Leden

16 handleidingen geschreven

2Gids Commentaar

This guide is amazing, but if you change the mainboard do you have to initialize it by software, like Spt?

Edgar Nunes - Antwoord

New main board from canon .

How to instalize?

Thomas Nguyen - Antwoord

Voeg opmerking toe

Weergavestatistieken:

Afgelopen 24 uren: 0

Afgelopen 7 dagen: 9

Afgelopen 30 dagen: 33

Altijd: 4,413