Ga door naar hoofdinhoud

Brother XM3700 Broken Needle Replacement

Wat je nodig hebt

  1. Brother XM3700 Broken Needle Replacement, Broken Needle: stap 1, afbeelding 1 van 3 Brother XM3700 Broken Needle Replacement, Broken Needle: stap 1, afbeelding 2 van 3 Brother XM3700 Broken Needle Replacement, Broken Needle: stap 1, afbeelding 3 van 3
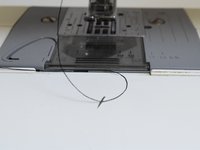
    • Adjust the needle with the handwheel towards you until it is at the highest position, as indicated by the silver thread take-up lever.

  2. Brother XM3700 Broken Needle Replacement: stap 2, afbeelding 1 van 2 Brother XM3700 Broken Needle Replacement: stap 2, afbeelding 2 van 2
    • Unscrew the bolt that holds the needle in place using either the tool that came with your Brother machine, or a small flat object like a coin.

  3. Brother XM3700 Broken Needle Replacement: stap 3, afbeelding 1 van 2 Brother XM3700 Broken Needle Replacement: stap 3, afbeelding 2 van 2
    • Remove the broken needle stem from the machine, and dispose of it carefully.

  4. Brother XM3700 Broken Needle Replacement: stap 4, afbeelding 1 van 2 Brother XM3700 Broken Needle Replacement: stap 4, afbeelding 2 van 2
    • Unthread the broken needle tip from the thread, and dispose of carefully.

  5. Brother XM3700 Broken Needle Replacement: stap 5, afbeelding 1 van 2 Brother XM3700 Broken Needle Replacement: stap 5, afbeelding 2 van 2
    • Select a Brother brand needle, using the needle size that works well with your fabric.

  6. Brother XM3700 Broken Needle Replacement: stap 6, afbeelding 1 van 2 Brother XM3700 Broken Needle Replacement: stap 6, afbeelding 2 van 2
    • Insert the needle with the flat side of the stem facing the back of the machine.

  7. Brother XM3700 Broken Needle Replacement: stap 7, afbeelding 1 van 1
    • Screw the bolt in first with your fingers and then with the tool until the needle is tightly secured.

  8. Brother XM3700 Broken Needle Replacement: stap 8, afbeelding 1 van 2 Brother XM3700 Broken Needle Replacement: stap 8, afbeelding 2 van 2
    • Rethread the needle and pull the thread through the back.

Conclusie

Congratulations! You have successfully replaced your broken needle. Happy sewing!

Één andere persoon heeft deze handleiding voltooid.

Nadya Verick

Lid sinds: 02/07/23

178 Reputatie

1 Handleiding geschreven

Team

UC Davis, Team 1-6, Andersen Winter 2023 Lid van UC Davis, Team 1-6, Andersen Winter 2023

UCD-ANDERSEN-W23S1G6

4 Leden

1 handleiding geschreven

0 opmerkingen

Voeg opmerking toe

Weergavestatistieken:

Afgelopen 24 uren: 1

Afgelopen 7 dagen: 4

Afgelopen 30 dagen: 13

Altijd: 427