Inleiding
The Blueair 311 Auto air filter has a built in high voltage ionizer. The high voltage ionizer presumably greatly increases the performance of the filter with very small (smoke-like) particles. But, if you are concerned about the long term health and indoor air quality impact of the ionizer, but want to still use the filter otherwise, follow this guide to disassemble, internally disconnect & disable the high voltage ionizer, and then reassemble the filter.
Wat je nodig hebt
-
-
Unplug the power adapter of the air filter
-
Grab the top (white) housing, rotate it counter-clockwise, and lift it to detach it from the base.
-
-
-
Rotate the filter top to be upside down.
-
Remove the 4 phillips head screws (red)
-
Remove the 4 phillips head screws (blue). These screws need a long/skinny screwdriver to reach, as they are sunk into plastic holes. But, they seem to be the same screws as the red screws.
-
Optionally, you can remove the 1 screw holding on the LED for the indicator on the front, and the plastic tab for the (presumably) particle sensing, but it is easier to reassemble if you do not remove those fasteners.
-
-
-
-
Lift the black top from the white housing. Lift from the side where the white clips are.
-
-
-
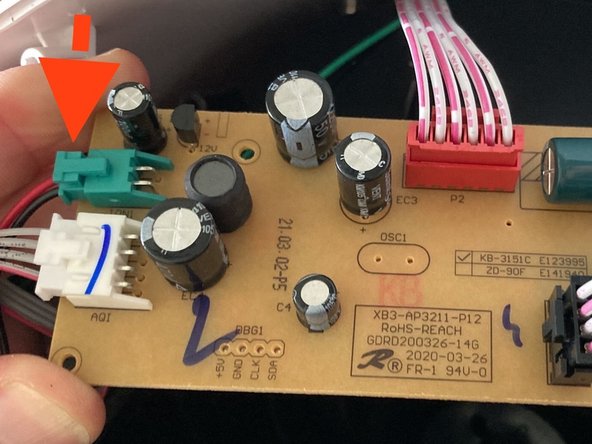
Unclip the connector for the 2-wire ionizer power cable, and disconnect if from the printed circuit board (PCB)
-
Note: It is possible & easier to unclip the connector, without fully removing the PCB, i.e. by reaching behind the PCB, and applying pressure purely by the feeling of the clip, to unclip it. These photos are just for clarity.
-


To reassemble your device, follow these instructions in reverse order.
To reassemble your device, follow these instructions in reverse order.
Annuleren: ik heb deze handleiding niet afgemaakt.
Één andere persoon heeft deze handleiding voltooid.