Deze versie kan foutieve bewerkingen bevatten. Schakel over naar de recentste gecontroleerde momentopname.
Wat je nodig hebt
-
Deze stap is niet vertaald. Help het te vertalen
-
Locate the notch to remove the back panel at the lower left corner of the panel.
-
Insert the plastic opening tool or a fingernail into the notch.
-
Apply force upwards until back panel becomes loosened.
-
-
Deze stap is niet vertaald. Help het te vertalen
-
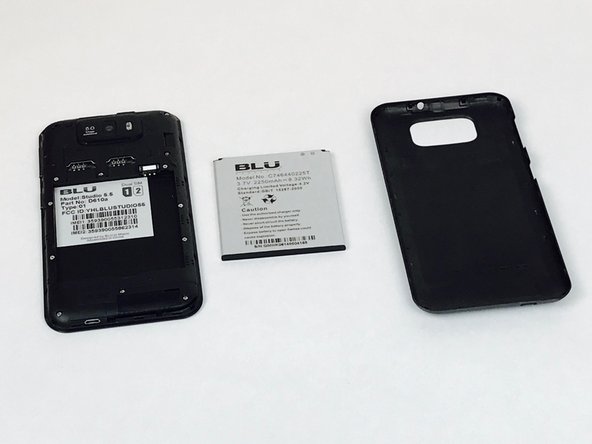
Remove the loosened back panel and set aside.
-
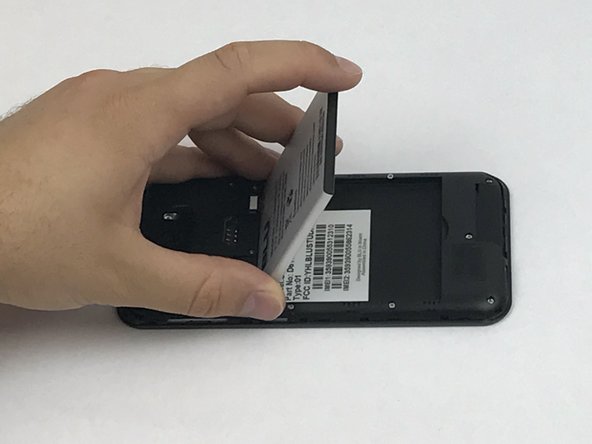
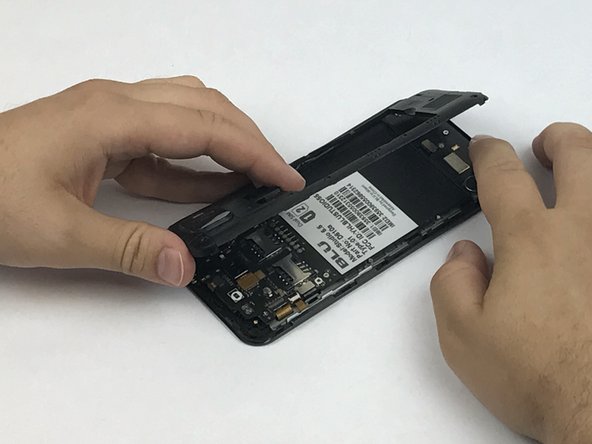
Locate the notch to remove the battery.
-
-
Deze stap is niet vertaald. Help het te vertalen
-
Insert a plastic opening tool or your fingernail into the notch and apply force upwards until the battery is loosened.
-
Remove the battery and set aside.
-
-
-
Deze stap is niet vertaald. Help het te vertalen
-
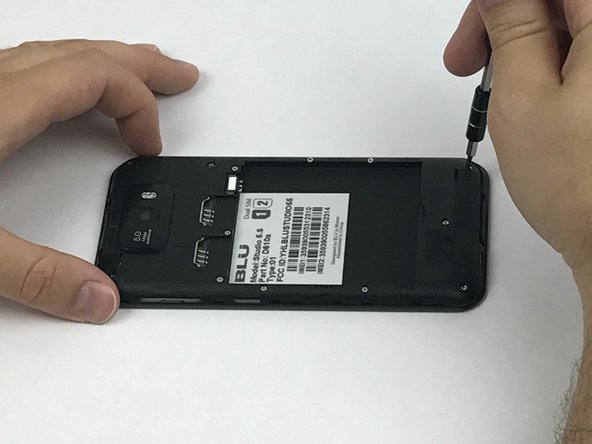
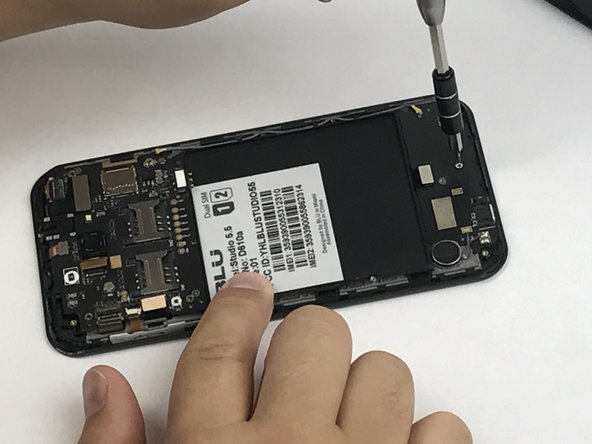
Locate all twelve screws along the back panel:
-
Seven 5mm screws.
-
Five 3.5mm screws.
-
Using a Phillips #000 screwdriver, remove all twelve screws.
-
-
Deze stap is niet vertaald. Help het te vertalen
-
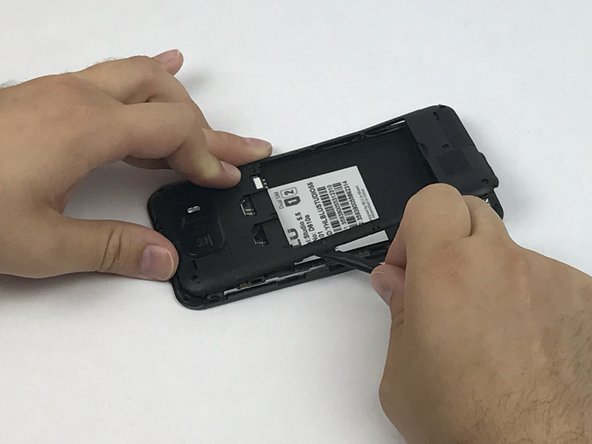
Now that all the screws have been removed, use a plastic opening tool to carefully pry at each of the corners until loosened.
-
Place the plastic opening tool inside the loosened panel and gently push upwards and move along the phone to remove the back panel.
-
Remove the panel as if you were turning the page of a book.
-
-
Deze stap is niet vertaald. Help het te vertalen
-
Locate the screw holding down the sub PCBA.
-
Remove the screw using the Phillips #000 screwdriver.
-
-
Deze stap is niet vertaald. Help het te vertalen
-
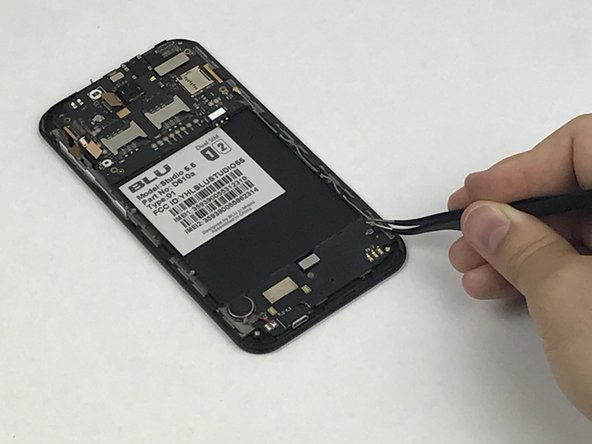
Locate the gold plated cable connecting the sub PCBA to the motherboard.
-
Locate the flex cable connector just above the sub PCBA screw.
-
Using tweezers, detach both cables from the sub PCBA.
-
-
Deze stap is niet vertaald. Help het te vertalen
-
Using tweezers, grab the PCBA and remove gently from assembly.
-


Team

USF Tampa, Team S1-G6, Nance Spring 2017 Lid van USF Tampa, Team S1-G6, Nance Spring 2017
USFT-NANCE-S17S1G6
3 Leden
8 handleidingen geschreven