Ga door naar hoofdinhoud

Blackberry Curve 8320 Speaker Replacement

Wat je nodig hebt

  1. Blackberry Curve 8320 Speaker Replacement, Battery: stap 1, afbeelding 1 van 2 Blackberry Curve 8320 Speaker Replacement, Battery: stap 1, afbeelding 2 van 2
    • Hold the phone with the back facing you.

    • Press the silver tab down and remove the cover.

  2. Blackberry Curve 8320 Speaker Replacement: stap 2, afbeelding 1 van 1
    • Pull up on the top edge of the battery to remove it.

  3. Blackberry Curve 8320 Speaker Replacement, Front Panel: stap 3, afbeelding 1 van 3 Blackberry Curve 8320 Speaker Replacement, Front Panel: stap 3, afbeelding 2 van 3 Blackberry Curve 8320 Speaker Replacement, Front Panel: stap 3, afbeelding 3 van 3
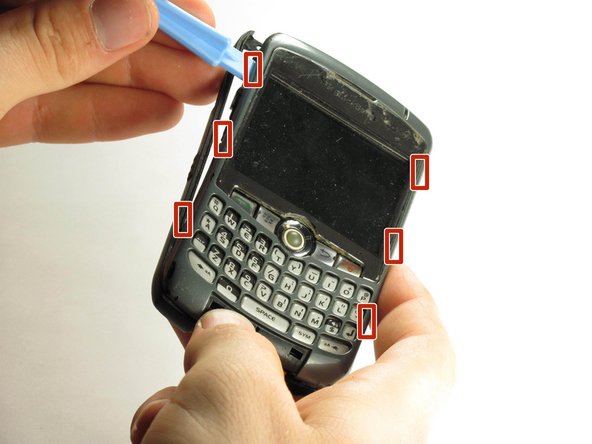
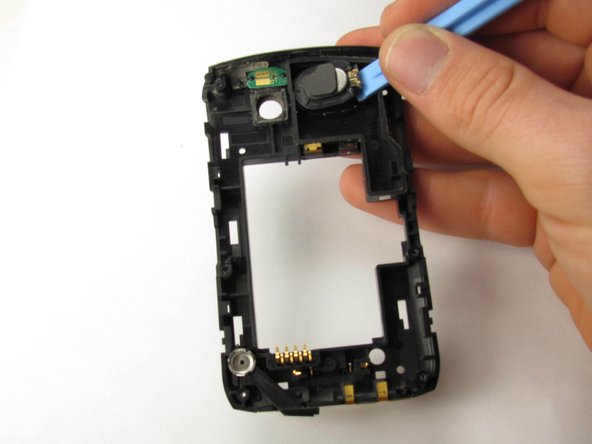
    • Use a plastic opening tool to gently pry the bottom cover loose.

    • Do not use excessive force at risk of damaging the antenna, which is under this casing.

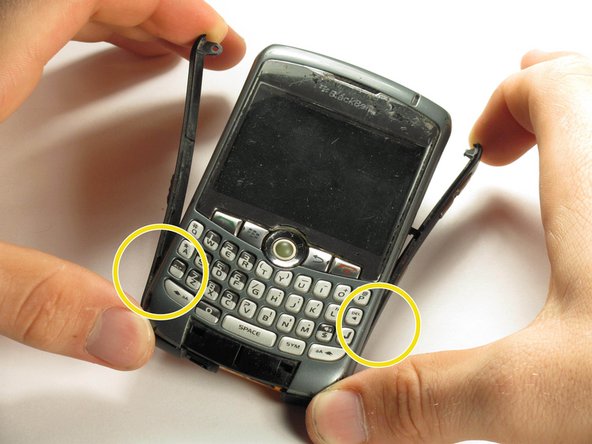
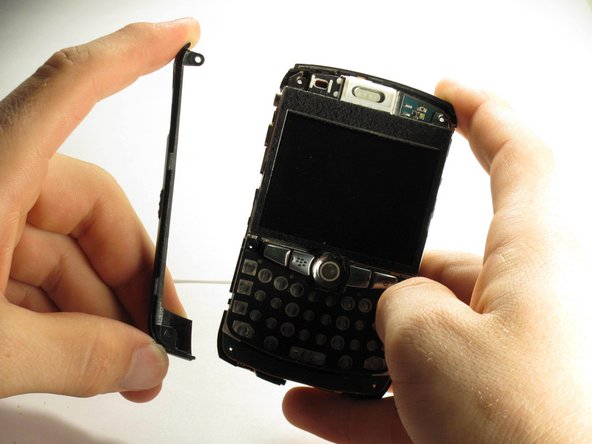
    • Pull the cover from the front of the phone after the back is loose.

  4. Blackberry Curve 8320 Speaker Replacement: stap 4, afbeelding 1 van 2 Blackberry Curve 8320 Speaker Replacement: stap 4, afbeelding 2 van 2
    • Remove the two top screws with a T5 Torx screwdriver.

    • The screws are 8mm long.

  5. Blackberry Curve 8320 Speaker Replacement: stap 5, afbeelding 1 van 2 Blackberry Curve 8320 Speaker Replacement: stap 5, afbeelding 2 van 2
    • Gently pry off the side casings from the top.

    • The side casings cannot be fully removed yet because they are screwed on at the bottom.

    • You will not need to remove the sides on the bottom.

  6. Blackberry Curve 8320 Speaker Replacement: stap 6, afbeelding 1 van 1
    • Use a plastic opening tool to detach the securing clips holding the the front panel in place.

    • There are six securing clips total.

  7. Blackberry Curve 8320 Speaker Replacement: stap 7, afbeelding 1 van 1
    • Carefully remove the front panel.

    • You may need to apply some force in removing because the front panel is attached to the rest of the device with adhesive.

  8. Blackberry Curve 8320 Speaker Replacement, Speaker: stap 8, afbeelding 1 van 3 Blackberry Curve 8320 Speaker Replacement, Speaker: stap 8, afbeelding 2 van 3 Blackberry Curve 8320 Speaker Replacement, Speaker: stap 8, afbeelding 3 van 3
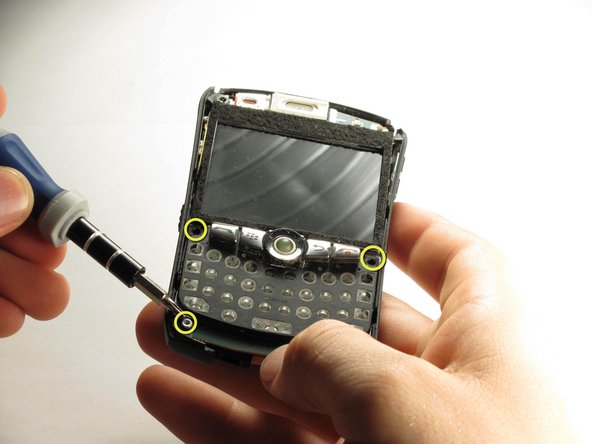
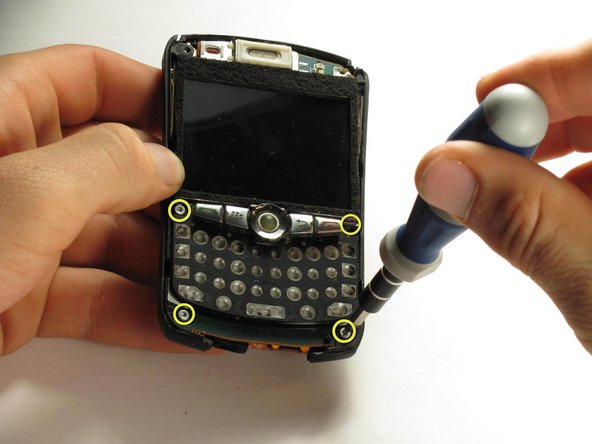
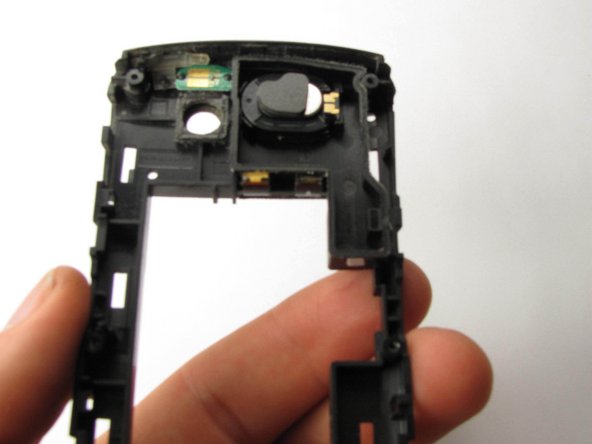
    • Use a T6 Torx screwdriver to remove the four screws located on the corners of the keyboard frame.

    • The screws are 6mm long.

  9. Blackberry Curve 8320 Speaker Replacement: stap 9, afbeelding 1 van 2 Blackberry Curve 8320 Speaker Replacement: stap 9, afbeelding 2 van 2
    • After the bottom two screws have been removed the side casings can be removed.

  10. Blackberry Curve 8320 Speaker Replacement: stap 10, afbeelding 1 van 3 Blackberry Curve 8320 Speaker Replacement: stap 10, afbeelding 2 van 3 Blackberry Curve 8320 Speaker Replacement: stap 10, afbeelding 3 van 3
    • Remove the back case.

    • The speaker is located on the back case.

Conclusie

To reassemble your device, follow these instructions in reverse order.

Één andere persoon heeft deze handleiding voltooid.

Christopher Aiello

Lid sinds: 10/12/11

89 Reputatie

5 handleidingen geschreven

Team

Cal Poly, Team 3-6, Regan Fall 2011 Lid van Cal Poly, Team 3-6, Regan Fall 2011

CPSU-REGAN-F11S3G6

5 Leden

9 handleidingen geschreven

0 opmerkingen

Voeg opmerking toe

Weergavestatistieken:

Afgelopen 24 uren: 0

Afgelopen 7 dagen: 1

Afgelopen 30 dagen: 2

Altijd: 1,989