Ga door naar hoofdinhoud
Word lid van de reparatiegemeenschap - Account aanmaken

Blackberry Curve 8320 Motherboard Replacement

Wat je nodig hebt

  1. Blackberry Curve 8320 Motherboard Replacement, Battery: stap 1, afbeelding 1 van 2 Blackberry Curve 8320 Motherboard Replacement, Battery: stap 1, afbeelding 2 van 2
    • Hold the phone with the back facing you.

    • Press the silver tab down and remove the cover.

    Vraag FixBot

    Voeg opmerking toe

  2. Blackberry Curve 8320 Motherboard Replacement: stap 2, afbeelding 1 van 1
    • Pull up on the top edge of the battery to remove it.

    Vraag FixBot

    Voeg opmerking toe

  3. Blackberry Curve 8320 Motherboard Replacement, Front Panel: stap 3, afbeelding 1 van 3 Blackberry Curve 8320 Motherboard Replacement, Front Panel: stap 3, afbeelding 2 van 3 Blackberry Curve 8320 Motherboard Replacement, Front Panel: stap 3, afbeelding 3 van 3
    • Use a plastic opening tool to gently pry the bottom cover loose.

    • Do not use excessive force at risk of damaging the antenna, which is under this casing.

    • Pull the cover from the front of the phone after the back is loose.

    Vraag FixBot

    Voeg opmerking toe

  4. Blackberry Curve 8320 Motherboard Replacement: stap 4, afbeelding 1 van 2 Blackberry Curve 8320 Motherboard Replacement: stap 4, afbeelding 2 van 2
    • Remove the two top screws with a T5 Torx screwdriver.

    • The screws are 8mm long.

    Vraag FixBot

    Voeg opmerking toe

  5. Blackberry Curve 8320 Motherboard Replacement: stap 5, afbeelding 1 van 2 Blackberry Curve 8320 Motherboard Replacement: stap 5, afbeelding 2 van 2
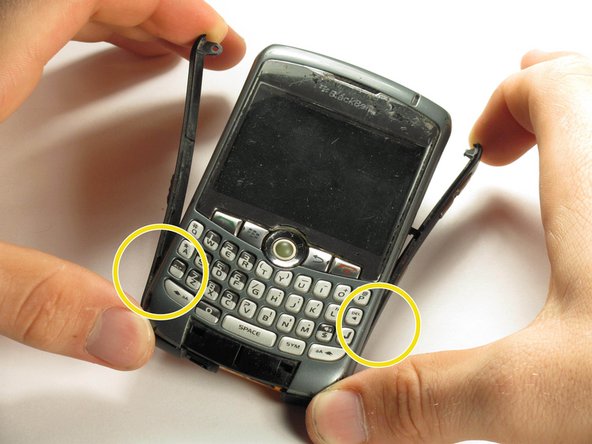
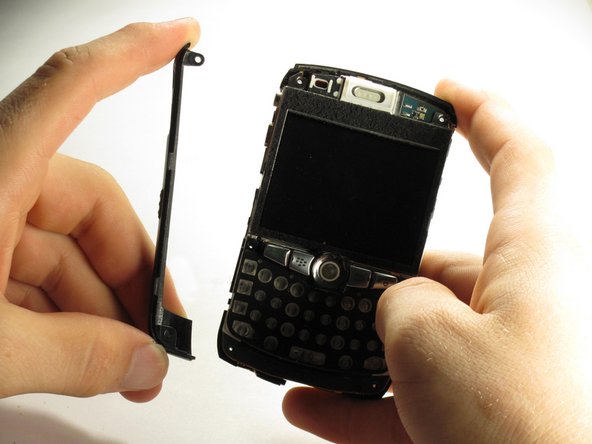
    • Gently pry off the side casings from the top.

    • The side casings cannot be fully removed yet because they are screwed on at the bottom.

    • You will not need to remove the sides on the bottom.

    Vraag FixBot

    Voeg opmerking toe

  6. Blackberry Curve 8320 Motherboard Replacement: stap 6, afbeelding 1 van 1
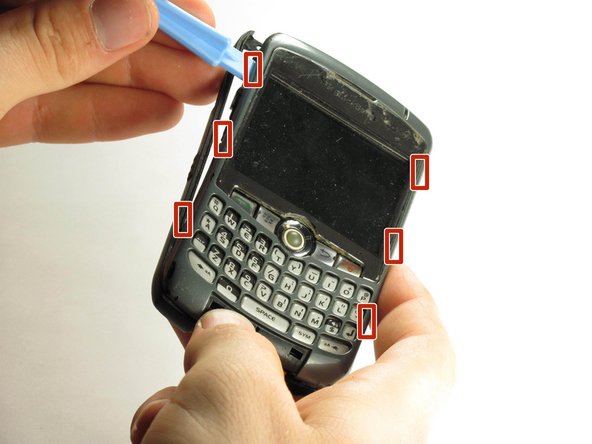
    • Use a plastic opening tool to detach the securing clips holding the the front panel in place.

    • There are six securing clips total.

    Vraag FixBot

    Voeg opmerking toe

  7. Blackberry Curve 8320 Motherboard Replacement: stap 7, afbeelding 1 van 1
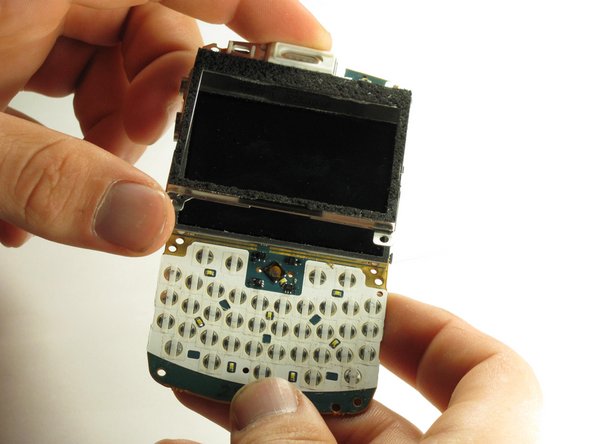
    • Carefully remove the front panel.

    • You may need to apply some force in removing because the front panel is attached to the rest of the device with adhesive.

    Vraag FixBot

    Voeg opmerking toe

  8. Blackberry Curve 8320 Motherboard Replacement, LCD Screen: stap 8, afbeelding 1 van 3 Blackberry Curve 8320 Motherboard Replacement, LCD Screen: stap 8, afbeelding 2 van 3 Blackberry Curve 8320 Motherboard Replacement, LCD Screen: stap 8, afbeelding 3 van 3
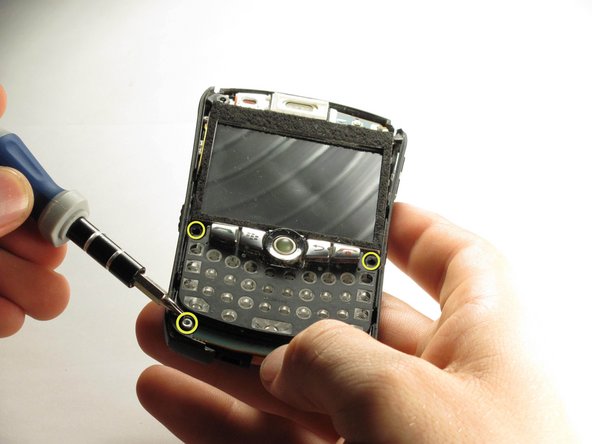
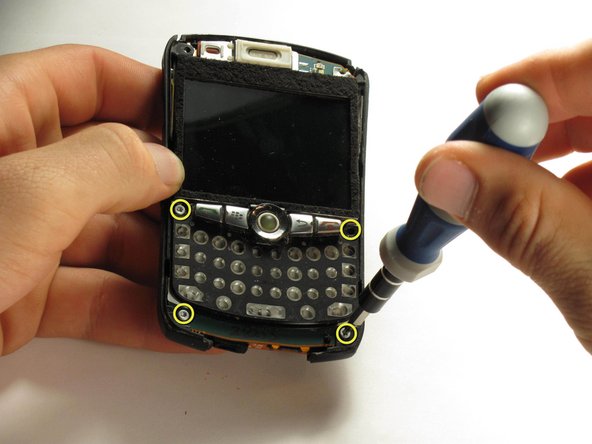
    • Use a T6 Torx screwdriver to remove the four screws located on the corners of the keyboard frame.

    • The screws are 6mm long.

    Vraag FixBot

    Voeg opmerking toe

  9. Blackberry Curve 8320 Motherboard Replacement: stap 9, afbeelding 1 van 2 Blackberry Curve 8320 Motherboard Replacement: stap 9, afbeelding 2 van 2
    • After the bottom two screws have been removed the side casings can be removed.

    Vraag FixBot

    Voeg opmerking toe

  10. Blackberry Curve 8320 Motherboard Replacement: stap 10, afbeelding 1 van 3 Blackberry Curve 8320 Motherboard Replacement: stap 10, afbeelding 2 van 3 Blackberry Curve 8320 Motherboard Replacement: stap 10, afbeelding 3 van 3
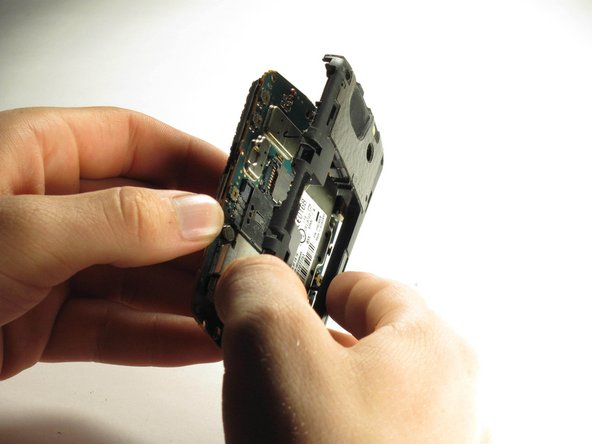
    • When all four screws are removed, the keyboard frame, screen housing, screen, and back casing can be separated.

    • The screen frame hooks on to the top of the motherboard with a small tab on the motherboard.

    Vraag FixBot

    Voeg opmerking toe

  11. Blackberry Curve 8320 Motherboard Replacement: stap 11, afbeelding 1 van 1
    • Place the motherboard on a flat surface with the LCD screen face up.

    Vraag FixBot

    Voeg opmerking toe

  12. Blackberry Curve 8320 Motherboard Replacement: stap 12, afbeelding 1 van 3 Blackberry Curve 8320 Motherboard Replacement: stap 12, afbeelding 2 van 3 Blackberry Curve 8320 Motherboard Replacement: stap 12, afbeelding 3 van 3
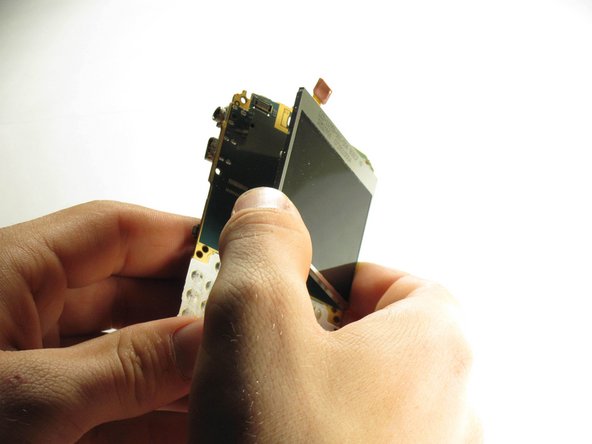
    • Using a plastic opening tool, gently pull the connector directly up from the motherboard.

    • Remove the LCD screen from the motherboard.

    • The screen is attached to the motherboard with adhesive.

    Vraag FixBot

    Voeg opmerking toe

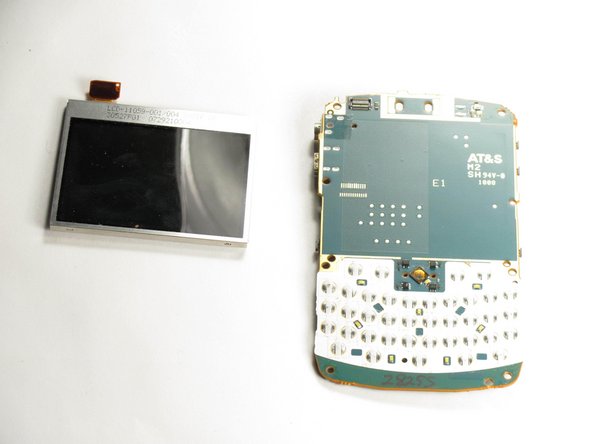
  13. Blackberry Curve 8320 Motherboard Replacement, Motherboard: stap 13, afbeelding 1 van 1
    • This is your motherboard. If you have a problem with it you should get a replacement from your phone provider.

    • Many motherboard related issues may be solved by simply cleaning the motherboard contacts with a cotton swab and highly concentrated rubbing alcohol.

    Vraag FixBot

    Voeg opmerking toe

Conclusie

To reassemble your device, follow these instructions in reverse order.

Annuleren: ik heb deze handleiding niet afgemaakt.

Yegor Pomortsev

Lid sinds: 10/12/11

126 Reputatie

2 handleidingen geschreven

Team

Cal Poly, Team 3-6, Regan Fall 2011 Lid van Cal Poly, Team 3-6, Regan Fall 2011

CPSU-REGAN-F11S3G6

5 Leden

17 handleidingen geschreven

0Gids Commentaar

Voeg opmerking toe

Weergavestatistieken:

Afgelopen 24 uren: 0

Afgelopen 7 dagen: 10

Afgelopen 30 dagen: 42

Altijd: 3,596