Ga door naar hoofdinhoud

BlackMagic Hyperdeck Studio Mini Fan Replacement

Wat je nodig hebt

Video overzicht

  1. BlackMagic Hyperdeck Studio Mini Fan Replacement, Unscrew the Outer Case: stap 1, afbeelding 1 van 1
    • 4 Screws on each side

  2. BlackMagic Hyperdeck Studio Mini Fan Replacement, Remove Fan: stap 2, afbeelding 1 van 1
    • 2 - Screws

    • 1 - Pull cable

  3. BlackMagic Hyperdeck Studio Mini Fan Replacement, Cut Off Connector from both the old and new fan: stap 3, afbeelding 1 van 1
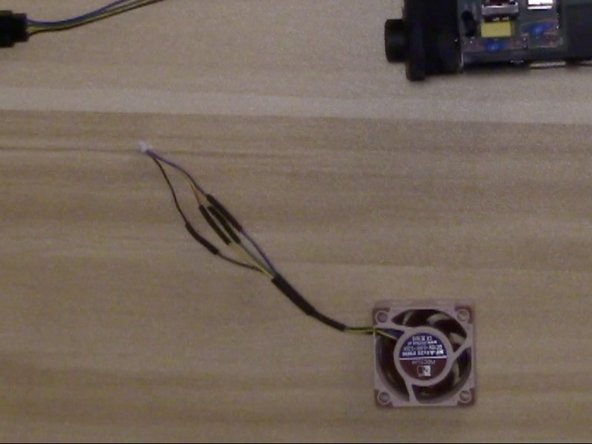
    • Leave some length to solder with and to reach connector on main board.

  4. BlackMagic Hyperdeck Studio Mini Fan Replacement, Prep Fan Wires and Connector Wires: stap 4, afbeelding 1 van 1
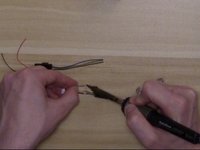
    • Strip Wires, Tin Wires, and prep by adding heat shrink tubing on wires (before shrinking).

  5. BlackMagic Hyperdeck Studio Mini Fan Replacement, Solder Connecter to Fan: stap 5, afbeelding 1 van 3 BlackMagic Hyperdeck Studio Mini Fan Replacement, Solder Connecter to Fan: stap 5, afbeelding 2 van 3 BlackMagic Hyperdeck Studio Mini Fan Replacement, Solder Connecter to Fan: stap 5, afbeelding 3 van 3
    • Solder the new fan to the old connector using the following pinout.

    • Adjust heat shrink tubing so it covers the solder joints and use heat gun to shrink tubing.

  6. BlackMagic Hyperdeck Studio Mini Fan Replacement, Re-assemble fan to device with fan label facing out: stap 6, afbeelding 1 van 2 BlackMagic Hyperdeck Studio Mini Fan Replacement, Re-assemble fan to device with fan label facing out: stap 6, afbeelding 2 van 2
    • Re-assemble fan to device with fan label facing out.

    • OPTIONAL - Use Small Round Nose Pliers to break off case grill to make fan even quieter.

  7. BlackMagic Hyperdeck Studio Mini Fan Replacement, Re-Assemble Case: stap 8, afbeelding 1 van 1
    • Re-Assemble case.

Conclusie

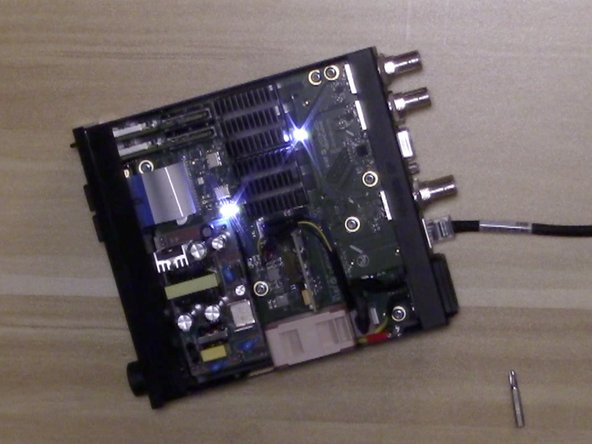
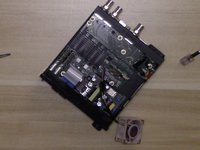
To reassemble your device, follow these instructions in reverse order.

3 andere personen hebben deze handleiding voltooid.

Kevin Krautle

Lid sinds: 10/10/16

508 Reputatie

2 handleidingen geschreven

7 opmerkingen

THANK YOU SO MUCH!!!! This was the perfect solution. The new Noctua fan even came with solderless connectors. The whole job only took 20 minutes. It is now completely silent!

tberntson - Antwoord

Just replaced mine monitoring the temperature now. As @tberntson mentioned, the fan comes with some Skotchlok connectors and no soldering even required. I can’t believe how quiet the new fan is. Complete night and day difference. Kevin, thanks so much for sharing this.

Adrian Cho - Antwoord

Hi! any one that have the part number for the Nactua fan with Skotchlok connectors is it NF-A4x20-PWM?

mikaelf - Antwoord

The connector you need is a Micro JST ZH 1.5mm 4-pin female connector. You can pick them up pre-wired on eBay.

Jamie - Antwoord

Thank you so much! I soldered it and it works great! So silent now that I can´t hear it at all!

pzacharias - Antwoord

Voeg opmerking toe

Weergavestatistieken:

Afgelopen 24 uren: 0

Afgelopen 7 dagen: 13

Afgelopen 30 dagen: 33

Altijd: 4,115