Deze versie kan foutieve bewerkingen bevatten. Schakel over naar de recentste gecontroleerde momentopname.
Wat je nodig hebt
-
Deze stap is niet vertaald. Help het te vertalen
-
Use a T9 Screwdriver to unscrew the two screws on the backside of the BlackBerry, one on the bottom left and one on the top right.
-
-
Deze stap is niet vertaald. Help het te vertalen
-
Remove the backside of the device and set aside for later use.
-
-
Deze stap is niet vertaald. Help het te vertalen
-
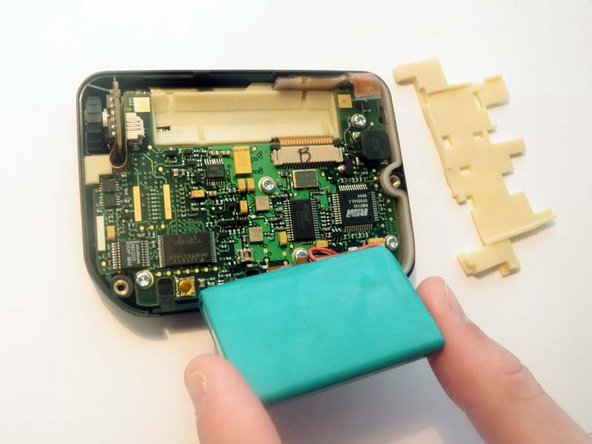
Remove the rubber placement pad that sits under the battery and set aside for later use. Gently fold back the battery, making sure the small plug connecting the battery to the logic board remains intact. Extra care should be taken as this part is quite delicate and easy to damage.
-
-
-
Deze stap is niet vertaald. Help het te vertalen
-
Use the T9 Screwdriver to remove the five visible screws: Top right, bottom right, middle center, bottom center, bottom left.
-
-
Deze stap is niet vertaald. Help het te vertalen
-
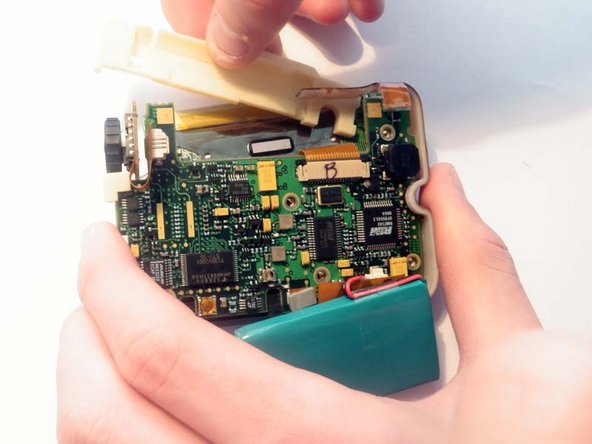
Carefully remove the board from the device by gently pushing on the screen from the front side. The battery, screen, and scroll wheel are all connected to the logic board. Be sure to support these components so they do not break.
-
Note the placement of two additional rubber pieces that cling loosely to the logic board. It is okay to let these pieces fall loose.
-
One is located below the scrollwheel.
-
Another is located behind the screen.
-
-
Deze stap is niet vertaald. Help het te vertalen
-
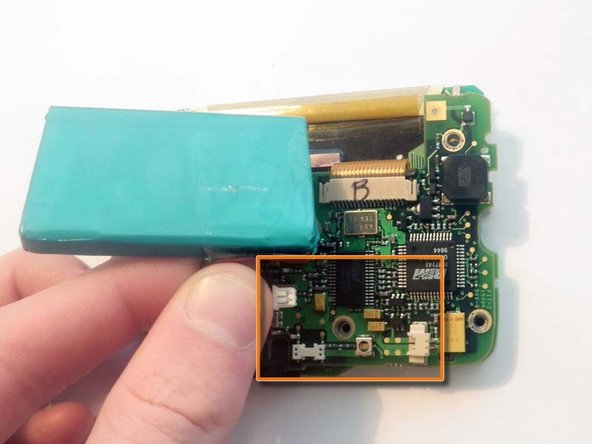
Disconnect the power conductor by gently peeling the grey section (which is connected to the logic board) upwards.
-
-
Deze stap is niet vertaald. Help het te vertalen
-
The conductor can now be easily removed by pulling it off of the logic board.
-
-
Deze stap is niet vertaald. Help het te vertalen
-
Gently pull on the wires connecting the battery to the device until the battery disconnects.
-


Team

Cal Poly, Team 33-83, Johann Spring 2010 Lid van Cal Poly, Team 33-83, Johann Spring 2010
CPSU-JOHANN-S10S33G83
4 Leden
9 handleidingen geschreven