Deze versie kan foutieve bewerkingen bevatten. Schakel over naar de recentste gecontroleerde momentopname.
Wat je nodig hebt
-
Deze stap is niet vertaald. Help het te vertalen
-
Remove the back cover of the phone.
-
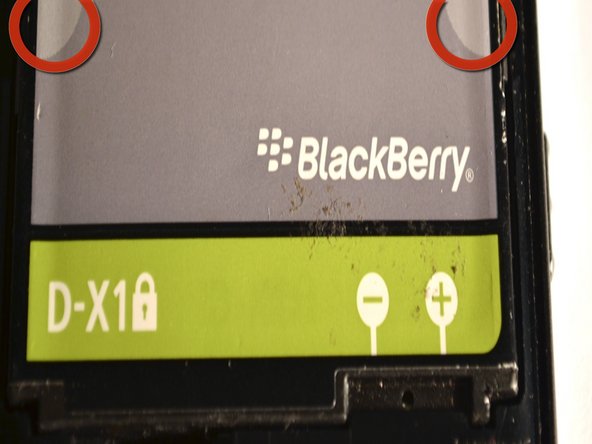
The battery will now be visible.
-
-
Deze stap is niet vertaald. Help het te vertalen
-
Pinch the battery at the grey semi-circles on the top left and top right corners of the battery using your fingers and remove it from the device.
-
-
Deze stap is niet vertaald. Help het te vertalen
-
Remove the lower rear cover, using a small iFixit opening tool.
-
-
Deze stap is niet vertaald. Help het te vertalen
-
Remove the six screws from the mid-frame of the device, using the T6 Torx Screwdriver.
-
-
-
Deze stap is niet vertaald. Help het te vertalen
-
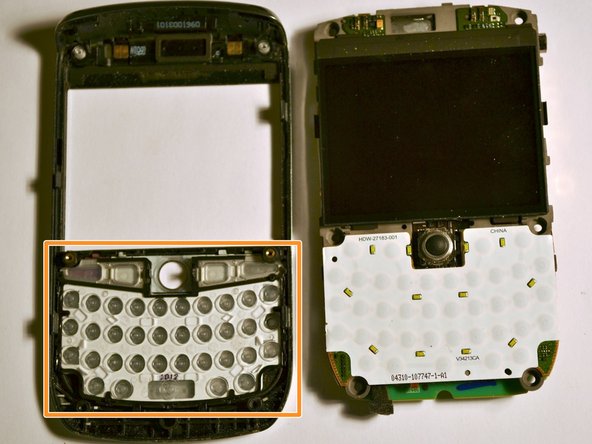
Gently remove the mid-frame from the phone, exposing the motherboard.
-
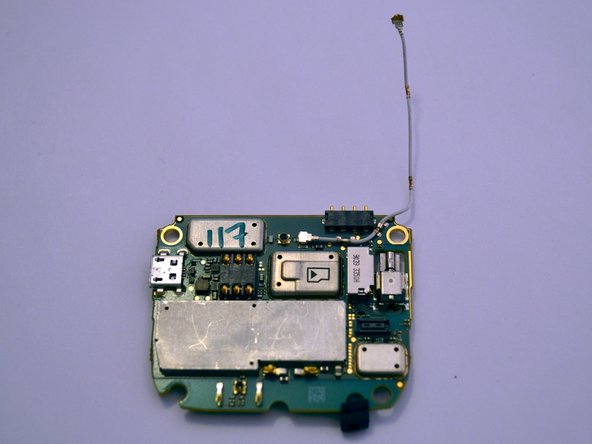
This is the motherboard.
-
-
Deze stap is niet vertaald. Help het te vertalen
-
Gently pull back the plastic tabs that secure the motherboard to the case.
-
Slowly pull the tabs, working your way around the case, until they are lifted and the motherboard is free.
-
Remove the motherboard.
-
-
Deze stap is niet vertaald. Help het te vertalen
-
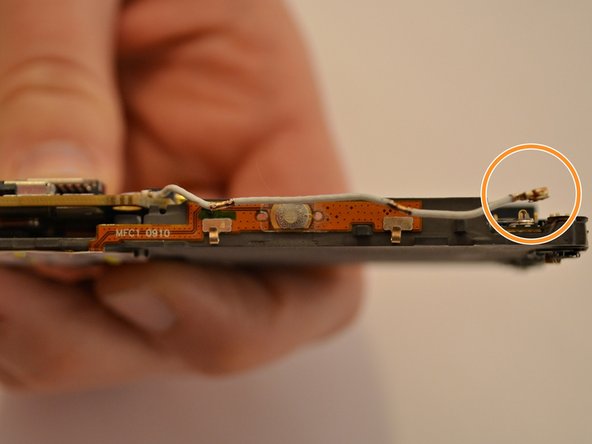
Carefully detach the antenna from the two clips on the side of the motherboard.
-
Disconnect the antenna from the motherboard in the same manner.
-
-
Deze stap is niet vertaald. Help het te vertalen
-
Carefully disconnect the ribbon cable located on the bottom right of the motherboard.
-
-
Deze stap is niet vertaald. Help het te vertalen
-
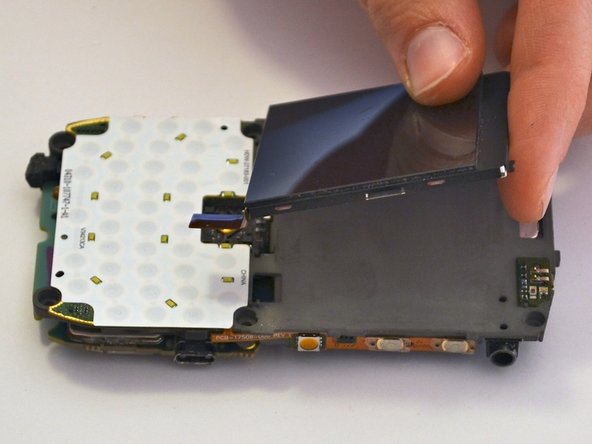
Locate the chip underneath the screen.
-
Gently remove the screen, without applying too much pressure, taking care not to damage it.
-
-
Deze stap is niet vertaald. Help het te vertalen
-
Lift up the motherboard from the bottom edge to reveal the ribbon cables.
-
Carefully disconnect the two ribbon cables connecting the motherboard to the display on either side.
-
Remove the motherboard and place off to the side.
-


Annuleren: ik heb deze handleiding niet afgemaakt.
3 andere personen hebben deze handleiding voltooid.
Team

Cuesta, Team 1-3, Zipperian Fall 2011 Lid van Cuesta, Team 1-3, Zipperian Fall 2011
CUESTA-ZIPPERIAN-F11S1G3
3 Leden
8 handleidingen geschreven