Ga door naar hoofdinhoud

Bissell OptiClean Cyclonic Vacuum Nozzle Replacement

  1. Bissell OptiClean Cyclonic Vacuum Nozzle Replacement, Nozzle: stap 1, afbeelding 1 van 1
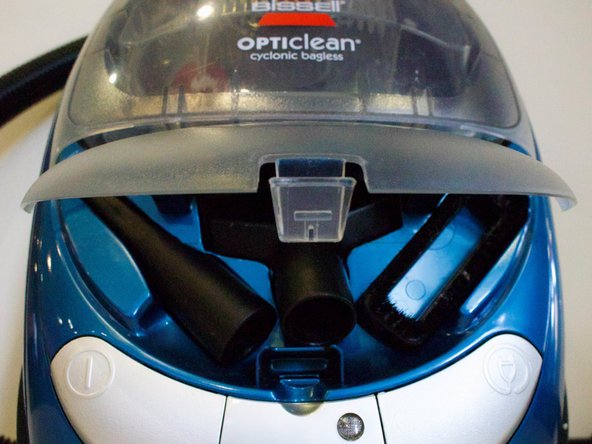
    • Place the vacuum upright and locate the nozzle attachment you want removed.

  2. Bissell OptiClean Cyclonic Vacuum Nozzle Replacement: stap 2, afbeelding 1 van 2 Bissell OptiClean Cyclonic Vacuum Nozzle Replacement: stap 2, afbeelding 2 van 2
    • Slide the attachment off of the end of the wand.

  3. Bissell OptiClean Cyclonic Vacuum Nozzle Replacement: stap 3, afbeelding 1 van 2 Bissell OptiClean Cyclonic Vacuum Nozzle Replacement: stap 3, afbeelding 2 van 2
    • The brush nozzle attachment has two parts, which can be separated and replaced.

    • The front of the vacuum has slots to hold up to two vacuum attachments. To store, simply place the attachment in the framed slots.

Conclusie

To reassemble your device, follow these instructions in reverse order.

Één andere persoon heeft deze handleiding voltooid.

Jorden Carroll

Lid sinds: 01/18/18

227 Reputatie

1 Handleiding geschreven

Team

Cal Poly, Team S12-G1, Banghart Winter 2018 Lid van Cal Poly, Team S12-G1, Banghart Winter 2018

CPSU-BANGHART-W18S12G1

5 Leden

5 handleidingen geschreven

Één opmerking

Voeg opmerking toe

Weergavestatistieken:

Afgelopen 24 uren: 0

Afgelopen 7 dagen: 0

Afgelopen 30 dagen: 6

Altijd: 215