Ga door naar hoofdinhoud

Beats Solo 2 Wire Replacement

Wat je nodig hebt

  1. Beats Solo 2 Wire Replacement, Core Wire: stap 1, afbeelding 1 van 1
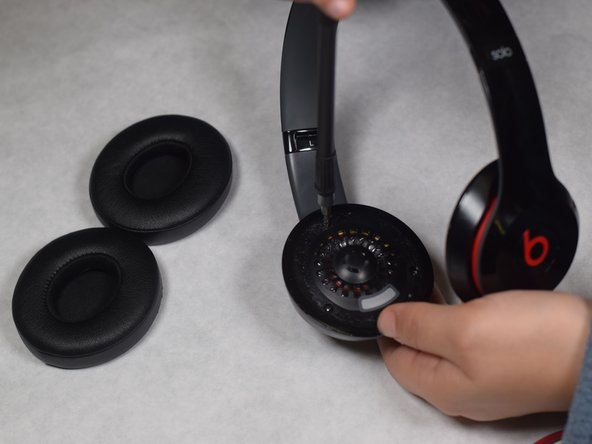
    • Pull out the wire from the beats. The wire is a jack wire and requires nothing special to remove.

  2. Beats Solo 2 Wire Replacement: stap 2, afbeelding 1 van 2 Beats Solo 2 Wire Replacement: stap 2, afbeelding 2 van 2
    • Remove the ear cushions from the headset. The preferred method to do this is to use a screwdriver and pry the cushions off.

  3. Beats Solo 2 Wire Replacement: stap 3, afbeelding 1 van 3 Beats Solo 2 Wire Replacement: stap 3, afbeelding 2 van 3 Beats Solo 2 Wire Replacement: stap 3, afbeelding 3 van 3
    • Remove the second cushion until both cushions are removed.

  4. Beats Solo 2 Wire Replacement: stap 4, afbeelding 1 van 3 Beats Solo 2 Wire Replacement: stap 4, afbeelding 2 van 3 Beats Solo 2 Wire Replacement: stap 4, afbeelding 3 van 3
    • Remove the screws from both ear bases.

  5. Beats Solo 2 Wire Replacement: stap 5, afbeelding 1 van 2 Beats Solo 2 Wire Replacement: stap 5, afbeelding 2 van 2
    • Once the screws are removed, pop off the inner speakers. Do this for both sides

  6. Beats Solo 2 Wire Replacement: stap 6, afbeelding 1 van 3 Beats Solo 2 Wire Replacement: stap 6, afbeelding 2 van 3 Beats Solo 2 Wire Replacement: stap 6, afbeelding 3 van 3
    • After you have removed the second internal speaker, you can begin the process of removing the wire. BE CAREFUL with this step, make sure you don't pull off the circuit board.

  7. Beats Solo 2 Wire Replacement: stap 7, afbeelding 1 van 3 Beats Solo 2 Wire Replacement: stap 7, afbeelding 2 van 3 Beats Solo 2 Wire Replacement: stap 7, afbeelding 3 van 3
    • Now we are going to remove the circuit board holder. Take off the white cover to get access to the screw. Then remove the screw and circuit board holder.

  8. Beats Solo 2 Wire Replacement: stap 8, afbeelding 1 van 3 Beats Solo 2 Wire Replacement: stap 8, afbeelding 2 van 3 Beats Solo 2 Wire Replacement: stap 8, afbeelding 3 van 3
    • slowly pry away cover

Conclusie

To reassemble your device, follow these instructions in reverse order.

8 andere personen hebben deze handleiding voltooid.

Darien Jewel

Lid sinds: 11/28/16

221 Reputatie

1 Handleiding geschreven

0 opmerkingen

Voeg opmerking toe

Weergavestatistieken:

Afgelopen 24 uren: 0

Afgelopen 7 dagen: 9

Afgelopen 30 dagen: 40

Altijd: 5,744