Deze versie kan foutieve bewerkingen bevatten. Schakel over naar de recentste gecontroleerde momentopname.
Wat je nodig hebt
-
Deze stap is niet vertaald. Help het te vertalen
-
Using a plastic opening tool, pry the casing from the rest of the device.
-
Pry all the way around the edge and then pull apart.
-
-
Deze stap is niet vertaald. Help het te vertalen
-
Using your thumb, remove the 8 rubber plugs in order to get to the screws.
-
Simply rub them towards the speakers and they will slide out enough to grip the edge and pull them out.
-
-
Deze stap is niet vertaald. Help het te vertalen
-
Using a Phillips #2 screwdriver, remove the 8 (10mm maxi-loc Phillips #2) screws that hold the casing together.
-
-
Deze stap is niet vertaald. Help het te vertalen
-
Pull apart the front casing from the back casing, slowly. Try to avoid any tension on any of the connected cables.
-
-
-
Deze stap is niet vertaald. Help het te vertalen
-
Gently pull on the plastic tab at the base of the ribbon cable to remove it from the motherboard.
-
-
Deze stap is niet vertaald. Help het te vertalen
-
Using your thumb and index finger, pull upwards on the base of the the power cable to remove it from the motherboard.
-
-
Deze stap is niet vertaald. Help het te vertalen
-
After completing the guide for removing the case, remove the cables connecting the speakers.
-
Simply pull up on them without pulling on the wires themselves.
-
-
Deze stap is niet vertaald. Help het te vertalen
-
Set the half of the device containing speakers to the side.
-
-
Deze stap is niet vertaald. Help het te vertalen
-
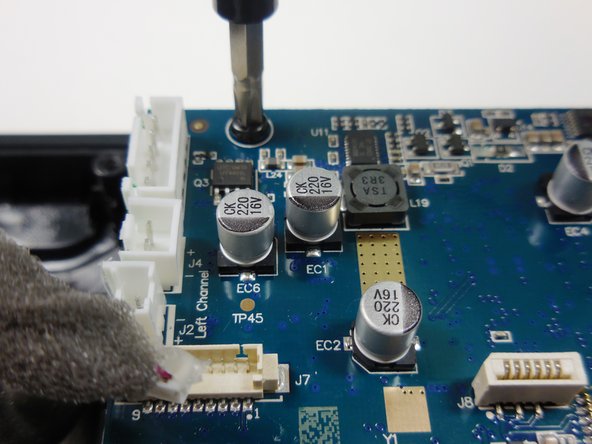
Remove all five remaining connectors on the motherboard.
-
-
Deze stap is niet vertaald. Help het te vertalen
-
Remove the chip for the Bluetooth antenna located to the top right of the motherboard.
-
-
Deze stap is niet vertaald. Help het te vertalen
-
Using a Phillips #2 screwdriver, unscrew the 4 (8mm pan head Phillips #2) screws holding the motherboard onto the case. They are located in the four corners of the board.
-
-
Deze stap is niet vertaald. Help het te vertalen
-
Using both hands, gently lift the motherboard from the case.
-
You have successfully removed the motherboard.
-


Annuleren: ik heb deze handleiding niet afgemaakt.
14 andere personen hebben deze handleiding voltooid.
Team

Colorado Springs, Team 9-2, Panko Spring 2015 Lid van Colorado Springs, Team 9-2, Panko Spring 2015
UCCS-PANKO-S15S9G2
3 Leden
7 handleidingen geschreven
5 opmerkingen
Disculpe la molestia quisiera saber el número de parte de los transistores Q2,Q3
I have a question regarding the contents of circuit.
which type of IC is used in the circuit which is hided by a marker. And if you have that ic than how can i contact you.
I need the Beats Pill XL Motherboard.. where i can buy
Bonjour impeccable bien expliqué
Ou puis-je trouvé cette carte
Merci beaucoup
0967197831 este es mi movil nesecito saber cuanto cuesta la placa de este beatspill xf ayudeme