Deze versie kan foutieve bewerkingen bevatten. Schakel over naar de recentste gecontroleerde momentopname.
Wat je nodig hebt
-
Deze stap is niet vertaald. Help het te vertalen
-
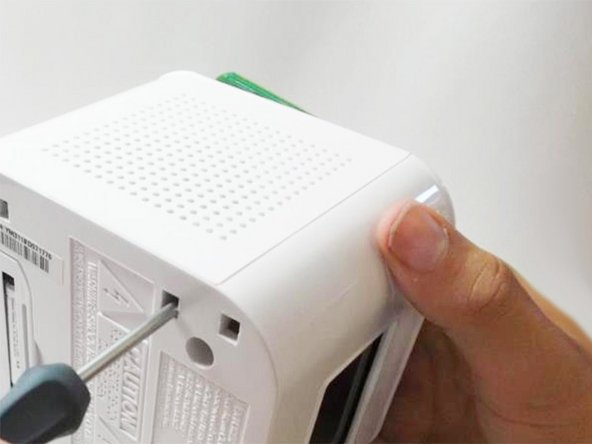
Turn the device upside down.
-
Apply constant pressure to the base of your Audiovox, while holding the plastic casing until the casing is completely removed.
-
-
Deze stap is niet vertaald. Help het te vertalen
-
Remove the four screws from the base using a Phillips #1 screwdriver.
-
-
Deze stap is niet vertaald. Help het te vertalen
-
Turn the device right-side up.
-
Gently pull the top panel off of the device.
-
-
Deze stap is niet vertaald. Help het te vertalen
-
Using a Phillips #1 screwdriver, remove the screw found in the middle of the board.
-
-
Deze stap is niet vertaald. Help het te vertalen
-
Pull back the board gently to avoid disconnecting the attached wires.
-
-
Deze stap is niet vertaald. Help het te vertalen
-
Slide a plastic opening tool along the rim of the faulty speaker where it meets the plastic casing.
-
-
Deze stap is niet vertaald. Help het te vertalen
-
Using your thumb, applying constant pressure, pull back the plastic tab towards the speaker and away from the metal bracket.
-
Simultaneously insert a Phillips #00 screwdriver into the square hole on the underside of clock and push through to lift the metal bracket off of the plastic tab.
-
-
Deze stap is niet vertaald. Help het te vertalen
-
Repeat the second part of "Step 7" for the other hole.
-
-
Deze stap is niet vertaald. Help het te vertalen
-
Pull up on the metal brackets, found on either side, until the speaker is completely removed. Removing the speaker is rather challenging. Don't get discouraged if it takes multiple attempts!
-


Annuleren: ik heb deze handleiding niet afgemaakt.
3 andere personen hebben deze handleiding voltooid.

Team

Cal Poly, Team 10-39, Amido Spring 2013 Lid van Cal Poly, Team 10-39, Amido Spring 2013
CPSU-AMIDO-S13S10G39
4 Leden
6 handleidingen geschreven