Ga door naar hoofdinhoud

Audio Technica ATH-AD500 Driver Replacement

Wat je nodig hebt

  1. Audio Technica ATH-AD500 Driver Replacement, Speaker Assembly: stap 1, afbeelding 1 van 1
    • Remove the ear pads by peeling them away from the grill.

    My jbl waerless headphone speaker changes how price

    Max Mad - Antwoord

    How to install the earpads

    rangaranju - Antwoord

  2. Audio Technica ATH-AD500 Driver Replacement: stap 2, afbeelding 1 van 1
    • Remove all four 1cm screws on the inside of the headphone using a #1 Phillips head.

  3. Audio Technica ATH-AD500 Driver Replacement: stap 3, afbeelding 1 van 1
    • Remove the speaker from the grill by pulling it out.

    • Remove the speaker carefully so you do not rip the wires out.

  4. Audio Technica ATH-AD500 Driver Replacement, Driver: stap 4, afbeelding 1 van 1
    • With a #0 phillips head, unscrew the three, 1 cm screws which are holding the driver (red wafer) in its bracket.

  5. Audio Technica ATH-AD500 Driver Replacement: stap 5, afbeelding 1 van 1
    • Pull the driver out of its bracket.

  6. Audio Technica ATH-AD500 Driver Replacement: stap 6, afbeelding 1 van 2 Audio Technica ATH-AD500 Driver Replacement: stap 6, afbeelding 2 van 2
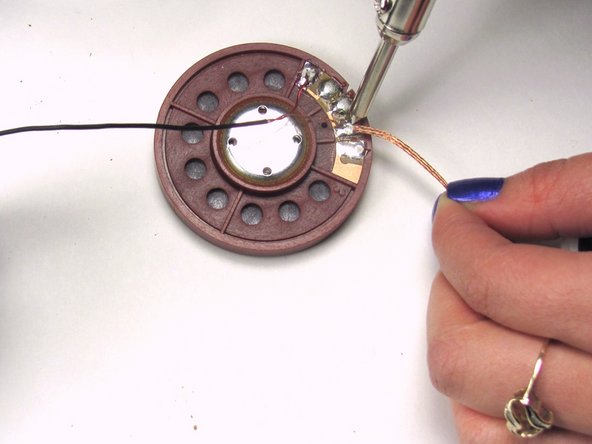
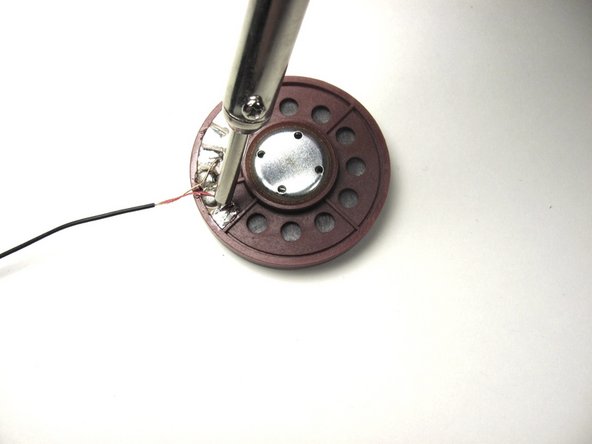
    • Remove the two wires, red and yellow, by de-soldering them from the driver using a soldering iron and desoldering wick. Reference Hoe moet je (de-)solderen?.

    • The areas where you solder will be hot so wait until the solder joints are cool before handling the wires again.

  7. Audio Technica ATH-AD500 Driver Replacement: stap 7, afbeelding 1 van 2 Audio Technica ATH-AD500 Driver Replacement: stap 7, afbeelding 2 van 2
    • Connect the existing wires to the new driver by re-soldering the wires using the soldering iron.

    • Using the copper as a reference, re-solder the yellow wire to the top left solder joint and the red to the bottom left solder joint.

    • The areas where you solder will be hot so wait until the solder joints are cool before handling the wires again.

Conclusie

To reassemble your device, follow these instructions in reverse order.

2 andere personen hebben deze handleiding voltooid.

Nick Levy

Lid sinds: 01/13/13

177 Reputatie

1 Handleiding geschreven

Team

Cal Poly, Team 17-19, Forte Winter 2013 Lid van Cal Poly, Team 17-19, Forte Winter 2013

CPSU-FORTE-W13S17G19

6 Leden

17 handleidingen geschreven

2 opmerkingen

where can i buy a replacement driver?

acidxgangster - Antwoord

You can order parts directly from PARTS@ATUS.COM

Nick Levy -

Voeg opmerking toe

Weergavestatistieken:

Afgelopen 24 uren: 1

Afgelopen 7 dagen: 9

Afgelopen 30 dagen: 40

Altijd: 10,863