Inleiding
Tools needed include an iFixit opening tool, a metal spudger, a removable head screwdriver with a T3 bit and a PH0 bit, and needle-nosed tweezers.
Wat je nodig hebt
-
-
Using a removable head screwdriver and a T4 bit, remove the screws on the base of the phone on either side of the charging port.
-
-
-
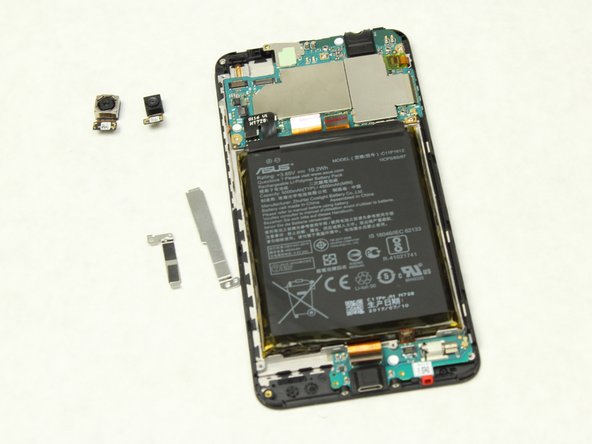
Starting near either of the 4 corners of the device notice the seam of the case around the front of the device.
-
Begin using the opening tool with a moderate amount of force to wedge between the back case and the phone.
-
Gently move the tool around the edges towards each corner until the back is removed.
-
-


To reassemble your device, follow these instructions in reverse order.
To reassemble your device, follow these instructions in reverse order.
Team

Sam Houston State, Team S11-G6, Blackburne Fall 2018 Lid van Sam Houston State, Team S11-G6, Blackburne Fall 2018
SHSU-BLACKBURNE-F18S11G6
4 Leden
10 handleidingen geschreven
2 opmerkingen
You can read T3 in the summary and T4 in the instructions: which one do I need?
Does this fix the Zenfone 4 max camera black screen?