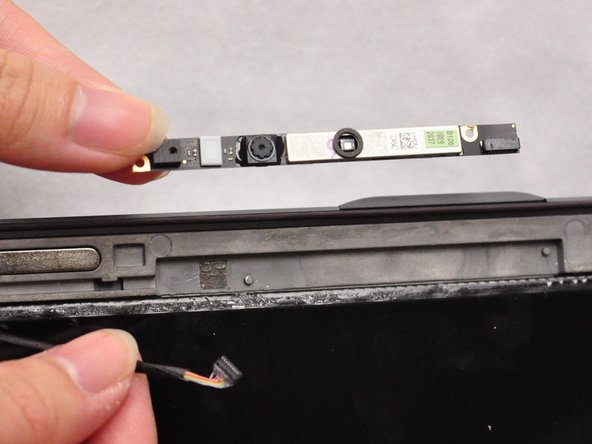
Ga door naar hoofdinhoud

Asus Zenbook UX32VD HD Web Camera Replacement

Wat je nodig hebt

  1. Asus Zenbook UX32VD  HD Web Camera Replacement, HD Web Camera: stap 1, afbeelding 1 van 1
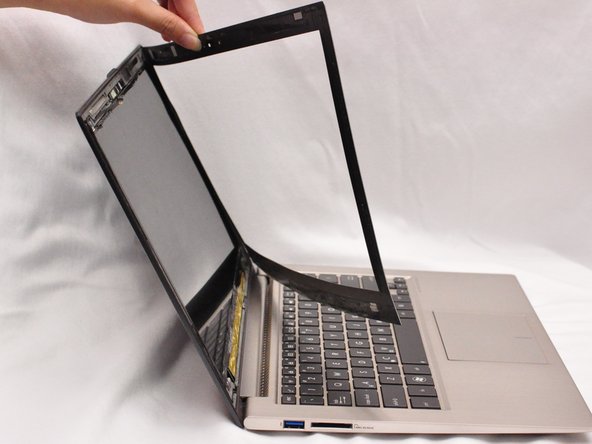
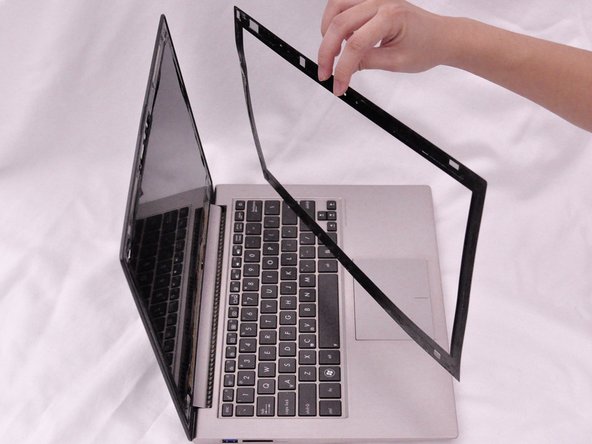
    • Heat the adhesive behind the screen frame with a hair dryer or a heat gun.

    • Use low heat with the heat gun. Over heating could damage delicate electronic components.

  2. Asus Zenbook UX32VD  HD Web Camera Replacement: stap 2, afbeelding 1 van 3 Asus Zenbook UX32VD  HD Web Camera Replacement: stap 2, afbeelding 2 van 3 Asus Zenbook UX32VD  HD Web Camera Replacement: stap 2, afbeelding 3 van 3
    Gereedschap gebruikt in deze stap:
    Metal Spudger Set
    $7.99
    Koop
    • Insert a spudger between the display screen frame and the back screen panel.

    • Pry the display screen frame away from the back screen panel.

    • Continue to heat and remove the display screen frame along the whole perimeter.

  3. Asus Zenbook UX32VD  HD Web Camera Replacement: stap 3, afbeelding 1 van 3 Asus Zenbook UX32VD  HD Web Camera Replacement: stap 3, afbeelding 2 van 3 Asus Zenbook UX32VD  HD Web Camera Replacement: stap 3, afbeelding 3 van 3
    • Remove display screen frame completely before adhesive cools and hardens.

  4. Asus Zenbook UX32VD  HD Web Camera Replacement: stap 4, afbeelding 1 van 2 Asus Zenbook UX32VD  HD Web Camera Replacement: stap 4, afbeelding 2 van 2
    • Unplug the bundled cable connector.

    • Pull the cable away from the connector in the same direction as the individual wires are running.

    • Pull evenly on the full width of the cable so that no individual wires are overly strained.

  5. Asus Zenbook UX32VD  HD Web Camera Replacement: stap 5, afbeelding 1 van 3 Asus Zenbook UX32VD  HD Web Camera Replacement: stap 5, afbeelding 2 van 3 Asus Zenbook UX32VD  HD Web Camera Replacement: stap 5, afbeelding 3 van 3
    Gereedschap gebruikt in deze stap:
    Spudger
    $2.99
    Koop
    • Pry the camera out from the two pins on the left and right of the camera with the tip of a spudger.

    • Remove the camera completely.

Conclusie

To reassemble your device, follow these instructions in reverse order.

Michael Remmel

Lid sinds: 09/17/15

709 Reputatie

3 handleidingen geschreven

Team

CSU Fullerton, Team 2-2, Bruce Fall 2015 Lid van CSU Fullerton, Team 2-2, Bruce Fall 2015

CSUF-BRUCE-F15S2G2

4 Leden

6 handleidingen geschreven

2 opmerkingen

what type/model/code for its replacement camera ? so i cant find it in part store...

tukangsedot - Antwoord

Thank you for the demo. It appears to be easy to replace the camera per your instructions. Kind regards. Mehran Gerami

Mehran Gerami - Antwoord

Voeg opmerking toe

Weergavestatistieken:

Afgelopen 24 uren: 2

Afgelopen 7 dagen: 6

Afgelopen 30 dagen: 8

Altijd: 1,866