Deze versie kan foutieve bewerkingen bevatten. Schakel over naar de recentste gecontroleerde momentopname.
Wat je nodig hebt
-
Deze stap is niet vertaald. Help het te vertalen
-
Place the computer upside down.
-
Using your thumbs, slide both latches away from each other (towards the outside).
-
Push the battery out with your fingers.
-
-
Deze stap is niet vertaald. Help het te vertalen
-
Remove the six screws highlighted on the picture.
-
Once the screws are removed, pry open the panel with the pry tool.
-
It should now look like this.
-
-
-
Deze stap is niet vertaald. Help het te vertalen
-
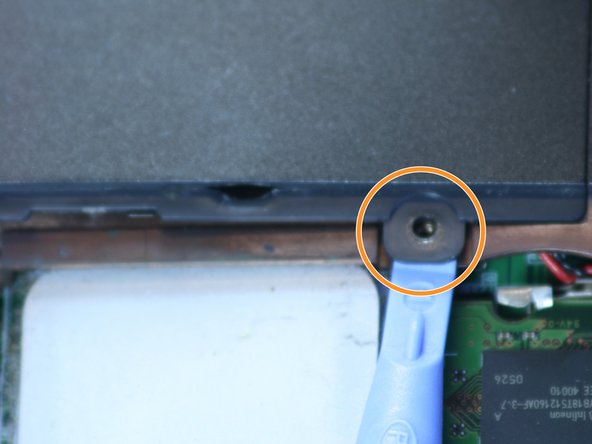
After removing that panel, locate the screw on the right as highlighted.
-
Remove that screw.
-
Pry open the side panel with the small prying tool as shown.
-
That panel should pop off and the wireless card will now be easily visible.
-
-
Deze stap is niet vertaald. Help het te vertalen
-
Place the small prying tool underneath the gold connector and gently apply pressure straight up until it pops off.
-
Repeat for the other one.
-
Place the gold connectors aside.
-
-
Deze stap is niet vertaald. Help het te vertalen
-
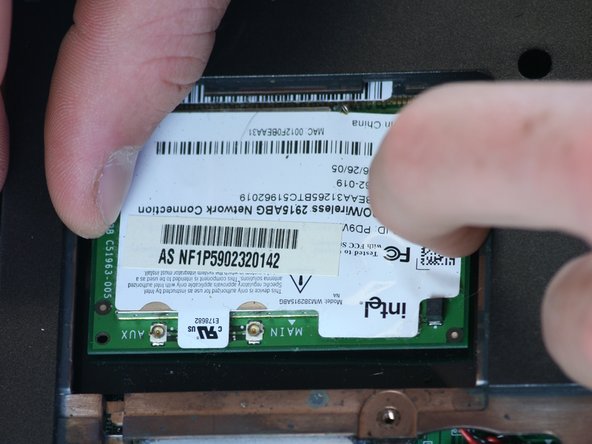
Locate the tabs that are holding the wireless card in place. These are highlighted in picture.
-
Place one finger on each tab and press each to the side away from the wireless card as shown.
-
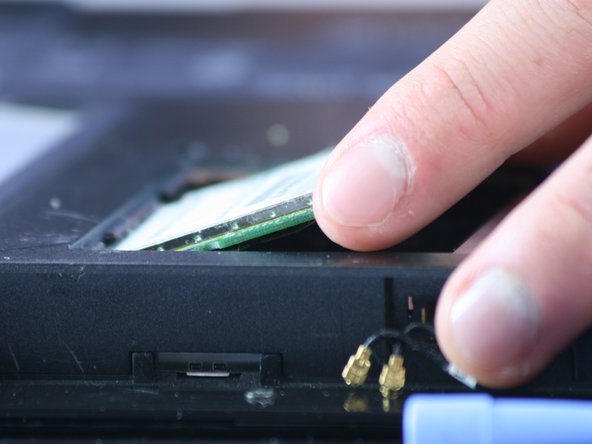
The wireless card should pop up as shown. Pull up more with fingers to get more clearance.
-
-
Deze stap is niet vertaald. Help het te vertalen
-
To remove the wireless card, pull the card directly out.
-
It should come out with just a little bit of pressure.
-
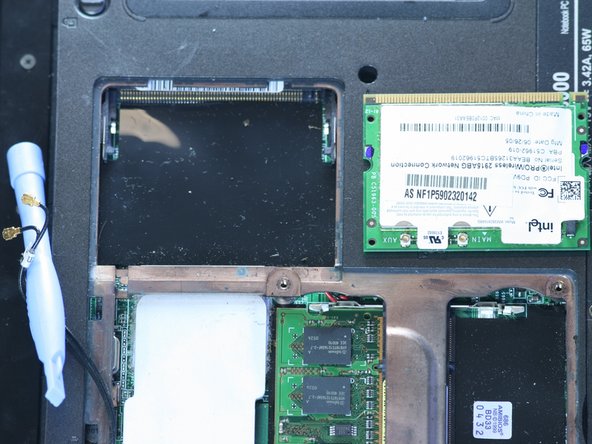
It should look as shown when removed.
-


Team

Cal Poly, Team 2-9, Johann Summer 2010 Lid van Cal Poly, Team 2-9, Johann Summer 2010
CPSU-JOHANN-R10S2G9
5 Leden
10 handleidingen geschreven