Ga door naar hoofdinhoud

Asus V6800V Speakers Replacement

Wat je nodig hebt

  1. Asus V6800V Speakers Replacement, Battery: stap 1, afbeelding 1 van 2 Asus V6800V Speakers Replacement, Battery: stap 1, afbeelding 2 van 2
    • Place the computer upside down.

    • Using your thumbs, slide both latches away from each other (towards the outside).

    • Push the battery out with your fingers.

    • The actual battery is not pictured.

  2. Asus V6800V Speakers Replacement, Keyboard: stap 2, afbeelding 1 van 1
    • Using a Phillips #0 screwdriver, remove the two screws from the case.

    • These screws should have a "K" symbol next to them.

  3. Asus V6800V Speakers Replacement: stap 3, afbeelding 1 van 3 Asus V6800V Speakers Replacement: stap 3, afbeelding 2 van 3 Asus V6800V Speakers Replacement: stap 3, afbeelding 3 van 3
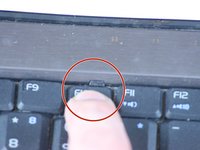
    • Locate the four tabs above the F1, F10, INSERT, and between the F5 and F6 keys.

    • Starting with the tab above the F1 key, press the tabs inward using your fingernail or spudger. Continue this process for the rest of the tabs.

    • Once all four tabs have been released, the top half of the keyboard should be free.

  4. Asus V6800V Speakers Replacement: stap 4, afbeelding 1 van 2 Asus V6800V Speakers Replacement: stap 4, afbeelding 2 van 2
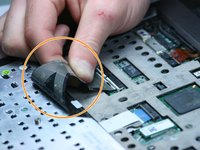
    • Pull the keyboard up from the top at a 45 degree angle. Place it upside down on the touchpad.

    • Pull the wide ribbon cable laterally from its socket on the motherboard to free the keyboard.

  5. Asus V6800V Speakers Replacement, Lower Case: stap 5, afbeelding 1 van 1
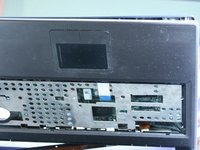
    • Using a Phillips #0 screwdriver, remove the screws at the bottom of the chassis to remove the top panel.

    • This will allow the lower case to be removed from the rest of the computer.

  6. Asus V6800V Speakers Replacement: stap 6, afbeelding 1 van 1
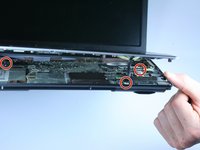
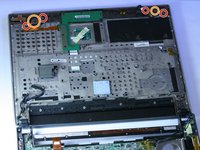
    • Remove the six screws from below the keyboard with a Phillips #0 screwdriver.

  7. Asus V6800V Speakers Replacement: stap 7, afbeelding 1 van 2 Asus V6800V Speakers Replacement: stap 7, afbeelding 2 van 2
    • Use your fingernails or a pry tool to gently separate both halves of the case. Begin at the front and work around the entire case.

    • Be cautious not to damage the cables that connect both sides of the case.

  8. Asus V6800V Speakers Replacement: stap 8, afbeelding 1 van 3 Asus V6800V Speakers Replacement: stap 8, afbeelding 2 van 3 Asus V6800V Speakers Replacement: stap 8, afbeelding 3 van 3
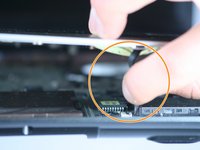
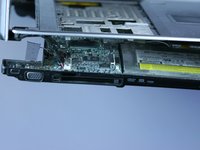
    • Remove the internal cables from front to back.

    • Use your fingers to gently remove the cables from their sockets.

    • The cables that connect the display to the main chassis are difficult to pull out using your fingers. A tool, such as tweezers, may be needed.

  9. Asus V6800V Speakers Replacement: stap 9, afbeelding 1 van 1
    • After separating the top and bottom halves of the case, lay them flat on the work area.

  10. Asus V6800V Speakers Replacement, Speakers: stap 10, afbeelding 1 van 3 Asus V6800V Speakers Replacement, Speakers: stap 10, afbeelding 2 van 3 Asus V6800V Speakers Replacement, Speakers: stap 10, afbeelding 3 van 3
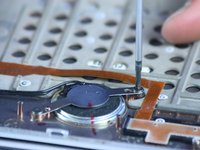
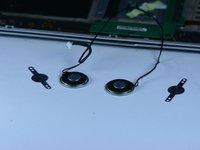
    • Remove the four screws using a Phillips #0 screwdriver.

    • Remove the protective metal plates with your hands.

  11. Asus V6800V Speakers Replacement: stap 11, afbeelding 1 van 3 Asus V6800V Speakers Replacement: stap 11, afbeelding 2 van 3 Asus V6800V Speakers Replacement: stap 11, afbeelding 3 van 3
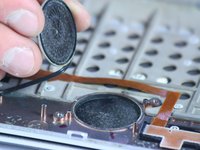
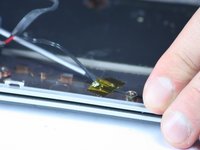
    • Make sure all cables and wires are disconnected.

    • Remove the speakers from the case with your hands.

Conclusie

To reassemble your device, follow these instructions in reverse order.

Één andere persoon heeft deze handleiding voltooid.

Jong Park

Lid sinds: 06/24/10

114 Reputatie

5 handleidingen geschreven

Team

Cal Poly, Team 2-9, Johann Summer 2010 Lid van Cal Poly, Team 2-9, Johann Summer 2010

CPSU-JOHANN-R10S2G9

5 Leden

10 handleidingen geschreven

0 opmerkingen

Voeg opmerking toe

Weergavestatistieken:

Afgelopen 24 uren: 0

Afgelopen 7 dagen: 1

Afgelopen 30 dagen: 2

Altijd: 3,128