Ga door naar hoofdinhoud

Asus U56E Laptop Screen Replacement

Wat je nodig hebt

  1. Asus U56E Laptop Screen Replacement, Screen: stap 1, afbeelding 1 van 2 Asus U56E Laptop Screen Replacement, Screen: stap 1, afbeelding 2 van 2
    • Position the laptop on a flat, stable surface, with the underside facing upward.

  2. Asus U56E Laptop Screen Replacement: stap 2, afbeelding 1 van 3 Asus U56E Laptop Screen Replacement: stap 2, afbeelding 2 van 3 Asus U56E Laptop Screen Replacement: stap 2, afbeelding 3 van 3
    • Make sure the laptop is unplugged before removing the battery to avoid risk of electric shock.

    • Slide the two battery lock switches toward each other.

    • Lift the battery to remove it from the laptop.

  3. Asus U56E Laptop Screen Replacement: stap 3, afbeelding 1 van 3 Asus U56E Laptop Screen Replacement: stap 3, afbeelding 2 van 3 Asus U56E Laptop Screen Replacement: stap 3, afbeelding 3 van 3
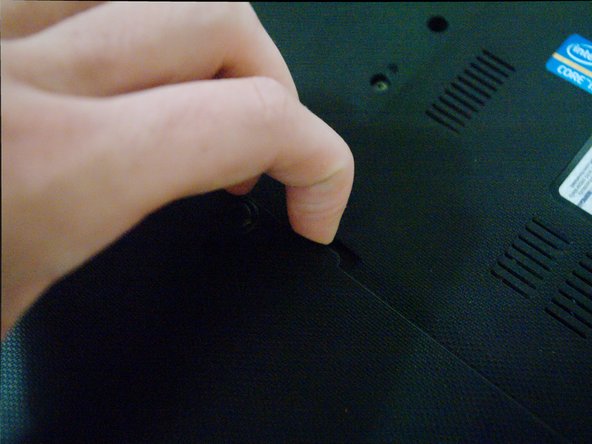
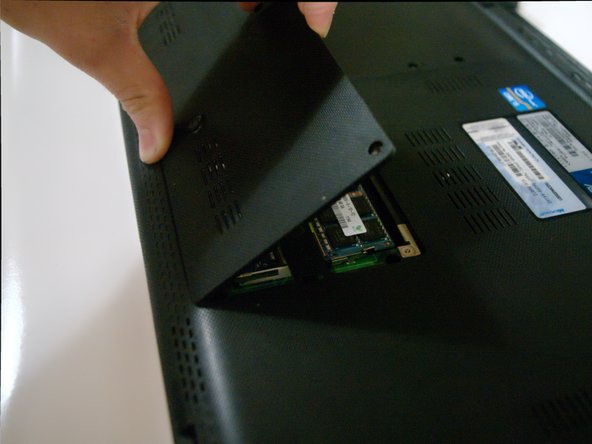
    • Remove the 3 Phillips #00 screws holding on the back cover of the laptop.

    • Lift the cover, exposing the laptop hard drive and RAM.

  4. Asus U56E Laptop Screen Replacement: stap 4, afbeelding 1 van 2 Asus U56E Laptop Screen Replacement: stap 4, afbeelding 2 van 2
    • Remove the eight small screws holding the hard drive in.

    • The hard drive cover can now be removed by lifting the tab on the left.

  5. Asus U56E Laptop Screen Replacement: stap 5, afbeelding 1 van 1
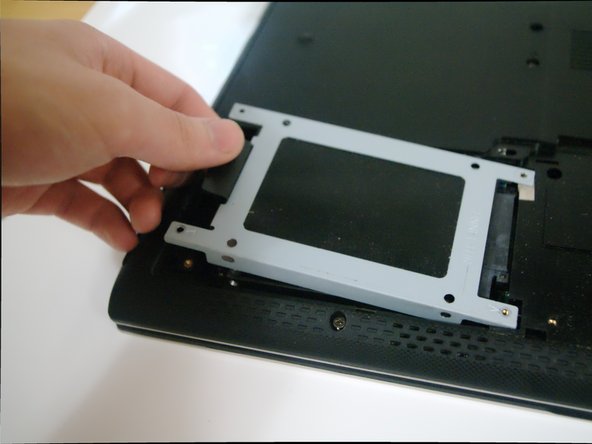
    • Gently slide the hard drive left toward the edge of the laptop, then lift up to remove it.

  6. Asus U56E Laptop Screen Replacement: stap 6, afbeelding 1 van 2 Asus U56E Laptop Screen Replacement: stap 6, afbeelding 2 van 2
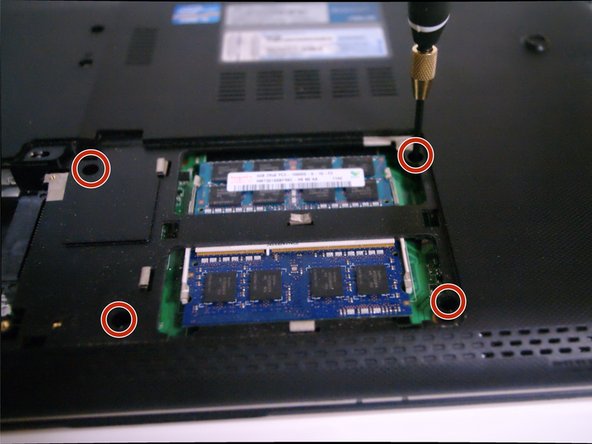
    • Remove the 4 Phillips #00 screws around the RAM.

  7. Asus U56E Laptop Screen Replacement: stap 7, afbeelding 1 van 2 Asus U56E Laptop Screen Replacement: stap 7, afbeelding 2 van 2
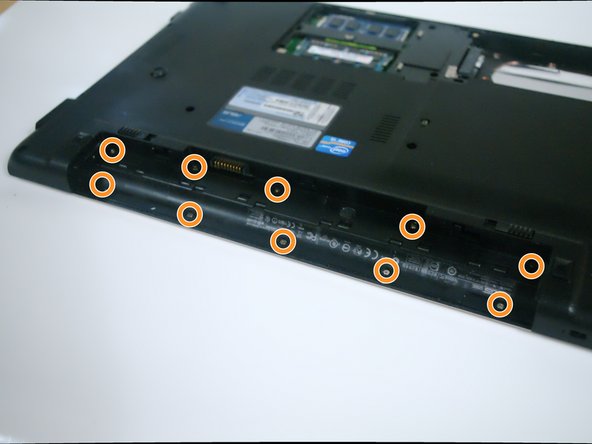
    • Remove the 10 Phillips #00 screws from the bottom of the laptop.

    • Remove 10 Phillips #000 screws from under the battery.

  8. Asus U56E Laptop Screen Replacement: stap 8, afbeelding 1 van 2 Asus U56E Laptop Screen Replacement: stap 8, afbeelding 2 van 2
    • Slide the optical drive out of the laptop.

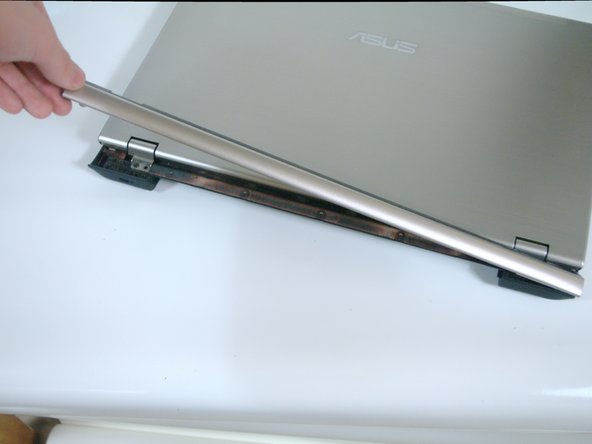
    • Gently lift the rear plastic hinge cover to separate it from the laptop.

  9. Asus U56E Laptop Screen Replacement: stap 9, afbeelding 1 van 3 Asus U56E Laptop Screen Replacement: stap 9, afbeelding 2 van 3 Asus U56E Laptop Screen Replacement: stap 9, afbeelding 3 van 3
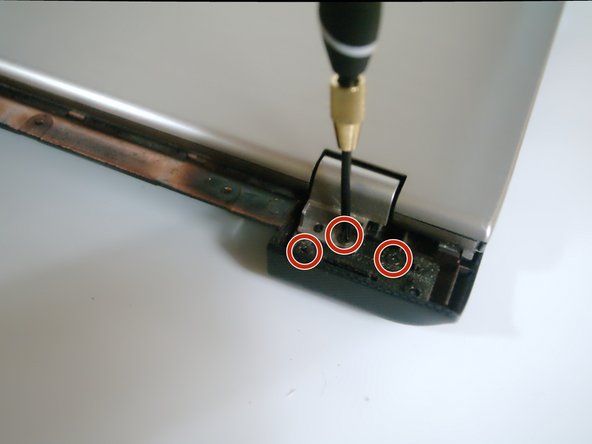
    • Remove the 3 Phillips #000 screws from each side of the hinge (six screws in total).

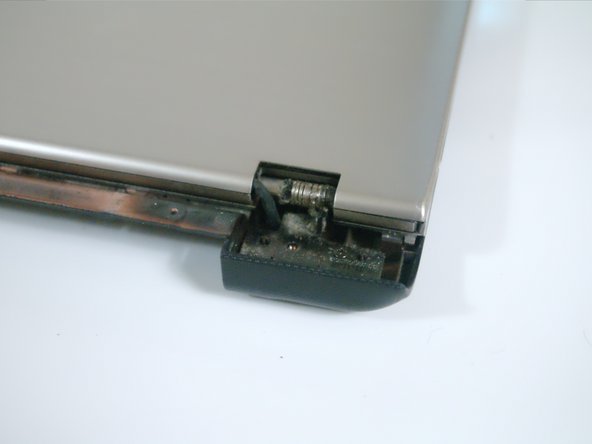
    • Gently lift the thin plastic cover from each side, exposing the laptop hinge.

    • Be aware of the thin cables still connected to the screen.

  10. Asus U56E Laptop Screen Replacement: stap 10, afbeelding 1 van 2 Asus U56E Laptop Screen Replacement: stap 10, afbeelding 2 van 2
    • Gently lift around the perimeter of keyboard to separate it from the laptop body.

    • It may help to use a Plastic Opening Tool.

    • Be careful not to pull too hard on the keyboard - It's connected to the motherboard with a thin ribbon cable!

  11. Asus U56E Laptop Screen Replacement: stap 11, afbeelding 1 van 3 Asus U56E Laptop Screen Replacement: stap 11, afbeelding 2 van 3 Asus U56E Laptop Screen Replacement: stap 11, afbeelding 3 van 3
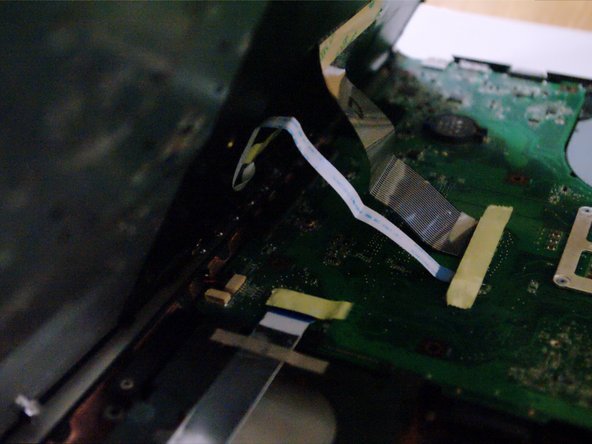
    • Pull the display connector straight up to remove it from the motherboard.

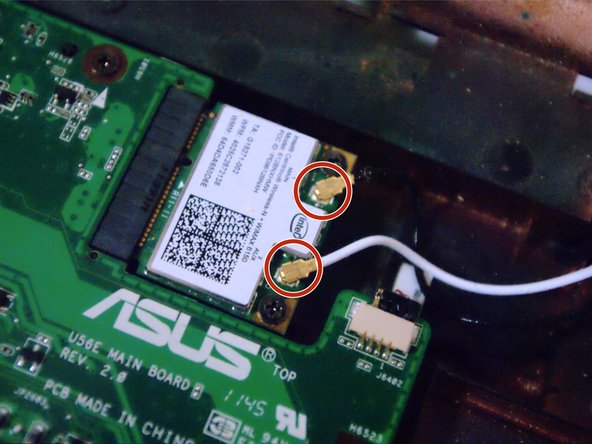
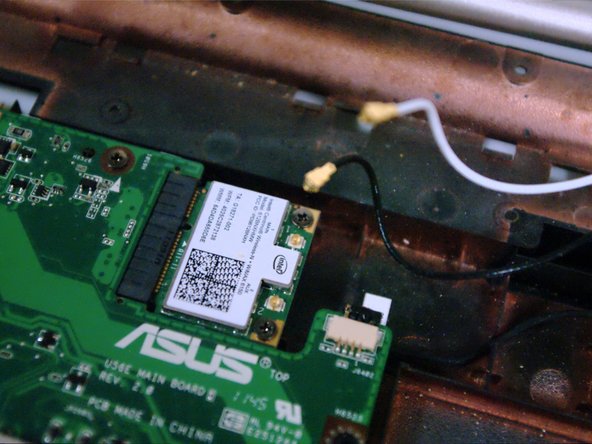
    • Carefully detach the white and black WiFi antennas from the wireless adapter.

  12. Asus U56E Laptop Screen Replacement: stap 12, afbeelding 1 van 1
    • The screen can now be safely removed from the laptop.

Conclusie

To reassemble your device, follow these instructions in reverse order.

Één andere persoon heeft deze handleiding voltooid.

David Zilar

Lid sinds: 09/29/15

167 Reputatie

1 Handleiding geschreven

Team

Cal Poly, Team 14-5, Green Fall 2015 Lid van Cal Poly, Team 14-5, Green Fall 2015

CPSU-GREEN-F15S14G5

4 Leden

5 handleidingen geschreven

0 opmerkingen

Voeg opmerking toe

Weergavestatistieken:

Afgelopen 24 uren: 0

Afgelopen 7 dagen: 6

Afgelopen 30 dagen: 14

Altijd: 1,345