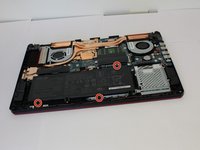
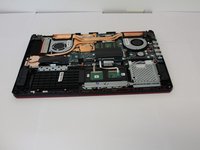
Ga door naar hoofdinhoud

Asus TUF Gaming FX705G M.2 SSD Replacement

Wat je nodig hebt

  1. Asus TUF Gaming FX705G M.2 SSD Replacement, Back Cover: stap 1, afbeelding 1 van 2 Asus TUF Gaming FX705G M.2 SSD Replacement, Back Cover: stap 1, afbeelding 2 van 2
    • Remove the eleven Phillips #0 screws that secure the back cover.

  2. Asus TUF Gaming FX705G M.2 SSD Replacement: stap 2, afbeelding 1 van 2 Asus TUF Gaming FX705G M.2 SSD Replacement: stap 2, afbeelding 2 van 2
    • Use the iFixit opening tool to lift the back cover's seam, then insert the spudger parallel to the back cover and lift gently upward.

    • You will hear pops as the back cover releases.

  3. Asus TUF Gaming FX705G M.2 SSD Replacement, Battery: stap 3, afbeelding 1 van 2 Asus TUF Gaming FX705G M.2 SSD Replacement, Battery: stap 3, afbeelding 2 van 2
    • Remove the three Phillips #00 screws from the battery housing.

  4. Asus TUF Gaming FX705G M.2 SSD Replacement: stap 4, afbeelding 1 van 2 Asus TUF Gaming FX705G M.2 SSD Replacement: stap 4, afbeelding 2 van 2
    • Disconnect the wire from the motherboard, and lift the battery from its housing.

  5. Asus TUF Gaming FX705G M.2 SSD Replacement, M.2 SSD: stap 5, afbeelding 1 van 1
    • Remove the Phillips #00 screw on the left side of the M.2 SSD.

  6. Asus TUF Gaming FX705G M.2 SSD Replacement: stap 6, afbeelding 1 van 1
    • Gently lift the screw side of the SSD to approximately a 45 degree angle and pull away from slot to remove it from the laptop.

Conclusie

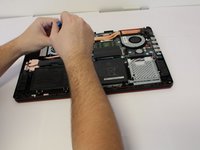
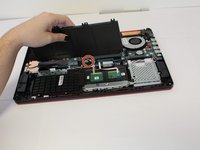
To reassemble your device, follow these instructions in reverse order.

3 andere personen hebben deze handleiding voltooid.

0 opmerkingen

Voeg opmerking toe

Weergavestatistieken:

Afgelopen 24 uren: 1

Afgelopen 7 dagen: 7

Afgelopen 30 dagen: 28

Altijd: 4,013