Inleiding
If for any reason you need to replace the front side M.2 SSD on a Asus ROG Strix X570-I Mini ITX motherboard, the replacement process can be found in this guide. In order to not damage or stress the motherboard, following a proper process is necessary in replacing this M.2 SSD. Be sure to keep your computer on a table away from any carpet or non-hardwood flooring. Keeping a static free environment is necessary to reduce the risk of shocking the circuits within your components. Remember to disconnect all USB devices and the power cable for the computer to avoid bodily harm.
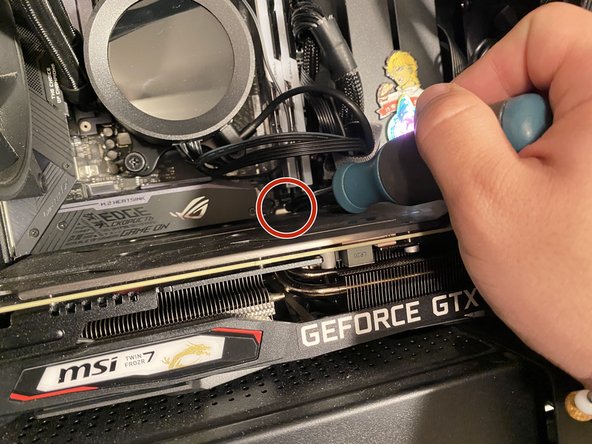
Step 3 requires you to remove the graphics card; be especially careful about this step as graphics cards tend to be the the most expensive part in your PC.
Wat je nodig hebt


To reassemble your device, follow these instructions in reverse order.
To reassemble your device, follow these instructions in reverse order.
Annuleren: ik heb deze handleiding niet afgemaakt.
7 andere personen hebben deze handleiding voltooid.

Team

University of North Texas, Team 1-7, Raign Spring 2022 Lid van University of North Texas, Team 1-7, Raign Spring 2022
UNT-RAIGN-S22S1G7
2 Leden
1 handleiding geschreven