Inleiding
Deze handleiding toont je hoe je de batterij veilig verwijdert en vervangt.
Wat je nodig hebt
-
-
Til de rubberen bescherming aan de onderkant van de laptop omhoog.
-
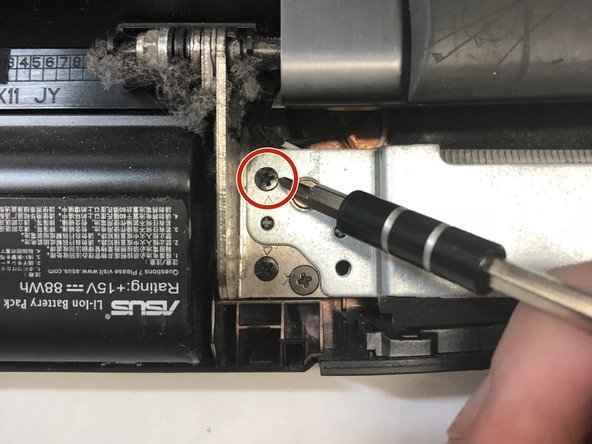
Verwijder de 5.2 mm lange schroef met een Phillips 1 schroevendraaier.
-
-
-
Gebruik de nylon spudger om het middelste paneel aan de achterkant te verwijderen.
-
-
-
Gebruik een Phillips 1 schroevendraaier om de 5 mm lange schroef onder het achterste paneel te verwijderen.
-
-
-
Gebruik een pincet om de bovenste vier rubberen stoppers aan de onderkant van de laptop te verwijderen.
-
-
-
-
Gebruik een Phillips 1 schroevendraaier om de vier 6.8 mm lange schroeven onder het achterste paneel te verwijderen.
-
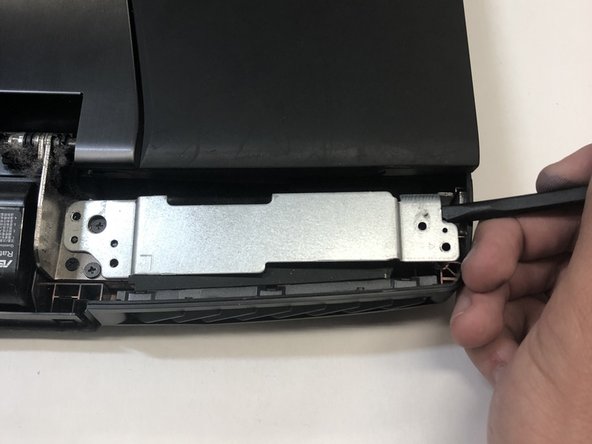
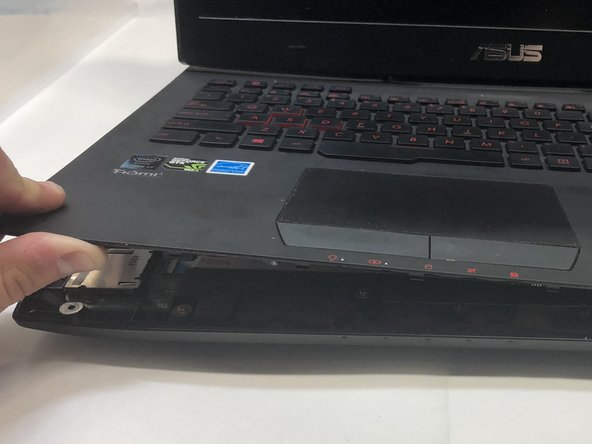
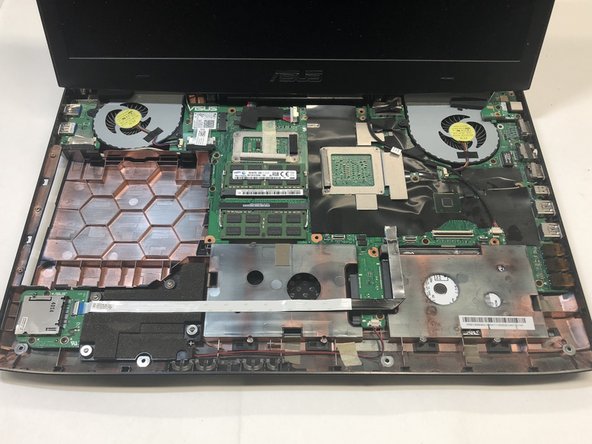
Til de metalen behuizingen weg van beide kanten van de laptop.
There are 3 screws to remove on the left side as the rear of the laptop is facing you.
-
-
-
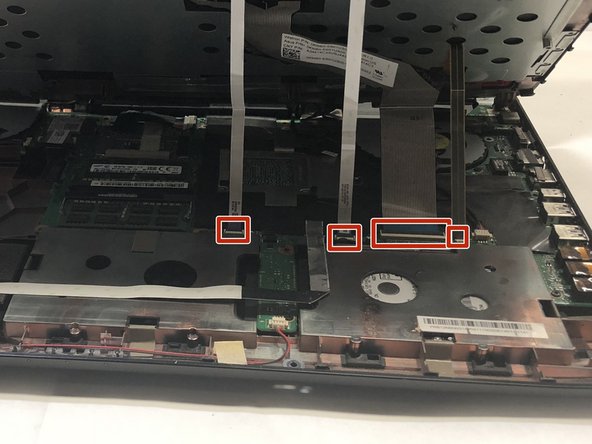
Gebruik een pincet om ieder van de vier lintkabelaansluitingen los te maken.
-
Het toetsenbord is nu volledig losgekoppeld van de laptop en klaar om te worden verwijderd.
ON STEP 11
Do not just pull the ribbons out! locate the grey bar on the connectors and lift them gently from the ribbon side upward, they will open and the ribbons will come away easily, replace the ribbons by putting them in place and clicking down the grey bars to lock them in.
Crud!! I didn't see your comment in time, Pastor! I am not accustomed to ribbon connectors. I found out too late, after severing one, that they each have “clips” locking them in place. This battery replacement just became complicated.
This is the keyboard panel removal. What about removing the keyboard from the keyboard panel?
-
-
-
Gebruik een pincet om de pinaansluiting voorzichtig los te koppelen.
ON STEP 12
BEWARE The guidance and second photo here is for the battery connector!!
DO NOT REMOVE MONITOR UNTIL YOU HAVE DISCONNECTED THE BLACK AND WHITE CABLES ON THE LEFT SIDE OF THE LEFT HINGE (Lift then off gently with tweezers) AND THE FLAT CONNECTOR ON THE RIGHT SIDE OF THE RIGHT HINGE! (There is a strap for you to gently pull on!)
I have a red and yellow wires that i have no idea were they go they are coming out of the monitor
I have a red and a blue wire coming from my monitor I have no idea where they go there's nothing in the instructions that said anything about them anyone have any thoughts
-
-
-
Gebruik een Phillips 1 schroevendraaier om de laatste vier overgebleven 6.8 mm lange schroeven, die onder het achterste paneel zitten, te verwijderen.
-
De monitor is nu volledig losgekoppeld en kan dus worden verwijderd van de laptop.
-
-
-
Koppel de gepinde aansluiting die de batterij aan het moederbord verbindt los.
-
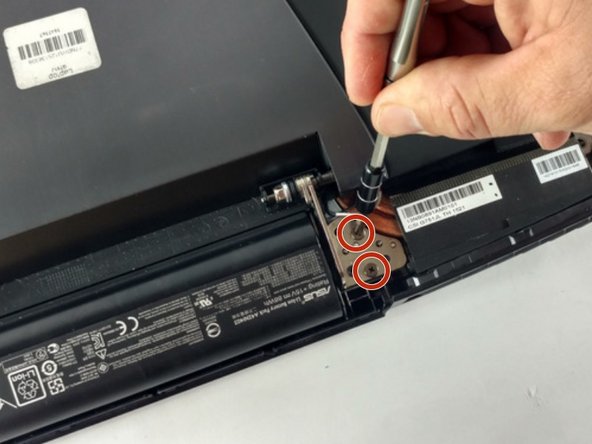
Gebruik een Phillips 1 schroevendraaier om de twee 5.4 mm lange schroeven te verwijderen.
-


Om je toestel weer in elkaar te zetten, volg je deze instructies in omgekeerde volgorde.
Om je toestel weer in elkaar te zetten, volg je deze instructies in omgekeerde volgorde.
Annuleren: ik heb deze handleiding niet afgemaakt.
7 andere personen hebben deze handleiding voltooid.
Met dank aan deze vertalers:
100%

Thomas Keulemans helpt ons de wereld te herstellen! Wil je bijdragen?
Begin met vertalen ›
Team

Cal Poly, Team S16-G1, Banghart Winter 2018 Lid van Cal Poly, Team S16-G1, Banghart Winter 2018
CPSU-BANGHART-W18S16G1
4 Leden
22 handleidingen geschreven
3 opmerkingen
Can yo please share the review of this battery? Should I go for original battery or ifixit battery?
Thank you so much for this Aurora it really helped me work on my ROG, hope my extra notes on Section 11 & 12 help others! Blessings!
I have a G751JT-CH71 & I'm not sure if the models are slightly different but I cannot remove the battery by simply lifting it out of the compartment. The battery has 4 lock-in tabs towards the back of the laptop AND 2 additional tabs that are beneath the board. I'm going to carefully pry the battery out, but I'm unsure if there's a recommended method to prying the battery out…
The screw doesn't come out completely.
Steve Menard - Antwoord