Ga door naar hoofdinhoud

Asus ROG G751JL-DS71 Left and Right Track Pad Buttons Replacement

Wat je nodig hebt

  1. Asus ROG G751JL-DS71 Left and Right Track Pad Buttons Replacement, Left and Right Track Pad Buttons: stap 1, afbeelding 1 van 2 Asus ROG G751JL-DS71 Left and Right Track Pad Buttons Replacement, Left and Right Track Pad Buttons: stap 1, afbeelding 2 van 2
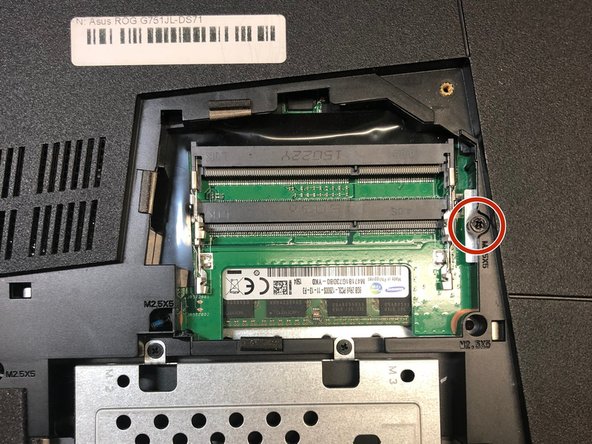
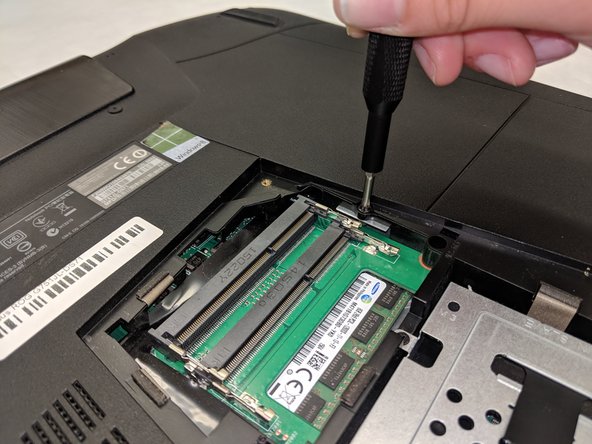
    • Lift the rubber cover found on the bottom of the laptop.

    • Remove the 5.2 mm screw with a Phillips 1 Screwdriver.

  2. Asus ROG G751JL-DS71 Left and Right Track Pad Buttons Replacement: stap 2, afbeelding 1 van 3 Asus ROG G751JL-DS71 Left and Right Track Pad Buttons Replacement: stap 2, afbeelding 2 van 3 Asus ROG G751JL-DS71 Left and Right Track Pad Buttons Replacement: stap 2, afbeelding 3 van 3
    • Use the standard spudger to remove the back center panel.

  3. Asus ROG G751JL-DS71 Left and Right Track Pad Buttons Replacement: stap 3, afbeelding 1 van 3 Asus ROG G751JL-DS71 Left and Right Track Pad Buttons Replacement: stap 3, afbeelding 2 van 3 Asus ROG G751JL-DS71 Left and Right Track Pad Buttons Replacement: stap 3, afbeelding 3 van 3
    • Use a Phillips 1 Screwdriver to remove the 5 mm screw that is located underneath the back panel.

  4. Asus ROG G751JL-DS71 Left and Right Track Pad Buttons Replacement: stap 4, afbeelding 1 van 2 Asus ROG G751JL-DS71 Left and Right Track Pad Buttons Replacement: stap 4, afbeelding 2 van 2
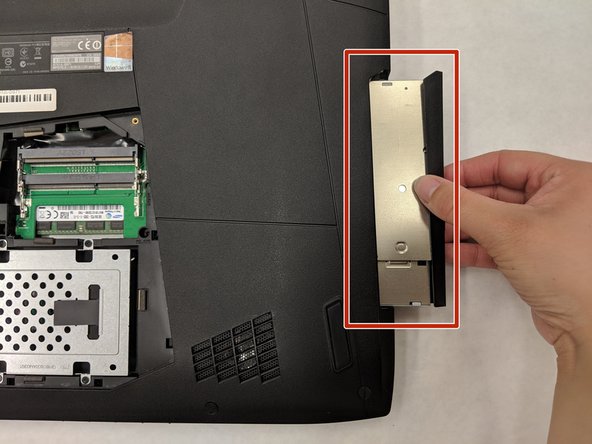
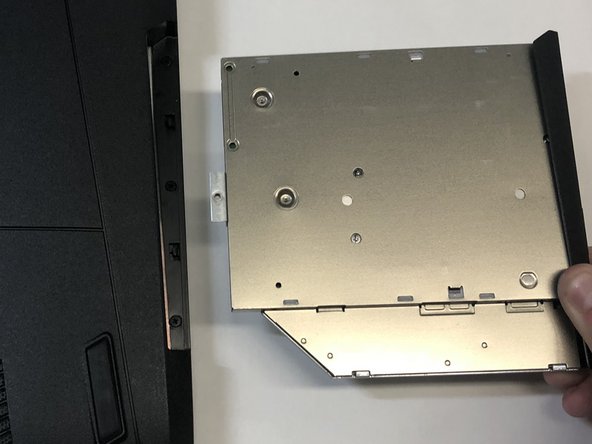
    • Pull out the optical drive found on the side of the laptop.

  5. Asus ROG G751JL-DS71 Left and Right Track Pad Buttons Replacement: stap 5, afbeelding 1 van 3 Asus ROG G751JL-DS71 Left and Right Track Pad Buttons Replacement: stap 5, afbeelding 2 van 3 Asus ROG G751JL-DS71 Left and Right Track Pad Buttons Replacement: stap 5, afbeelding 3 van 3
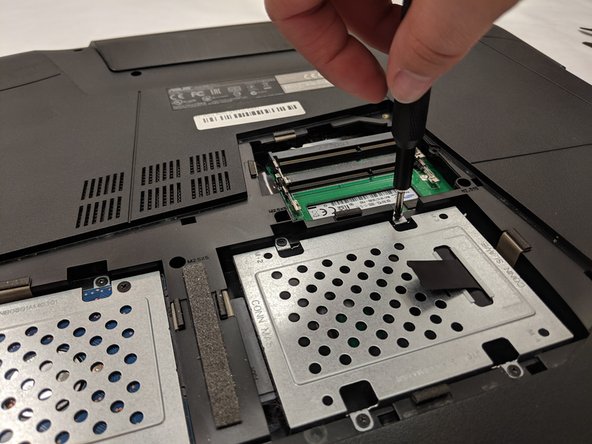
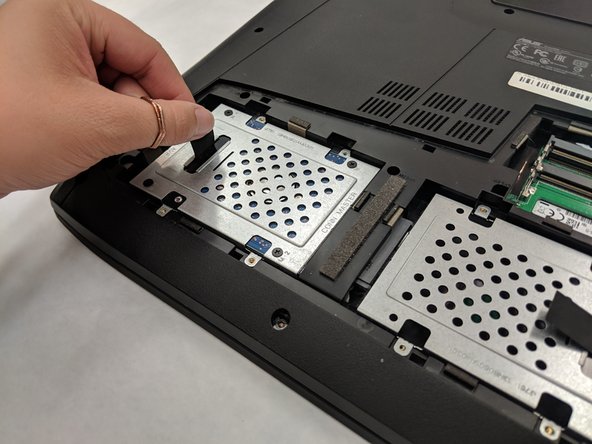
    • Remove the screws holding the hard drives in place using a Phillips 1 screwdriver.

    • Using the small flaps, remove the hard drives by hand.

  6. Asus ROG G751JL-DS71 Left and Right Track Pad Buttons Replacement: stap 6, afbeelding 1 van 2 Asus ROG G751JL-DS71 Left and Right Track Pad Buttons Replacement: stap 6, afbeelding 2 van 2
    Gereedschap gebruikt in deze stap:
    Tweezers
    $4.99
    Koop
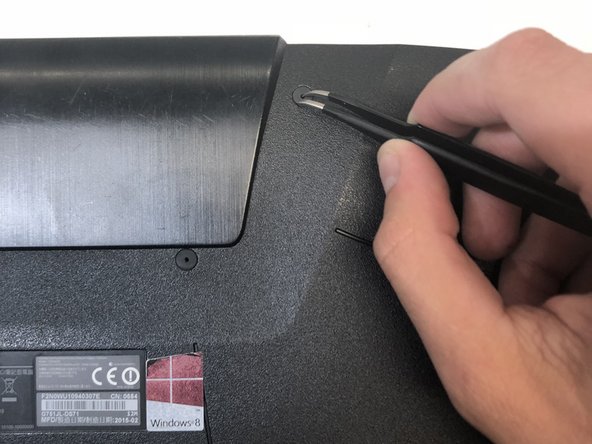
    • Use a pair of tweezers to remove the top four rubber stoppers found on the bottom of the laptop.

  7. Asus ROG G751JL-DS71 Left and Right Track Pad Buttons Replacement: stap 7, afbeelding 1 van 2 Asus ROG G751JL-DS71 Left and Right Track Pad Buttons Replacement: stap 7, afbeelding 2 van 2
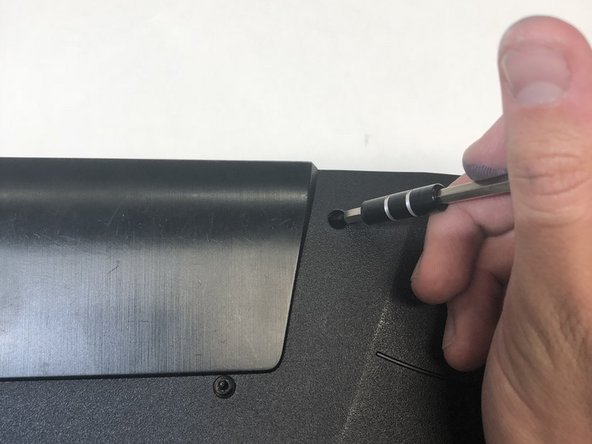
    • Use a Phillips 1 Screwdriver to remove the top four 8.5 mm screws.

  8. Asus ROG G751JL-DS71 Left and Right Track Pad Buttons Replacement: stap 8, afbeelding 1 van 3 Asus ROG G751JL-DS71 Left and Right Track Pad Buttons Replacement: stap 8, afbeelding 2 van 3 Asus ROG G751JL-DS71 Left and Right Track Pad Buttons Replacement: stap 8, afbeelding 3 van 3
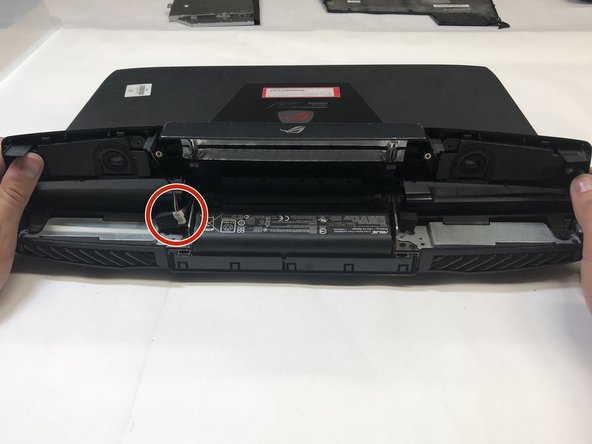
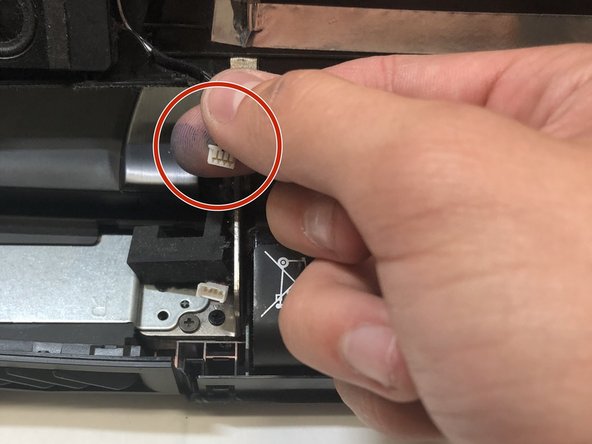
    • Use a metal spudger to carefully pry the top back panel off.

    • While removing the top back panel, be careful not to break the four pin connector located underneath.

    • Disconnect the four-pin connector and remove the top back panel from the computer.

  9. Asus ROG G751JL-DS71 Left and Right Track Pad Buttons Replacement: stap 9, afbeelding 1 van 1
    • Use a Phillips 1 Screwdriver to remove the four 6.8 mm screws underneath the back panel.

  10. Asus ROG G751JL-DS71 Left and Right Track Pad Buttons Replacement: stap 10, afbeelding 1 van 1
    • Use a Phillips 1 Screwdriver to remove the ten 5.2 mm screws holding the main panel in place.

  11. Asus ROG G751JL-DS71 Left and Right Track Pad Buttons Replacement: stap 11, afbeelding 1 van 3 Asus ROG G751JL-DS71 Left and Right Track Pad Buttons Replacement: stap 11, afbeelding 2 van 3 Asus ROG G751JL-DS71 Left and Right Track Pad Buttons Replacement: stap 11, afbeelding 3 van 3
    • Use a metal spudger to pry the keyboard from the base of the laptop.

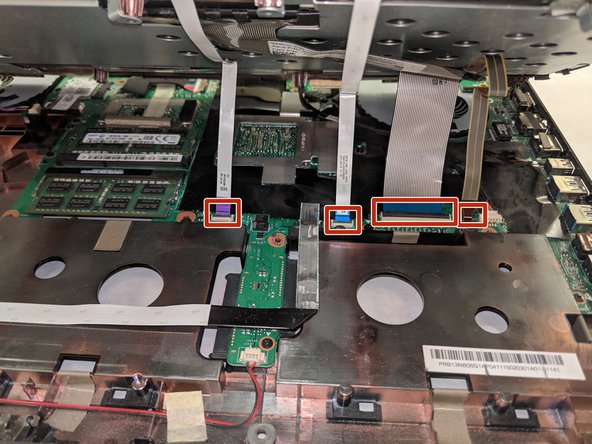
    • Lift the keyboard carefully so as to not tear or break the four ribbon connectors underneath the keyboard.

  12. Asus ROG G751JL-DS71 Left and Right Track Pad Buttons Replacement: stap 12, afbeelding 1 van 2 Asus ROG G751JL-DS71 Left and Right Track Pad Buttons Replacement: stap 12, afbeelding 2 van 2
    • Use a pair of tweezers to undo each of the four ribbon connectors.

    • The keyboard is now completely disconnected from the laptop and you can remove it.

  13. Asus ROG G751JL-DS71 Left and Right Track Pad Buttons Replacement: stap 13, afbeelding 1 van 2 Asus ROG G751JL-DS71 Left and Right Track Pad Buttons Replacement: stap 13, afbeelding 2 van 2
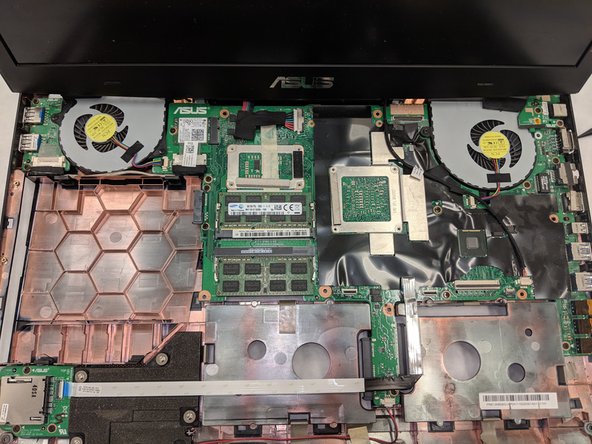
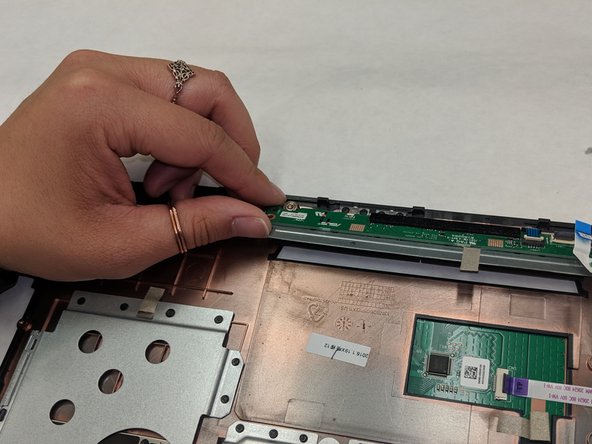
    • Use a pair of tweezers to undo each of the two ribbon connectors.

    • Use a Phillips 1 Screwdriver to remove the four 6.8 mm screws underneath the back panel.

    • The Left and right button is now completely disconnected from the laptop and you can remove it.

Conclusie

To reassemble your device, follow these instructions in reverse order.

3 andere personen hebben deze handleiding voltooid.

D'Artagnan Scott Engle

Lid sinds: 04/01/19

297 Reputatie

1 Handleiding geschreven

Team

IUPUI, Team S8-G8, Wilson Spring 2019 Lid van IUPUI, Team S8-G8, Wilson Spring 2019

IUPUI-WILSON-S19S8G8

4 Leden

3 handleidingen geschreven

0 opmerkingen

Voeg opmerking toe

Weergavestatistieken:

Afgelopen 24 uren: 0

Afgelopen 7 dagen: 5

Afgelopen 30 dagen: 21

Altijd: 1,117