Ga door naar hoofdinhoud

Asus ROG G751JL-BB17T29 Top Rear Panel

Gearchiveerde handleiding
Deze handleiding wordt enkel nog bijgehouden voor historische doeleinden. Gebruik de laatste versie van deze gids om uw reparatie uit te voeren.
Alleen vereisten
Deze handleiding is alleen bedoeld als vereiste voor andere handleidingen. Het staat niet op zichzelf.

Wat je nodig hebt

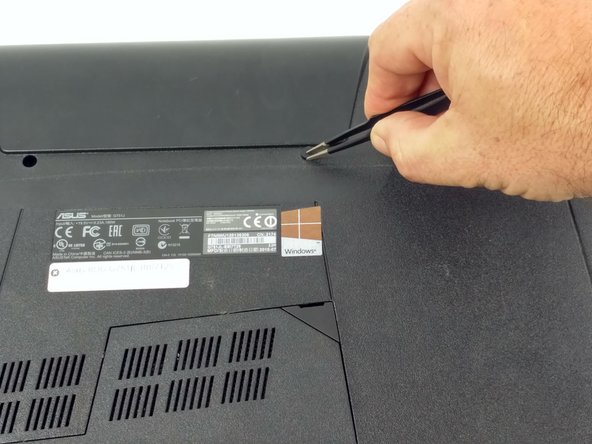
  1. Asus ROG G751JL-BB17T29 Top Rear Panel, Top Rear Panel: stap 1, afbeelding 1 van 2 Asus ROG G751JL-BB17T29 Top Rear Panel, Top Rear Panel: stap 1, afbeelding 2 van 2
    • Remove the four rubber stoppers at the hinge edge of the laptop.

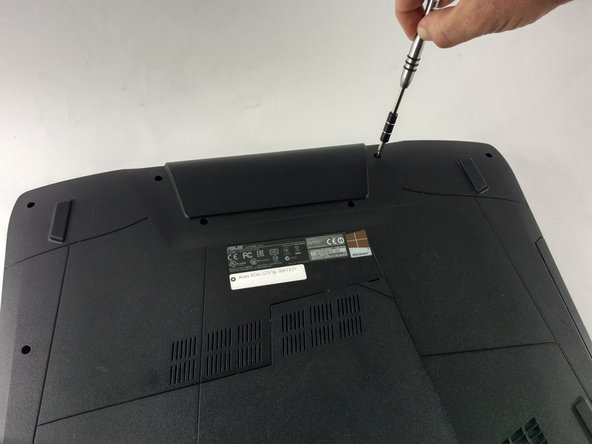
  2. Asus ROG G751JL-BB17T29 Top Rear Panel: stap 2, afbeelding 1 van 2 Asus ROG G751JL-BB17T29 Top Rear Panel: stap 2, afbeelding 2 van 2
    • Remove the four 8.5 mm Phillips #1 screws at the hinge edge of the laptop.

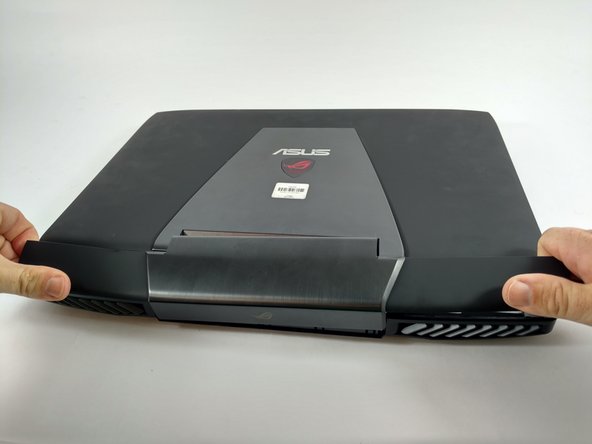
  3. Asus ROG G751JL-BB17T29 Top Rear Panel: stap 3, afbeelding 1 van 2 Asus ROG G751JL-BB17T29 Top Rear Panel: stap 3, afbeelding 2 van 2
    • The speakers are located on the top facing side of the computer, next to where the screen connects to the base.

    • Using a nylon spudger, carefully pry the top back panel off to reveal the speakers.

    • While removing the top back panel, be careful not to break the four pin connector located underneath.

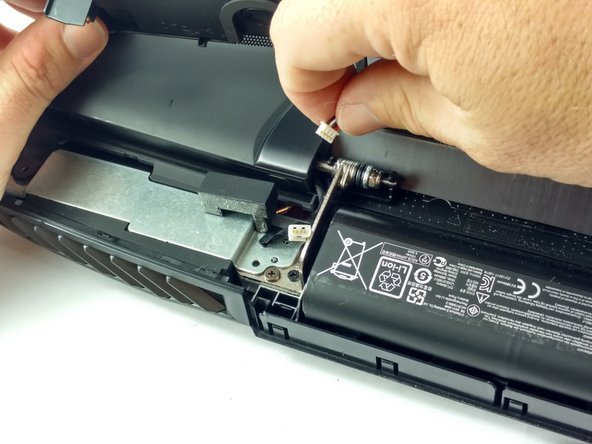
  4. Asus ROG G751JL-BB17T29 Top Rear Panel: stap 4, afbeelding 1 van 2 Asus ROG G751JL-BB17T29 Top Rear Panel: stap 4, afbeelding 2 van 2
    • Disconnect the four-pin connector and remove the top back panel from the computer.

Conclusie

To reassemble your device, follow these instructions in reverse order.

Kristofer Cesaroni

Lid sinds: 10/06/16

983 Reputatie

8 handleidingen geschreven

Team

USF Tampa, Team 2-1, Sullivan Fall 2016 Lid van USF Tampa, Team 2-1, Sullivan Fall 2016

USFT-SULLIVAN-F16S2G1

4 Leden

20 handleidingen geschreven

0 opmerkingen

Voeg opmerking toe

Weergavestatistieken:

Afgelopen 24 uren: 0

Afgelopen 7 dagen: 2

Afgelopen 30 dagen: 2

Altijd: 109