Inleiding
This guide demonstrates how to remove the battery in your Asus ROG Ally.
Wat je nodig hebt
-
-
Completely power off your device and unplug all cables.
-
-
Gereedschap gebruikt in deze stap:FixMat$36.95
-
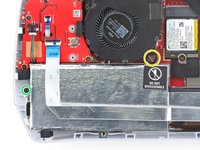
Use a Phillips #0 screwdriver to remove the five 17.2 mm‑long screws securing the top edge and bottom corners of the back cover.
-
Use a Phillips #0 screwdriver to fully loosen the remaining captive screw at the center of the bottom edge. This should create a small gap between the back cover and chassis.
-
-
-
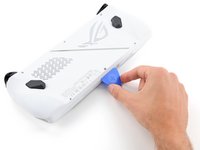
Insert the flat edge of an opening pick between the bottom edge of the back cover and chassis, near the captive screw.
-
Angle the pick upward and push it under the back cover.
-
-
-
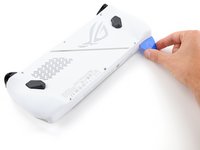
Slide the opening pick along the bottom edge and around the corners of the back cover to release the clips securing it.
-
-
-
-
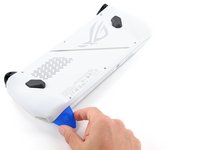
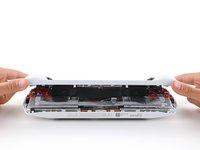
Lift the bottom edge of the back cover off the chassis to release the remaining clips.
-
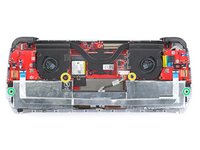
Remove the back cover.
-
-
-
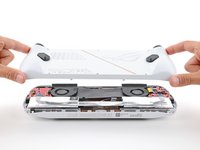
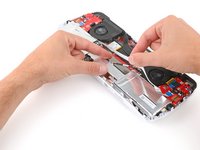
Use your fingers to peel up and remove the black plastic cover between the fans.
-
-
-
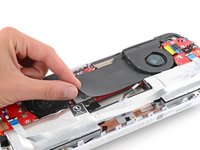
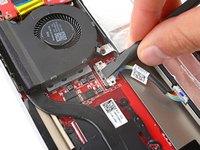
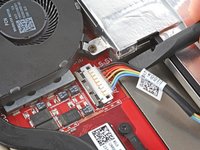
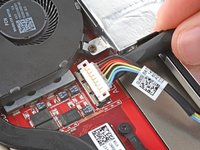
Use the flat end of a spudger to gently push the locking bar away from the connector to unlatch it.
-
-
-
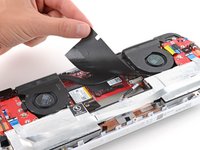
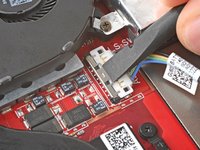
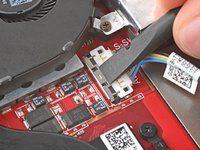
Insert the flat end of a spudger under the center of the battery connector.
-
Lift the connector straight up and out of its socket to disconnect the battery.
-
-
Gereedschap gebruikt in deze stap:Tweezers$4.99
-
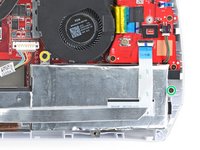
Use a Phillips #00 screwdriver to remove the four screws securing the battery:
-
Two 9.6 mm‑long screws near the center of the top edge
-
Two 3.4 mm‑long screws at the left and right edges
-
-
-
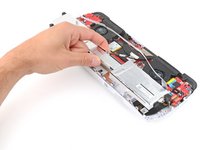
With one hand, hold the ribbon cable that runs along the top of the battery out of the way.
-
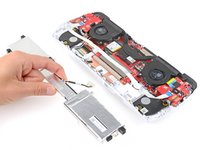
With your free hand, lift the battery straight up and remove it.
-


To reassemble your device, follow these instructions in reverse order.
To reassemble your device, follow these instructions in reverse order.

