Ga door naar hoofdinhoud

Asus N56VM Motherboard Replacement

Wat je nodig hebt

  1. Asus N56VM Motherboard Replacement, Remove battery: stap 1, afbeelding 1 van 1
    • Remove the battery and the AC power

  2. Asus N56VM Motherboard Replacement, Remove bottom cover: stap 2, afbeelding 1 van 2 Asus N56VM Motherboard Replacement, Remove bottom cover: stap 2, afbeelding 2 van 2
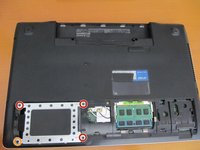
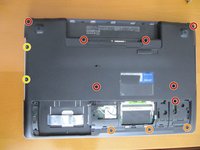
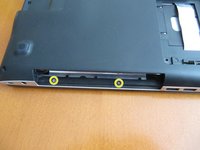
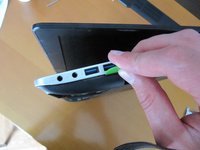
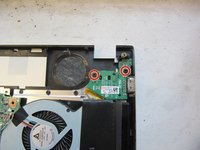
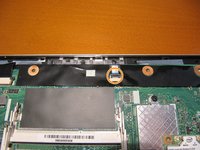
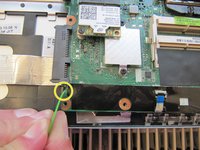
    • Remove the M2x4 screw of the bottom cover

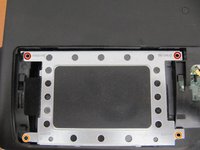
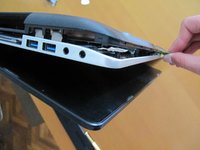
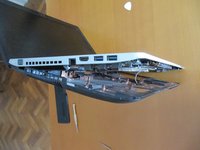
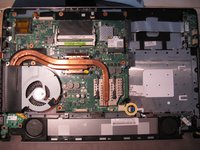
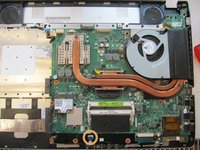
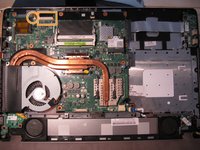
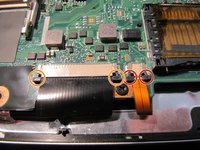
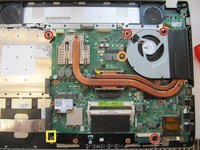
    • Remove the bottom cover by sliding it downwards

  3. Asus N56VM Motherboard Replacement, Optical drive: stap 3, afbeelding 1 van 1
    • Remove the screw holding the optical drive

  4. Asus N56VM Motherboard Replacement: stap 4, afbeelding 1 van 1
    • Pull out the optical drive

  5. Asus N56VM Motherboard Replacement, Hard Disk: stap 5, afbeelding 1 van 2 Asus N56VM Motherboard Replacement, Hard Disk: stap 5, afbeelding 2 van 2
    • Remove the screws

    • Remove the 3 M2x10 screws

    • Remove the one M2x4 screw

  6. Asus N56VM Motherboard Replacement: stap 6, afbeelding 1 van 1
    • Gently pull the hard disk to the left

  7. Asus N56VM Motherboard Replacement, RAM: stap 7, afbeelding 1 van 1
    • Remove the two RAM modules

    • Pop them out gently

    • Make sure you are electrostatically not loaded

  8. Asus N56VM Motherboard Replacement: stap 8, afbeelding 1 van 1
    • Detach the two cables from the wireless module

  9. Asus N56VM Motherboard Replacement: stap 9, afbeelding 1 van 2 Asus N56VM Motherboard Replacement: stap 9, afbeelding 2 van 2
    • Remove all screws from the bottom cover

    • Remove 7 M2x10 screws

    • Remove 3 M2x4 screws

    • Remove 2 small screws

  10. Asus N56VM Motherboard Replacement: stap 10, afbeelding 1 van 3 Asus N56VM Motherboard Replacement: stap 10, afbeelding 2 van 3 Asus N56VM Motherboard Replacement: stap 10, afbeelding 3 van 3
    • Open the lid of the notebook

    • Use a plastic opening tool to pry the bottom case

    • Be very careful when opening so that the cables in the case are not severed.

  11. Asus N56VM Motherboard Replacement: stap 11, afbeelding 1 van 1
    • The motherboard is still connected to the bottom case by several cables, so don't try to remove it entirely just yet.

    • Hold the upper part with one hand, and use your other hand to disconnect the black&white cable (antenna for the wifi card)

  12. Asus N56VM Motherboard Replacement: stap 12, afbeelding 1 van 1
    • The motherboard is still connected to the bottom case by several cables, so don't try to remove it entirely just yet.

    • Continue to hold the upper part with one hand, and use your other hand to disconnect the black ribbon cable

    • Remove the upper part with the motherboard

  13. Asus N56VM Motherboard Replacement: stap 13, afbeelding 1 van 2 Asus N56VM Motherboard Replacement: stap 13, afbeelding 2 van 2
    • This component is attached by a cable to the lower side of the motherboard therefore it is advised to remove it.

    • Remove the two screws holding the VGA IC

    • Lift the IC

  14. Asus N56VM Motherboard Replacement: stap 14, afbeelding 1 van 3 Asus N56VM Motherboard Replacement: stap 14, afbeelding 2 van 3 Asus N56VM Motherboard Replacement: stap 14, afbeelding 3 van 3
    • Remove the cable by first lifting the black holder and then removing the cable

  15. Asus N56VM Motherboard Replacement: stap 15, afbeelding 1 van 1
    • Remove the white cable simply by pulling it out from the connector

  16. Asus N56VM Motherboard Replacement: stap 16, afbeelding 1 van 3 Asus N56VM Motherboard Replacement: stap 16, afbeelding 2 van 3 Asus N56VM Motherboard Replacement: stap 16, afbeelding 3 van 3
    • Remove the touchpad cable by first lifting the black holder

  17. Asus N56VM Motherboard Replacement: stap 17, afbeelding 1 van 3 Asus N56VM Motherboard Replacement: stap 17, afbeelding 2 van 3 Asus N56VM Motherboard Replacement: stap 17, afbeelding 3 van 3
    • Remove the two keyboard cables by first pulling out the black holders. After that the cables are released

  18. Asus N56VM Motherboard Replacement: stap 18, afbeelding 1 van 2 Asus N56VM Motherboard Replacement: stap 18, afbeelding 2 van 2
    • Remove the four screws holding the motherboard

    • Remove the screw holding the fan

    • Pry out the plastic thing holding the motherboard in place

Conclusie

To reassemble your device, follow these instructions in reverse order.

Één andere persoon heeft deze handleiding voltooid.

Stanky

Lid sinds: 07/08/17

1.268 Reputatie

6 handleidingen geschreven

2 opmerkingen

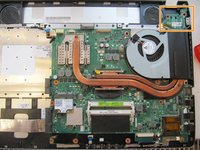
Can you please help me locate the gpu VRM on the motherboard? My gpu is faulty and needs to be rebonded, so I wanna permanently disable it.

Coll Student - Antwoord

Sorry, I can’t help you with that

Stanky -

Voeg opmerking toe

Weergavestatistieken:

Afgelopen 24 uren: 3

Afgelopen 7 dagen: 4

Afgelopen 30 dagen: 16

Altijd: 3,424