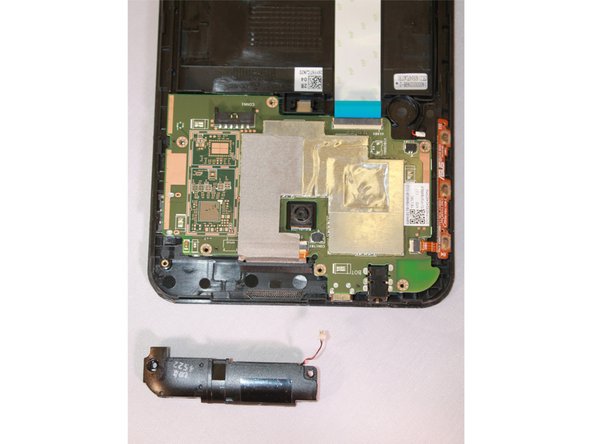
Ga door naar hoofdinhoud

Asus MeMO Pad 7 ME170C Speaker Replacement

Wat je nodig hebt

  1. Asus MeMO Pad 7 ME170C Speaker Replacement, Speaker: stap 1, afbeelding 1 van 3 Asus MeMO Pad 7 ME170C Speaker Replacement, Speaker: stap 1, afbeelding 2 van 3 Asus MeMO Pad 7 ME170C Speaker Replacement, Speaker: stap 1, afbeelding 3 van 3
    • Before beginning to disassemble the device, power it off.

    • Make sure to be gentle with the device. Excessive force can result in a damaged screen.

    • Using the Jimmy tool, gently wedge it into the seam of the device at the side.

    • Pry the Jimmy tool gently all around the seam. Use up and down motions until the back panel is detached.

  2. Asus MeMO Pad 7 ME170C Speaker Replacement: stap 2, afbeelding 1 van 3 Asus MeMO Pad 7 ME170C Speaker Replacement: stap 2, afbeelding 2 van 3 Asus MeMO Pad 7 ME170C Speaker Replacement: stap 2, afbeelding 3 van 3
    • From the top of the tablet, locate the white cable connector.

    • It is inserted in a black port on the motherboard.

    • Use the blue plastic opening tool to push the white cable connector out of the port.

    • Push the cable in a sideways motion towards the top of the device.

  3. Asus MeMO Pad 7 ME170C Speaker Replacement: stap 3, afbeelding 1 van 2 Asus MeMO Pad 7 ME170C Speaker Replacement: stap 3, afbeelding 2 van 2
    • Use the Phillips #000 screwdriver to remove the seven screws.

    • There should be two silver and five black screws for a total of seven screws.

  4. Asus MeMO Pad 7 ME170C Speaker Replacement: stap 4, afbeelding 1 van 2 Asus MeMO Pad 7 ME170C Speaker Replacement: stap 4, afbeelding 2 van 2
    • Use the slender, metal spudger tool to gently lift up the edge of the speaker to remove the device.

Conclusie

To reassemble your device, follow these instructions in reverse order.

Één andere persoon heeft deze handleiding voltooid.

0 opmerkingen

Voeg opmerking toe

Weergavestatistieken:

Afgelopen 24 uren: 0

Afgelopen 7 dagen: 2

Afgelopen 30 dagen: 4

Altijd: 674