Ga door naar hoofdinhoud

Asus G75VW-BHI7N07 Audio Jack Replacement

Wat je nodig hebt

  1. Asus G75VW-BHI7N07 Audio Jack  Replacement, Audio Jack: stap 1, afbeelding 1 van 3 Asus G75VW-BHI7N07 Audio Jack  Replacement, Audio Jack: stap 1, afbeelding 2 van 3 Asus G75VW-BHI7N07 Audio Jack  Replacement, Audio Jack: stap 1, afbeelding 3 van 3
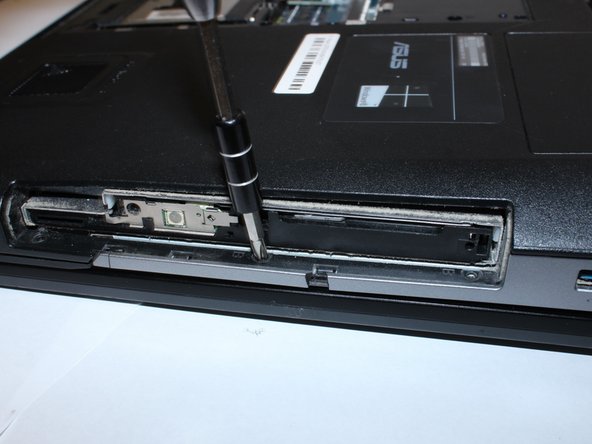
    • Remove the 5 (9 mm screws) around the outside edges of the back cover with the PH1 Phillips-head screwdriver.

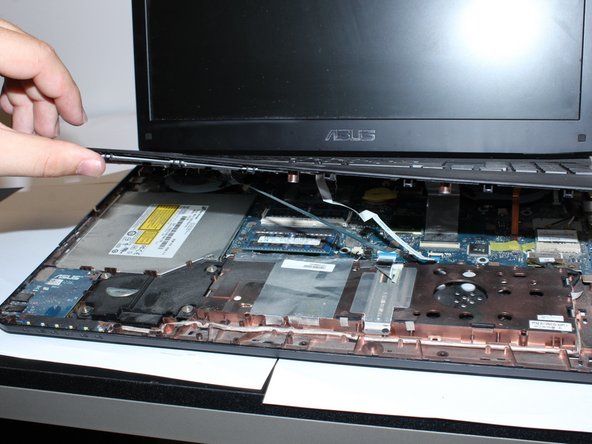
    • Lift off the back cover using the opening tool.

  2. Asus G75VW-BHI7N07 Audio Jack  Replacement: stap 2, afbeelding 1 van 3 Asus G75VW-BHI7N07 Audio Jack  Replacement: stap 2, afbeelding 2 van 3 Asus G75VW-BHI7N07 Audio Jack  Replacement: stap 2, afbeelding 3 van 3
    • Remove the 10 (9 mm) screws marked 'A' using the PH1 Phillips-head screwdriver.

    • Remove the battery by pressing the slide release button.

    • Remove 2 more (9 mm) 'A' marked screws within the battery compartment using the PH1 Phillips-head screwdriver.

  3. Asus G75VW-BHI7N07 Audio Jack  Replacement: stap 3, afbeelding 1 van 2 Asus G75VW-BHI7N07 Audio Jack  Replacement: stap 3, afbeelding 2 van 2
    • Remove the cover for the disc drive with the opening tool.

    • Remove the 6 (4 mm) 'B' marked screws with the PH1 Phillips-head screwdriver. (3 screws are in the battery compartment and 3 are under the disc drive cover)

  4. Asus G75VW-BHI7N07 Audio Jack  Replacement: stap 4, afbeelding 1 van 2 Asus G75VW-BHI7N07 Audio Jack  Replacement: stap 4, afbeelding 2 van 2
    • Pry open the keypad platform with the opening tool.

    • You will need to lift the keypad platform with your hands to get to the laptop's internal systems.

  5. Asus G75VW-BHI7N07 Audio Jack  Replacement: stap 5, afbeelding 1 van 3 Asus G75VW-BHI7N07 Audio Jack  Replacement: stap 5, afbeelding 2 van 3 Asus G75VW-BHI7N07 Audio Jack  Replacement: stap 5, afbeelding 3 van 3
    • Take out 1 (5mm) screw, using the J0 Phillips head screwdriver.

    • Use the opening tool to remove the audio-electrical board.

    • Lift out with your hands.

Conclusie

To reassemble your device, follow these instructions in reverse order.

Één andere persoon heeft deze handleiding voltooid.

Joy

Lid sinds: 09/08/17

437 Reputatie

4 handleidingen geschreven

0 opmerkingen

Voeg opmerking toe

Weergavestatistieken:

Afgelopen 24 uren: 1

Afgelopen 7 dagen: 8

Afgelopen 30 dagen: 9

Altijd: 629