Deze versie kan foutieve bewerkingen bevatten. Schakel over naar de recentste gecontroleerde momentopname.
Wat je nodig hebt
-
Deze stap is niet vertaald. Help het te vertalen
-
Lay the laptop upside down.
-
Locate the two battery lock tabs.
-
-
Deze stap is niet vertaald. Help het te vertalen
-
Slide the tabs outward to unlock the battery.
-
Holding the right tab open, slide the battery out of the laptop.
-
-
Deze stap is niet vertaald. Help het te vertalen
-
Use a plastic opening tool to pull up the four metal latches in the battery cavity that is located on the bottom of the laptop.
-
-
Deze stap is niet vertaald. Help het te vertalen
-
Flip the laptop over, and open the display.
-
Use a plastic opening tool to lift the edge of the keyboard that is nearest to the screen.
-
Gently lift the keyboard and slide it toward the screen.
-
-
-
Deze stap is niet vertaald. Help het te vertalen
-
Use a spudger tool to release the tabs on the ribbon cable ZIF connector that is attached to the underside of the keyboard.
-
Once the ZIF connector tabs have been released, remove the keyboard.
-
-
Deze stap is niet vertaald. Help het te vertalen
-
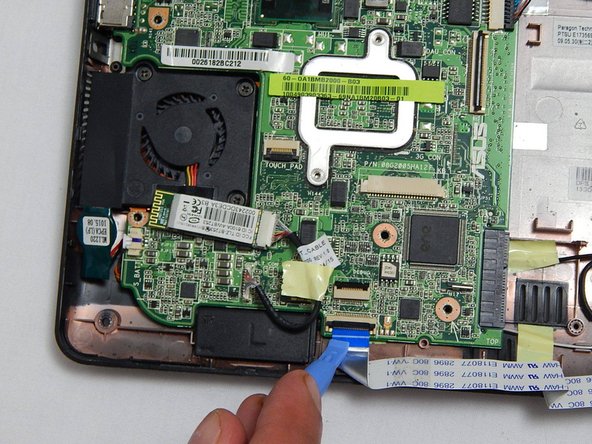
Detach the ribbon cable that connects the SD card module and the motherboard by lifting the black clips using the plastic opening tool.
-
-
Deze stap is niet vertaald. Help het te vertalen
-
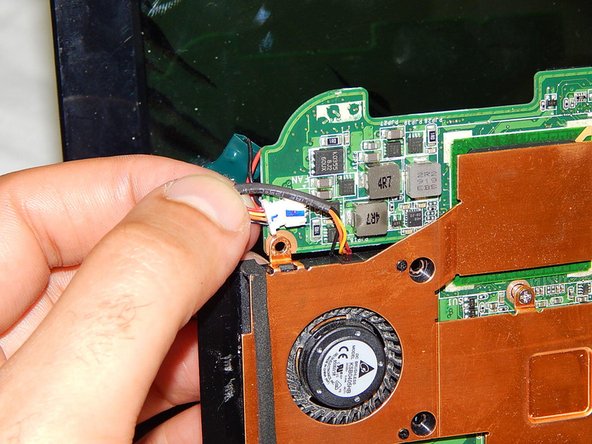
Detach the Bluetooth wire located below the fan by gently pulling it upward.
-
-
Deze stap is niet vertaald. Help het te vertalen
-
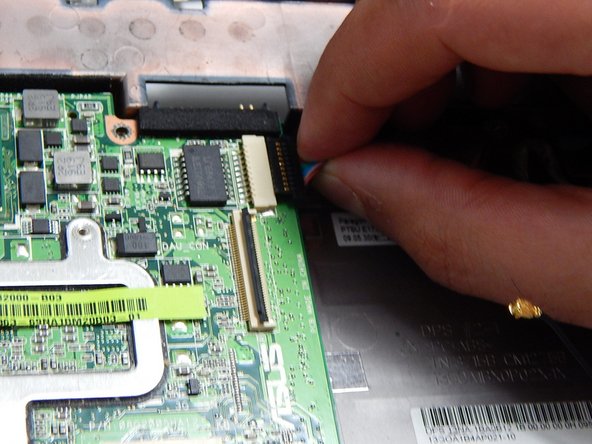
Detach the black structure connected to the input cables in the top right center of the motherboard by pulling them to the right, away from the fan.
-
-
Deze stap is niet vertaald. Help het te vertalen
-
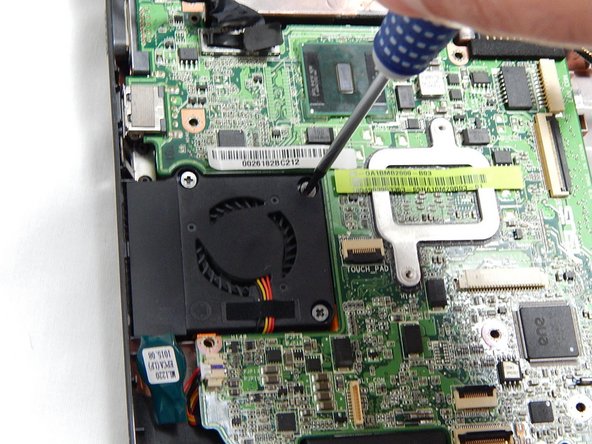
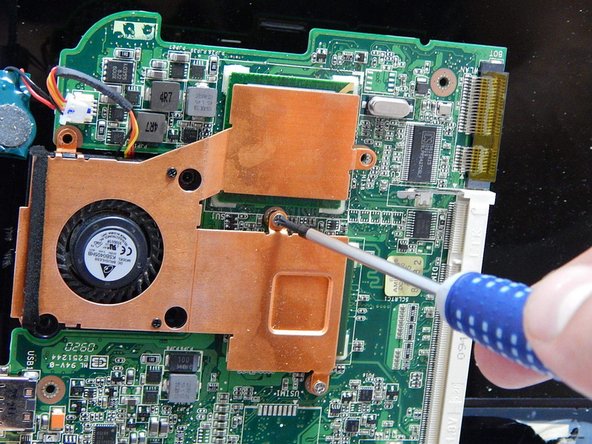
Remove the three 5.5 mm screws holding the motherboard to the motherboard plastic frame.
-
Remove the four 5.5 mm screws surrounding the fan.
-
-
Deze stap is niet vertaald. Help het te vertalen
-
Disconnect the cable attaching the motherboard to the fan.
-
-
Deze stap is niet vertaald. Help het te vertalen
-
Remove two 5.5 mm screws holding the fan and the brass frame to the motherboard.
-


Annuleren: ik heb deze handleiding niet afgemaakt.
4 andere personen hebben deze handleiding voltooid.
Team

University of Maryland, Team 3-4, Calaway Spring 2014 Lid van University of Maryland, Team 3-4, Calaway Spring 2014
UMD-CALAWAY-S14S3G4
1 Lid
8 handleidingen geschreven