Inleiding
This guide is used to show the steps necessary to remove the RAM in the Asus A52F. This could be used for upgrading your existing RAM with new RAM.
Wat je nodig hebt
-
-
-
Place the laptop face down with the battery facing away from you.
-
Locate the two buttons next to the battery.
-
Slide the right slider to the unlocked (red) position.
 Vraag FixBot
-
-
-
Hold the left button to the left.
-
Slide the battery with your other hand away from you and it should disconnect.
-
-
-
-
-
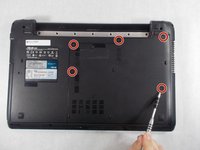
Remove the five Phillips # 0 screws from the back panel.
-
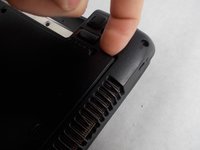
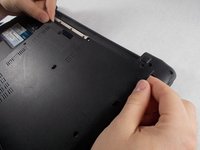
Using your finger or a plastic spudger start to carefully pry up the back planel.
-
-
-
-
-
-
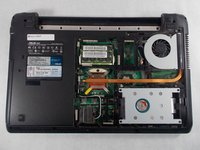
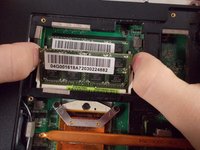
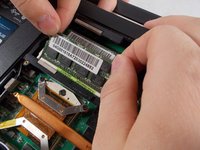
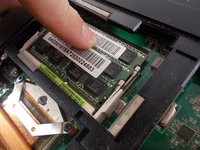
Gently push the metal retaining arms away from the center of the RAM module.
-
-
-
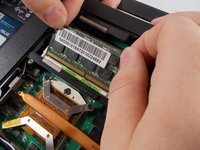
Carefully grab the top edge of the RAM and gently pull it it out at it's angle.
-
-
-
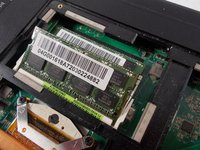
To insert new RAM line up notch in the connector and slide in at a 30° angle.
-
Push straight down until the metal clips on both sides click into place
-
-


To reassemble your device, follow these instructions in reverse order.
Annuleren: ik heb deze handleiding niet afgemaakt.
3 andere personen hebben deze handleiding voltooid.
Team

UMass Dartmouth, Team S5-G1, Botvin Spring 2017 Lid van UMass Dartmouth, Team S5-G1, Botvin Spring 2017
UMASSD-BOTVIN-S17S5G1
4 Leden
7 handleidingen geschreven