Inleiding
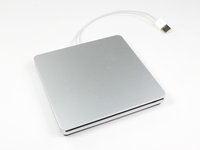
Een eenvoudige handleiding voor het vervangen van de optische schijf in de externe optische schijf die Apple verkoopt voor de MacBook Air. Als je optische schijf kapotgaat, gebruik dan deze handleiding om deze te vervangen.
Opmerking: Hier is een methode om het OS X-configuratiebestand voor de SuperDrive te hacken voor gebruik op oudere iMac-, MacBook- of MacBook Pro-systemen waarmee de schijf normaal gesproken niet werkt. Voorzichtig gebruiken!
Open het bestand com.apple.Boot.plist in een teksteditor of gebruik nano in Terminal. U ziet de sleutel <key>Kernel Flags</key>
Voeg daaronder de volgende regel toe:
<string>mbasd=1</string>
Herstart uw Mac.
Als je het latere model A1379 hebt:
Helaas moet je de interne schijf vervangen door een identieke externe Apple SuperDrive, omdat de contacten op de printplaat rechtstreeks aan de USB-kabel zijn gesoldeerd. Het model dat vóór 2012 is geproduceerd, is een standaard PATA slimline-schijf, maar voor elke SuperDrive die in 2012 of later bij Apple is gekocht, is een soldeerbout nodig om deze te repareren.
Wat je nodig hebt
-
-
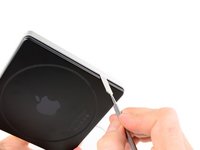
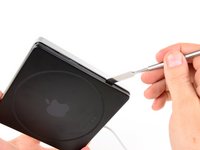
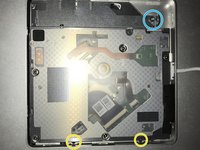
Om de SuperDrive te openen, moeten we de onderkant verwijderen.
-
De onderkant zit met 8 clips vast.
-
6 langs de zijkanten
-
2 op de achterkant
-
-
-
-
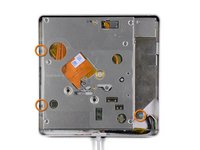
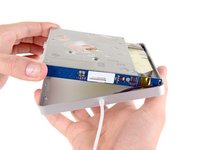
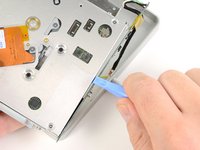
(A1270) Til het optische station omhoog aan de dikke zijde en trek het eruit.
-
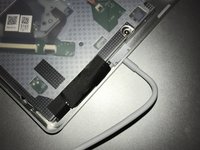
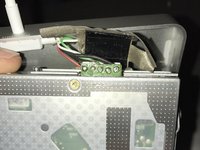
(A1379) Met dit model moet je nog voorzichtiger zijn, omdat er minder speling is. Trek de isolatietape los om de connector te zien.
-
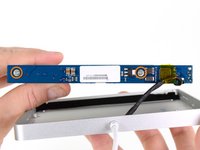
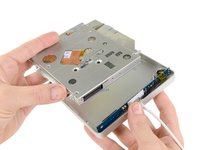
Bij het terugplaatsen van het optische station eerst de lip in de groefzijde steken, zoals op de afbeelding te zien is.
-


Om het apparaat weer in elkaar te zetten, volg je deze instructies in omgekeerde volgorde.
Annuleren: ik heb deze handleiding niet afgemaakt.
53 andere personen hebben deze handleiding voltooid.
Met dank aan deze vertalers:
100%

Toon Konings helpt ons de wereld te repareren! Doe je mee?
Begin met vertalen ›

23Gids Commentaar
After you pry open, inside there is an internal Super Drive.
Please tell me what's the markings/printed words model, name, brand, part number, etc....
Thank you.
My drive has nothing on that orange part in the middle of the drive (like you can see in the pictures here) except for two QR codes; it has absolutely no markings/printed words model, name, brand, part number, etc. on the inside, except the manufacturing date 2012 stamped inside the black aluminum bottom case cover.
Hope this helps.
Thank you. My drive from 2012 ist fastened with a six-sided star-shaped Torx screw on the right side. The ones on the left side are black Philips screws and they are so tiny that they are hard to see in normal light. All I want to do is clean the drive from dust since it won't read DVDs anymore, while it has no problems with CDs at all. So now this Torx screw is another obstacle. I will have to waste more time & money buying an extra tool, thanks to Apple.
Is it possible to replace the internal DVD drive by a Bluray? Does macOS Sierra work with external Bluray drives?
Thanks for helping.
Sincerely
Yes, but the only drive that is known to be an ATAPI (EIDE) connecting drive that supports Blu-ray is the Panasonic UJ-215-B. They were astronomically priced new in 2007-2008 when they were released. Good luck finding one today, and if you do it will still be very expensive and almost never a new one. But it seems to be a direct drop in replacement. I myself have already begun this project, and have one on the way right now. Bought it for $250 so it was pricey but considering it was new I got very lucky.