Ga door naar hoofdinhoud

Deze handleiding heeft recentere wijzigingen. Schakel over naar de nieuwste niet-geverifieerde versie.

Apple Time Capsule Model A1254 Logic Board Replacement

Wat je nodig hebt

  1. Apple Time Capsule Model A1254 Logic Board Replacement, Back Plate: stap 1, afbeelding 1 van 3 Apple Time Capsule Model A1254 Logic Board Replacement, Back Plate: stap 1, afbeelding 2 van 3 Apple Time Capsule Model A1254 Logic Board Replacement, Back Plate: stap 1, afbeelding 3 van 3
    • Turn the device upside down to reveal the rubber section of the back plate. Using a metal spudger, carefully wedge the blunt tip into the space between the aluminum back plate and the rubber, separating the two pieces.

    • This may take a few minutes to pry the rubber off completely. Once your are able to get a grip on the rubber it is easier to peel it off using your hands.

    • Depending on air temperature and how set the adhesive is, you may need to spend some time warming the back plate with a hot plate (on low) or hair dryer.

    • Don't worry about re-applying adhesive to the rubber; the remaining adhesive has plenty of strength to affix itself to the aluminum.

  2. Apple Time Capsule Model A1254 Logic Board Replacement: stap 2, afbeelding 1 van 2 Apple Time Capsule Model A1254 Logic Board Replacement: stap 2, afbeelding 2 van 2
    • Remove the ten 3mm screws with a Phillips #00 screwdriver.

    • The screws with adhesive covering do not need to be removed.

  3. Apple Time Capsule Model A1254 Logic Board Replacement: stap 3, afbeelding 1 van 2 Apple Time Capsule Model A1254 Logic Board Replacement: stap 3, afbeelding 2 van 2
    • The fan affixed to the back plate is connected to the logic board. A small wire must be detached to fully remove the back plate.

    • Pull the base of the wire close to the logic board and the connector will pop off.

  4. Apple Time Capsule Model A1254 Logic Board Replacement, Internal Power Supply Replacement: stap 4, afbeelding 1 van 2 Apple Time Capsule Model A1254 Logic Board Replacement, Internal Power Supply Replacement: stap 4, afbeelding 2 van 2
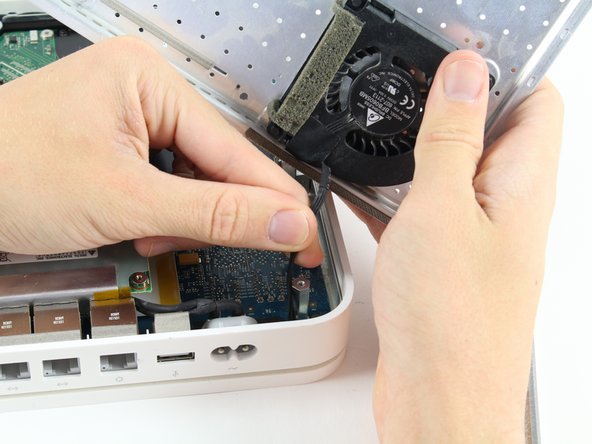
    • Remove the external connector from its housing by lifting it up, then out.

    • Lift the internal power supply brick out of the device.

    • You may have to wiggle the brick slightly when removing it, but it will lift straight up and out as nothing else is holding it down.

  5. Apple Time Capsule Model A1254 Logic Board Replacement: stap 5, afbeelding 1 van 1
    • Disconnect the SATA connector from the hard drive.

    • This cable does not have a locking mechanism so it can just be pulled out.

  6. Apple Time Capsule Model A1254 Logic Board Replacement: stap 6, afbeelding 1 van 1
    • Disconnect the final power cable from the logic board.

    • Be careful when pushing in the tab on the logic board connector to release the cable lock.

  7. Apple Time Capsule Model A1254 Logic Board Replacement, Hard Drive: stap 7, afbeelding 1 van 1
    • Peel off the adhesive backed foam from the top of the drive.

    • Lift the drive straight up and out of the device.

  8. Apple Time Capsule Model A1254 Logic Board Replacement: stap 8, afbeelding 1 van 3 Apple Time Capsule Model A1254 Logic Board Replacement: stap 8, afbeelding 2 van 3 Apple Time Capsule Model A1254 Logic Board Replacement: stap 8, afbeelding 3 van 3
    • Remove the SATA connector and power connector from the end of the hard drive by simply pulling the cables straight away from the connection points.

  9. Apple Time Capsule Model A1254 Logic Board Replacement, Logic Board: stap 9, afbeelding 1 van 1
    • Remove the three 4mm screws from the base of the board with a Phillips #0 screwdriver.

    • The center screw will release a small aluminum mounting block, be sure to keep track of this for reassembly.

  10. Apple Time Capsule Model A1254 Logic Board Replacement: stap 10, afbeelding 1 van 2 Apple Time Capsule Model A1254 Logic Board Replacement: stap 10, afbeelding 2 van 2
    • Remove the three hexagonal mounting blocks by twisting them counter clockwise.

    • Some of the mounting blocks may need to be loosened by a wrench or a small set of plyers first before being removed by hand.

  11. Apple Time Capsule Model A1254 Logic Board Replacement: stap 11, afbeelding 1 van 1
    • Press in the two aluminum tabs to lift the board up and out from under the tabs.

    • There are still connectors keeping the board attached to the device shell. Do NOT remove the board all the way at this step, just out from under the tabs.

  12. Apple Time Capsule Model A1254 Logic Board Replacement: stap 12, afbeelding 1 van 1
    • Remove the LED cable from the top left corner of the logic board by pulling the cable straight out and away from the board.

  13. Apple Time Capsule Model A1254 Logic Board Replacement: stap 13, afbeelding 1 van 1
    • Pull the two indicated tabs away from the RAM card and carefully pull out the card.

    • This can be tricky with only one person, ask a friend for a spare set of hands to pull apart the tabs.

Conclusie

To reassemble your device, follow these instructions in reverse order.

7 andere personen hebben deze handleiding voltooid.

Patrick Butler

Lid sinds: 10/06/16

1.124 Reputatie

2 handleidingen geschreven

Team

Cal Poly, Team 4-2, Livingston Fall 2016 Lid van Cal Poly, Team 4-2, Livingston Fall 2016

CPSU-LIVINGSTON-F16S4G2

4 Leden

17 handleidingen geschreven

2 opmerkingen

Between step 12 and 13 there is no detail on how to remove the board! I did the procedure until step #12 but board is firmly attached to the case! even after pullling the metal tabs it’s still glued to the base, please help

Juan Fonseca - Antwoord

The board seems stuck because of sticky thermal pads between the chips and the housing. Assuming all screws are removed and cables disconnected, you should be able to pull up the board by just applying force. Hope this helps.

Steffen Moldekleiv -

Voeg opmerking toe

Weergavestatistieken:

Afgelopen 24 uren: 0

Afgelopen 7 dagen: 6

Afgelopen 30 dagen: 26

Altijd: 9,029