Deze versie kan foutieve bewerkingen bevatten. Schakel over naar de recentste gecontroleerde momentopname.
Wat je nodig hebt
-
Deze stap is niet vertaald. Help het te vertalen
-
Position the Powerbook towards you with the monitor closed.
-
Press the battery removal latch located on the right side of the front panel.
-
Gently slide the battery out.
-
-
Deze stap is niet vertaald. Help het te vertalen
-
Turn the laptop over and remove the three T8 torx screws from the bottom panel.
-
-
-
Deze stap is niet vertaald. Help het te vertalen
-
Turn the laptop back over and open the monitor.
-
With the monitor facing towards you, gently pull up on the keyboard panel from the bottom.
-
-
Deze stap is niet vertaald. Help het te vertalen
-
Gently lift up the laptop's front-most panel and slowly raise the trackpad from the logic board.
-
Disconnect the front panel's ribbon cable from the board by slowly pulling it out of the connection port. Set the panel aside.
-
-
Deze stap is niet vertaald. Help het te vertalen
-
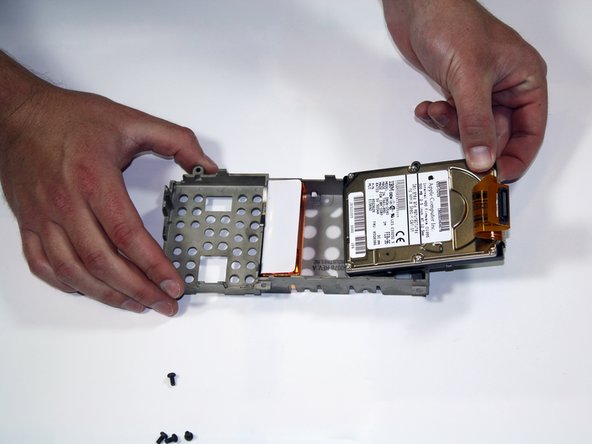
Unscrew the Torx #8 screws holding the hard drive case in place on the logic board.
-
Lift up on the hard drive to disconnect its ribbon cable from the logic board, just like in the previous steps.
-
-
Deze stap is niet vertaald. Help het te vertalen
-
Unscrew the four Torx #8 screws holding the hard drive to its case.
-


Annuleren: ik heb deze handleiding niet afgemaakt.
2 andere personen hebben deze handleiding voltooid.
Team

Cal Poly, Team 25-30, Garner Spring 2011 Lid van Cal Poly, Team 25-30, Garner Spring 2011
CPSU-GARNER-S11S25G30
4 Leden
6 handleidingen geschreven